How to Read a Macrame Pattern (A Beginner’s Visual Guide)

Ever stared at a macrame pattern and felt completely lost? You’re not alone. Learning how to read a macrame pattern (a beginner’s visual guide) is one of the most common stumbling blocks for new crafters — and honestly, it’s more approachable than it looks.
Once you understand the basic language of macrame diagrams, abbreviations, and knot symbols, everything clicks into place. In this guide, you’ll learn exactly how to decode any macrame pattern, from simple wall hangings to intricate plant hangers, so you can start creating with confidence.
Why Macrame Patterns Look Confusing at First

Macrame patterns use a mix of written instructions, abbreviations, and sometimes visual diagrams — and that combination can feel overwhelming when you’re brand new. Unlike knitting or crochet, macrame doesn’t have one universal notation system. That means each designer may use slightly different terminology.
The good news? Most patterns follow a predictable structure. Once you’ve learned the core knot abbreviations and understand how cord counts work, you can pick up almost any pattern and follow along.
Think of it like learning a new language — a little vocabulary goes a long way. Before diving into your first project, it also helps to understand that macrame is one of the most satisfying fun crafts to make at home, especially because the barrier to entry is surprisingly low.
Key Abbreviations and Knot Terms You Must Know

Every macrame pattern relies on a set of standard abbreviations. Memorizing these will save you a ton of time. Here are the most common ones you’ll encounter:
- SK — Square Knot
- HK — Half Knot
- HH — Half Hitch
- DHH — Double Half Hitch (also written as DDHH)
- LHK — Left Half Knot
- RHK — Right Half Knot
- ASK — Alternating Square Knots
- FK — Flat Knot (another term for Square Knot)
- WC — Working Cord
- FC — Filler Cord
Most patterns will include a legend or key at the beginning. Always read this section first before jumping into the instructions — it’ll define any unique abbreviations that particular designer uses.
How to Read a Macrame Pattern: Understanding Cord Setup

One of the first things a macrame pattern tells you is how to prepare your cords. This is usually expressed as a cord count and length — for example, “Cut 8 cords, each 4 meters long.” Here’s what that really means: when you fold each cord in half and mount it onto a dowel or ring, one 4-meter cord becomes two 2-meter working strands. So “8 cords” often means 16 working strands total.
Always check whether the pattern counts cords before or after folding — this is a common point of confusion for beginners. Some patterns also label cords by number (Cord 1, Cord 2, etc.) from left to right. This numbering system is used to tell you exactly which cords interact with each other in each step.
Pay close attention to this, especially for diagonal or complex knot patterns.
Reading Written vs. Diagram-Based Patterns

Macrame patterns come in two main formats: written instructions and visual diagrams. Written patterns describe each step in text, while diagram patterns use symbols and lines to represent knots and cord movements. For beginners, written patterns are often easier to follow because they walk you through each action explicitly.
Diagram patterns become more intuitive with experience and are especially helpful for understanding how knots relate to each other spatially. If a pattern includes both, use the diagram as a visual reference while following the written steps. This combo approach helps you stay oriented and reduces the chance of losing your place.
Decoding Row-by-Row Instructions in a Macrame Pattern

Most macrame patterns are structured in rows or sections. A typical row instruction might look like this: “Row 1: Tie SK with Cords 1–4, SK with Cords 5–8, SK with Cords 9–12.” This tells you to tie three separate square knots across the row, each using a group of four cords. The key is to work consistently from left to right (or as the pattern specifies) and keep your tension even throughout.
After completing a row, patterns often say “Repeat Row 1” or “Work Rows 1–3 alternating.” Alternating square knots, for example, means that in the next row, you skip the first two cords and use Cords 3–6, 7–10, and so on — creating that classic diamond mesh look. Macrame fits beautifully into a wider world of home craft projects quick that you can finish over a weekend without needing advanced skills.
Working with Repeats and Pattern Sections
Many patterns use brackets or asterisks to indicate repeating sections — like “*Tie SK, skip 2 cords* repeat across row.” The section inside the asterisks is your repeat unit. Count your cords carefully before starting a repeat to make sure you have the right multiple. If a pattern calls for repeating a 4-cord group and you have 20 cords total, you’ll work 5 repeats across.
Getting this math right upfront saves major headaches later.
Visual Diagram Symbols: A Quick Reference

If your pattern includes a visual chart, here’s how to interpret the most common symbols:
- Straight vertical lines — represent hanging cords
- X or crossing lines — indicate where cords cross or knot
- Filled circle or dot — often marks a knot point
- Arrow — shows the direction of a knot (left-to-right or diagonal)
- Shaded area — can indicate a section of alternating knots
Not all designers use the same symbols, so always cross-reference with the pattern’s legend. If there’s no legend, look for an accompanying tutorial or video from the same designer — most macrame creators share visual walkthroughs alongside their patterns.
Practical Tips for Following Your First Macrame Pattern

Reading a pattern is one thing — successfully executing it is another. Here are some hands-on tips to make your first experience smoother:
- Print the pattern and use a highlighter to mark each completed row.
- Use sticky notes to track which row you’re on, especially for long projects.
- Test your knots on scrap cord before starting the real project.
- Keep a ruler nearby to check spacing between knots if the pattern specifies measurements.
- Watch a knot tutorial video for any abbreviation you don’t recognize before you start.
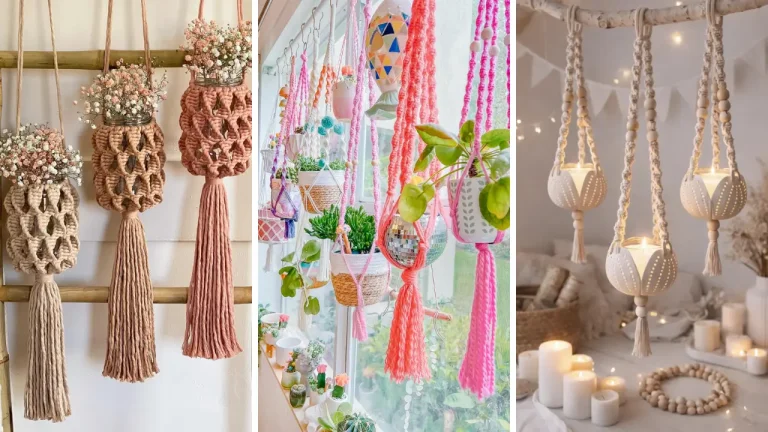
Starting simple is always the best approach. A small wall hanging or keychain is a perfect first project because the patterns are short and repetitive, which helps you build muscle memory for the knots. Once you’ve got the basics down, macrame becomes a wonderful source of DIY handmade gifts — from plant hangers to bag handles — that people genuinely love to receive.
You can even stretch your creativity further by exploring handmade gift craft ideas that pair macrame with other materials like beads, driftwood, or pressed flowers for a truly personal touch.
Common Beginner Mistakes When Reading Macrame Patterns

Even with the best instructions, beginners tend to make a few predictable errors. Knowing these in advance helps you avoid them:
- Miscounting cords — always double-count before starting each row.
- Ignoring tension — knots that are too tight or too loose will make your pattern look uneven.
- Skipping the legend — assuming you know what an abbreviation means without checking the key.
- Confusing working cords with filler cords — filler cords stay in the center and don’t actively knot; working cords wrap around them.
The most important habit you can develop? Slow down. Rushing through a pattern almost always leads to mistakes that are difficult to undo in macrame because knots tighten with tension.
Conclusion: You Can Read Any Macrame Pattern With Practice
Learning how to read a macrame pattern (a beginner’s visual guide) doesn’t require any special talent — just a willingness to slow down, learn the vocabulary, and practice one knot at a time. Start with the abbreviations, understand your cord setup, work row by row, and use the pattern’s legend as your best friend. The more patterns you read, the faster you’ll recognize the structure and rhythm of each one.
What feels like a foreign language today will feel like second nature after just two or three projects. Macrame is one of those crafts that rewards patience beautifully. Whether you’re making a gift or decorating your own space, the skills you build reading patterns will open up an entire world of creative possibilities.
And if you’re looking for more inspiration on a budget, dollar store crafts ideas can help you gather supplies without spending a lot — perfect for practicing new patterns. Ready to pick up your first pattern? Drop your favorite macrame project in the comments, share this guide with a friend who’s been wanting to try macrame, or bookmark it for the next time you’re puzzling over a new pattern.
You’ve got this!
FAQ: How to Read a Macrame Pattern
Q: What does “SK” mean in a macrame pattern? A: “SK” stands for Square Knot, which is one of the most fundamental knots in macrame. It’s made by combining a left half knot and a right half knot around two filler cords.
Most beginner macrame patterns are built almost entirely from square knots, so mastering this one abbreviation takes you a long way. Q: How to read a macrame pattern when it uses diagram symbols instead of written words? A: Start by locating the pattern’s legend or key, which explains what each symbol represents.
Vertical lines typically represent hanging cords, while X-shapes or dots indicate knot points. Practice reading one row of the diagram at a time and physically match what you see to the cords in your hands — it becomes intuitive quickly. Q: How many cords do I actually need when a pattern says “cut 10 cords”?
A: It depends on whether the pattern counts cords before or after folding. If you fold each cord in half to mount it on a dowel, 10 cords become 20 working strands. Always read the setup section of a pattern carefully — it usually clarifies whether cord counts are pre- or post-fold.
Q: Can I follow a macrame pattern as a complete beginner with no knotting experience? A: Absolutely, especially if you choose a beginner-friendly pattern that uses only square knots and half hitches. Look for patterns labeled “beginner” or “easy” that include a full knot legend and step-by-step written instructions.
Starting with a small project like a keychain or mini wall hanging will help you understand how to read a macrame pattern (a beginner’s visual guide) without feeling overwhelmed. Q: What’s the difference between working cords and filler cords in macrame pattern instructions? A: Filler cords (also called carrier cords) stay in the center and provide structure — they don’t actively participate in the knotting movement.
Working cords are the ones that wrap, cross, and knot around the filler cords to create the pattern. Patterns often specify which cords play which role, and keeping them straight is essential for your knots to look correct.