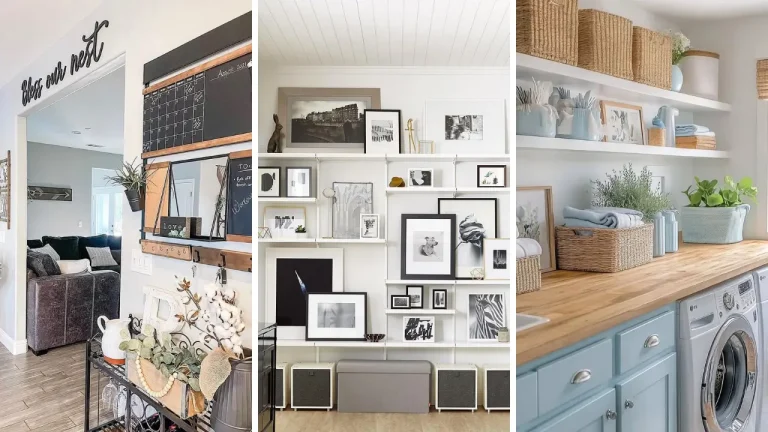
25 Fun Home Crafts to Make This Weekend (No Experience Needed)
Are you searching for creative ways to spend your weekend without breaking the bank or needing professional skills? The good news is that crafting at home has never been more accessible or rewarding. Whether you want to refresh your living space, create meaningful gifts, or simply enjoy a relaxing hobby, these projects deliver impressive results with minimal effort.
This comprehensive guide features 25 fun home crafts to make this weekend that require absolutely no experience. Let’s dive in…
1. Rustic Mason Jar Lanterns

- Mason jars (any size)
- Twine or jute rope
- LED tea light candles
- Spray paint (optional)
Transform ordinary mason jars into charming lanterns that add warmth to any room. Start by wrapping twine around the jar’s neck in a decorative pattern, securing it with a small dot of hot glue. You can leave the glass clear or apply a light coat of frosted spray paint for a softer glow. These rustic lanterns work beautifully as centerpieces, patio decorations, or bathroom accents. The LED tea lights provide safe, flickering illumination without any fire hazard. Group several jars of varying heights together for maximum visual impact.
2. Colorful Painted Rock Garden

- Smooth river rocks
- Acrylic paint set
- Clear sealant spray
- Fine-tip paint brushes
Painted rocks offer endless creative possibilities while requiring zero artistic training. Gather smooth river rocks from your yard or purchase them inexpensively at garden centers. Clean them thoroughly and let them dry completely before applying your base coat of acrylic paint. Create simple designs like ladybugs, flowers, inspirational words, or abstract patterns. The key is embracing imperfection and letting your creativity flow freely. Once your designs dry completely, apply a clear sealant spray to protect your artwork from weather damage. Display these decorative stones in planters, garden beds, or along walkways.
3. Elegant Macrame Wall Hanging

- Macrame cord (4mm thickness)
- Wooden dowel or driftwood
- Scissors
- Measuring tape
Macrame wall hangings bring bohemian elegance to any space using just basic knotting techniques. Cut your macrame cord into equal lengths, typically four times the desired finished length. Fold each piece in half and attach them to your wooden dowel using simple lark’s head knots. Master two fundamental knots to create stunning patterns: the square knot and the spiral knot.
These foundational techniques combine to produce intricate-looking designs that appear far more complicated than they actually are. Finish your piece by trimming the ends into a chevron, diagonal, or straight pattern.
4. Vintage Book Page Wreath

- Old book or newspaper pages
- Cardboard or foam wreath form
- Hot glue gun
- Ribbon for hanging
Give old books new life by transforming their pages into a sophisticated paper wreath. Roll individual pages into cone shapes and secure them with hot glue. Continue creating cones until you have enough to cover your entire wreath form generously.
Attach each paper cone to the wreath form, layering them closely together for a full, lush appearance. The natural cream tones of aged paper create an elegant, neutral piece that complements any decor style. Add a burlap ribbon bow or small accent flowers for a finished touch that looks professionally designed.
See also: 18 Large DIY Wall Art Ideas to Make a Statement in Any Room
5. Modern Concrete Planters

- Quick-setting concrete mix
- Plastic containers (various sizes)
- Cooking spray
- Sandpaper
Concrete planters add industrial-chic style to your home and garden with surprisingly simple construction. Select two plastic containers of different sizes that nest together with adequate space between them. Coat the inside of the larger container and outside of the smaller one with cooking spray for easy release.
Mix your quick-setting concrete according to package directions until it reaches a thick, pourable consistency. Pour the mixture into the larger container, then press the smaller container into the center and weight it down. After curing for 24 hours, carefully remove both molds and smooth rough edges with fine-grit sandpaper.
6. Decorative Fabric Baskets

- Cotton rope (1/2 inch thick)
- Fabric strips or ribbon
- Hot glue gun
- Scissors
Create custom storage baskets that match your decor perfectly using cotton rope and your favorite fabrics. Begin by coiling the rope tightly into a flat spiral, securing each layer with hot glue as you work. Continue building upward, gradually shaping the walls of your basket.
Wrap fabric strips around sections of the rope as you coil for colorful accents and patterns. Alternate between wrapped and plain sections to create visual interest. These handmade baskets provide stylish organization for everything from throw blankets to bathroom essentials.
7. Aromatic Herb Sachets

- Dried lavender or herbs
- Fabric scraps
- Ribbon or twine
- Essential oils (optional)
Fill your home with natural fragrance by crafting simple herb sachets from fabric scraps. Cut fabric into small squares or circles, place a tablespoon of dried herbs in the center, and gather the edges together. Secure with ribbon or twine for a charming finished look. These aromatic sachets make perfect drawer fresheners, closet deodorizers, or car air fresheners. Mix dried lavender with chamomile for relaxation, or combine rosemary with mint for an energizing scent. Add a few drops of essential oil to boost the fragrance intensity and longevity.
8. Personalized Photo Coasters

- White ceramic tiles (4×4 inch)
- Printed photos
- Mod Podge
- Felt pads
Turn cherished memories into functional art with custom photo coasters. Print your favorite images sized to fit standard ceramic tiles, which you can purchase inexpensively at any hardware store. Apply a thin, even layer of Mod Podge to the tile surface before carefully positioning your photo. Smooth out any air bubbles using a credit card or bone folder, working from center to edges. Apply several protective topcoats of Mod Podge, allowing each layer to dry completely. Attach adhesive felt pads to the bottom corners to protect furniture surfaces from scratches.
9. Whimsical Wind Chimes

- Collected items (keys, shells, beads)
- Sturdy branch or driftwood
- Fishing line or string
- Small bells (optional)
Design unique wind chimes using collected treasures and natural materials. Gather items that hold meaning or simply appeal to your aesthetic sense. Old keys, seashells, vintage buttons, and colorful beads all create beautiful sounds and visual interest when caught by the breeze. Drill small holes in items as needed, then thread them onto fishing line at varying lengths. Attach each strand to a sturdy branch, spacing them evenly for balanced movement. Incorporate small metal bells throughout for gentle tinkling sounds that enhance the peaceful ambiance.
10. Geometric Wall Art

- Wooden craft sticks or dowels
- Acrylic paint
- Strong craft glue
- Yarn or string
Create striking geometric wall art using basic shapes and bold colors. Arrange wooden craft sticks or thin dowels into triangles, hexagons, or diamond shapes. Secure the joints with strong craft glue and allow them to dry completely before adding color. Paint each section with acrylic paint in complementary colors or varying shades of a single hue. Wrap yarn around certain sections for added texture and visual interest. These modern art pieces make impressive statement decorations that cost almost nothing to produce.
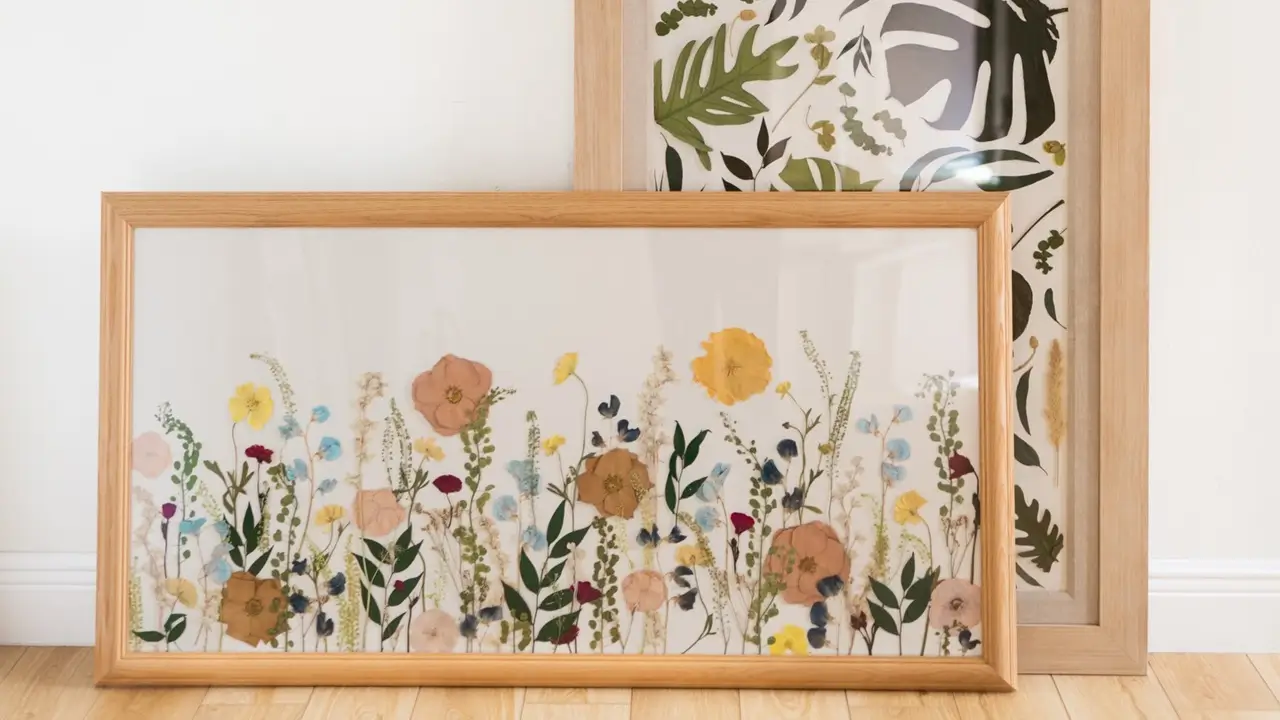
11. Natural Pressed Flower Frames

- Fresh flowers and leaves
- Heavy books
- Glass floating frames
- Parchment paper
Preserve garden beauty forever with pressed flower artwork. Collect flowers and foliage in various sizes, choosing specimens with flat profiles that press easily. Place them between sheets of parchment paper inside heavy books, stacking additional weight on top. After two to three weeks of pressing, your botanical specimens will be perfectly flat and dry. Arrange them artfully inside glass floating frames that display both sides beautifully. Create themed collections featuring seasonal blooms or mix different varieties for eclectic arrangements.
12. Upcycled Tin Can Organizers

- Clean tin cans
- Spray paint
- Decorative paper or fabric
- Mod Podge
Transform empty tin cans into stylish organizers for your desk, bathroom, or craft room. Remove labels completely and file down any sharp edges for safety. Apply a base coat of spray paint in your desired color, allowing it to dry fully between coats. Wrap cans with decorative paper or fabric using Mod Podge as both adhesive and sealant. Group multiple cans of varying heights together on a decorative tray for cohesive organization. These upcycled containers work perfectly for storing pens, makeup brushes, kitchen utensils, or craft supplies.
13. Bohemian Tassel Garland

- Yarn in multiple colors
- Scissors
- Cardboard template
- Twine or string
Add playful texture to any room with a colorful tassel garland. Wrap yarn around a cardboard template repeatedly, then tie off one end and cut the opposite end to create individual tassels. Adjust the cardboard size to change your tassel length as desired. Thread completed tassels onto sturdy twine, spacing them evenly along the length. Mix coordinating colors for a cohesive look or embrace rainbow variations for maximum impact. Drape your bohemian garland across mantels, headboards, or party tables for instant festive decoration.
See also: 15 Easy DIY Projects Using Recycled Materials (2026 Guide)
14. Scented Soy Candles

- Soy wax flakes
- Candle wicks
- Essential oils or fragrance oils
- Heat-safe containers
Craft custom scented candles that fill your home with your favorite aromas. Melt soy wax flakes in a double boiler, monitoring the temperature carefully. Once melted, remove from heat and let cool slightly before adding your chosen fragrance oils. Secure candle wicks to the bottom center of your containers using a small dot of melted wax. Pour the scented wax slowly, holding the wick straight until the wax begins to set. Allow your homemade candles to cure for at least 24 hours before burning for best scent throw.
15. Statement Mirror Frame

- Plain round mirror
- Wooden craft sticks or rope
- Gold spray paint
- Strong adhesive
Upgrade an inexpensive plain mirror into a designer-worthy statement piece. Arrange wooden craft sticks in a sunburst pattern around the mirror’s edge, varying lengths for dynamic visual appeal. Alternatively, coil thick rope around the perimeter for nautical-inspired style. Apply gold spray paint to wooden elements for glamorous warmth, or leave natural for rustic charm. Secure everything with industrial-strength adhesive, allowing adequate drying time before hanging. This custom mirror frame adds significant visual interest while reflecting light beautifully throughout your space.
16. Decorative Terracotta Pots

- Plain terracotta pots
- Acrylic paint
- Painter’s tape
- Clear sealant
Personalize ordinary terracotta pots with paint designs that complement your interior style. Use painter’s tape to create clean geometric patterns, stripes, or color-blocked sections. Apply acrylic paint in thin, even coats for smooth, professional-looking coverage. Experiment with techniques like ombre gradients, polka dots, or hand-painted botanical motifs. Once completely dry, seal your artwork with clear sealant for durability against watering and sunlight. These customized planters make thoughtful gifts when paired with small succulents or herbs.
17. Woven Wall Basket Display

- Assorted woven baskets
- Picture hanging hardware
- Level
- Pencil
Create instant bohemian charm by arranging woven baskets as wall art. Collect baskets in varying sizes, shapes, and textures from thrift stores, import shops, or your own collection. The mix of patterns and materials adds rich visual depth impossible to achieve with traditional art. Plan your arrangement on the floor before committing to wall placement. Attach picture hanging hardware to each basket’s back, distributing weight evenly for secure mounting. This basket gallery wall works particularly well above sofas, beds, or in entryways where texture creates welcoming warmth.
18. Fabric Wrapped Vases

- Glass bottles or vases
- Fabric strips or linen
- Fabric glue
- Scissors
Give plain glass vessels new life with fabric wrapping techniques. Select natural fabrics like linen, burlap, or cotton in neutral tones for timeless elegance. Cut strips slightly wider than your vessel’s height to allow for folding and finishing edges neatly. Apply fabric glue to the glass surface in sections, smoothing the fabric as you wrap. Overlap edges slightly and fold excess fabric into the opening for clean lines. These textile-covered vases add organic warmth and coordinate beautifully with dried flower arrangements.
19. Minimalist Wooden Shelves

- Wooden boards
- Leather straps or rope
- Wall hooks
- Wood stain (optional)
Construct simple hanging shelves that combine functionality with modern design. Sand wooden boards smooth and apply your preferred stain color, or leave them natural for Scandinavian-inspired simplicity. Cut leather straps or thick rope to create hanging loops of equal length. Thread the leather straps through drilled holes or wrap rope around board ends securely. Mount sturdy wall hooks at your desired height, ensuring they can support the shelf weight plus displayed items. These minimalist shelves provide perfect spots for small plants, books, or decorative objects.
20. Colorful Glass Magnets

- Glass gems or cabochons
- Patterned scrapbook paper
- Strong magnets
- Clear-drying glue
Create adorable glass magnets that brighten up refrigerators and magnetic boards. Trace around your glass gems onto decorative paper, cutting circles slightly smaller than the gem’s flat side. The glass will magnify the pattern beautifully, so choose bold designs. Apply clear-drying glue to attach paper circles to the flat side of each gem, pressing firmly to remove air bubbles. Once dry, glue strong magnets to the paper backing. These handmade magnets make perfect small gifts, party favors, or cheerful additions to your own kitchen.
21. Natural Driftwood Mobile

- Driftwood pieces
- Clear fishing line
- Decorative beads
- Feathers or shells
Craft a serene driftwood mobile that brings natural coastal beauty indoors. Collect weathered driftwood pieces during beach walks or purchase them from craft stores. Select pieces with interesting shapes and varying sizes that will balance visually when hung. String decorative beads, feathers, shells, or sea glass onto fishing line at different lengths. Attach these strands to your largest driftwood piece, then balance smaller driftwood sections from the main piece. This nature-inspired mobile creates gentle movement and peaceful energy in bedrooms or reading nooks.
22. Stamped Clay Dishes

- Air-dry clay
- Rolling pin
- Rubber stamps or textured items
- Small bowl for shaping
Form elegant clay dishes for jewelry, keys, or small treasures without any kiln or special equipment. Roll air-dry clay to approximately quarter-inch thickness on a smooth surface. Press rubber stamps or textured items like lace, leaves, or buttons into the surface for decorative impressions. Cut circles using a cookie cutter or bowl rim, then drape over an inverted bowl to create curved dish shapes. Allow to dry completely over 24-48 hours before painting or sealing. These handcrafted trinket dishes add artisanal charm to nightstands, entryway tables, and bathroom counters.
23. Vintage Button Art

- Assorted vintage buttons
- Canvas or heavy cardboard
- Hot glue gun
- Pencil for sketching
Transform collected vintage buttons into charming wall art that celebrates color and texture. Sketch simple shapes onto your canvas surface like hearts, trees, flowers, or monogram letters. Sort buttons by color, size, and style to plan your gradients and placements. Begin gluing buttons within your sketched outline, layering smaller buttons atop larger ones for dimension. Fill spaces completely for maximum impact, mixing complementary colors and varied textures throughout. This button artwork creates meaningful pieces, especially when using buttons inherited from family members.
24. Simple Rope Bowls

- Cotton clothesline rope
- Sewing machine or hot glue
- Fabric dye or paint
- Scissors
Coil simple rope bowls that serve as beautiful catchalls throughout your home. Start by tightly coiling one end of cotton rope into a flat spiral, securing with zigzag stitches or hot glue as you work. Continue coiling and building upward, shaping the walls gradually. Dip finished bowls in fabric dye for ombre effects, or paint geometric patterns using acrylics. These versatile coiled containers organize everything from fruit on kitchen counters to remote controls on coffee tables. Make multiple sizes for cohesive, matching storage solutions throughout your home.
25. Personalized Welcome Doormat
- Plain coir doormat
- Stencils or freezer paper
- Acrylic outdoor paint
- Stencil brush
Greet guests with a custom welcome doormat that expresses your personal style. Purchase an inexpensive plain coir mat and create or print stencils for your desired design. Secure stencils firmly to the mat surface using painter’s tape to prevent paint bleeding. Apply acrylic outdoor paint using a dabbing motion rather than brushing for crisp edges. Build color gradually with multiple thin coats rather than one thick application. Your personalized doormat can feature family names, house numbers, seasonal greetings, or playful phrases that make visitors smile.
These 25 fun home crafts to make this weekend prove that beautiful, personalized home decor requires no special skills or expensive materials. From simple painted rocks to elegant macrame hangings, each project offers creative satisfaction and impressive results that anyone can achieve. Grab your supplies and start creating today!. Share your favorite ideas in the comments below and let everyone know which projects you plan to tackle first. Rate this post to help other crafters discover these easy weekend projects!