20 Home Craft Projects You Can Finish in Under an Hour

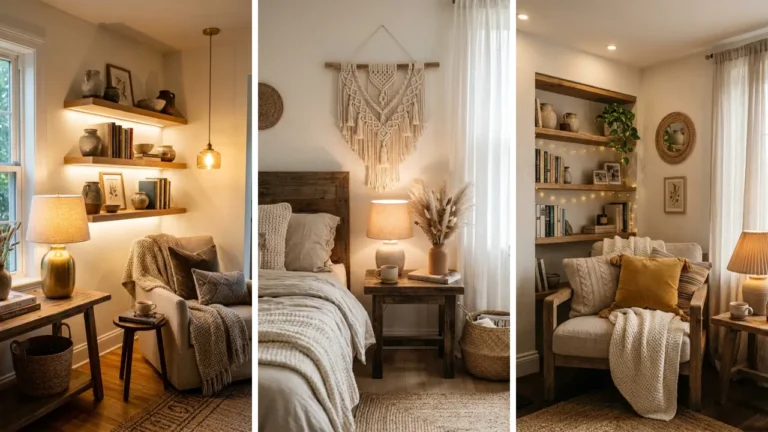
Are you craving a creative outlet but constantly running short on time? The good news is that stunning home decor doesn’t require weekend-long commitments or professional skills.
With the right projects, you can transform ordinary materials into extraordinary pieces in sixty minutes or less. These 20 home craft projects you can finish in under an hour prove that beautiful results and busy schedules can coexist perfectly.
Whether you’re a seasoned crafter or a curious beginner, these ideas deliver maximum impact with minimal time investment. Let’s dive in…
1. Rustic Mason Jar Lanterns

- Mason jars (any size)
- Twine or jute rope
- Battery-operated tea lights
- Hot glue gun
- Dried flowers or greenery
Transform ordinary mason jars into enchanting lanterns that cast a warm, inviting glow throughout your space. Start by wrapping twine around the jar’s neck, securing it with small dots of hot glue as you work your way around. The rustic texture creates instant farmhouse charm without any complicated techniques.
Tuck small sprigs of dried lavender or eucalyptus beneath the twine for added visual interest. Drop a battery-operated tea light inside, and your lantern is ready to illuminate dinner tables, mantels, or outdoor gatherings. These versatile pieces work beautifully as centerpieces or clustered in groups of three for maximum impact.
Consider using tinted jars in blue or green for coastal vibes, or frost clear jars with spray-on glass coating for a winter wonderland effect. The possibilities are endless, and each variation takes mere minutes to complete.
2. Elegant Fabric-Wrapped Vases

- Glass vases or bottles
- Fabric scraps or old scarves
- Fabric glue or Mod Podge
- Scissors
Give thrift store vases a stunning makeover using fabric scraps you already have at home. Cut your chosen fabric into strips or panels that wrap around the vase’s exterior. Apply a generous coat of fabric glue and smooth the material onto the glass, pressing firmly to eliminate air bubbles.
This technique works especially well with bold geometric prints or delicate floral patterns that complement your existing decor. The wrapped texture adds dimension and visual warmth that plain glass simply cannot achieve.
Allow fifteen minutes for drying, and your transformed vase is ready for display. Mix and match different fabric patterns across multiple vases for an eclectic, collected-over-time aesthetic. Group them on shelves or windowsills where natural light can highlight the textile details.
3. Minimalist Concrete Planters

- Quick-set concrete mix
- Plastic containers (various sizes)
- Cooking spray
- Sandpaper
- Acrylic paint (optional)
Create sleek concrete planters that bring industrial sophistication to any room. Mix your concrete according to package directions, achieving a thick but pourable consistency. Coat both your outer mold and inner displacement container with cooking spray for easy release.
Pour concrete into the larger container, then press the smaller one inside to create the planting cavity. Hold it in place with tape or weights while the quick-set formula cures. Most varieties reach handleable firmness within thirty to forty-five minutes. Once demolded, sand any rough edges smooth.
Leave your planter in its natural gray state for modern appeal, or paint geometric patterns using acrylic craft paint. These substantial pieces make perfect homes for succulents, cacti, or air plants.
See also: 18 DIY Handmade Gifts From Home Crafts You’ll Love to Make
4. Boho Tassel Garland

- Yarn in coordinating colors
- Scissors
- Cardboard rectangle
- Twine or string for hanging
Craft a stunning tassel garland that adds instant bohemian flair to any wall or doorway. Wrap yarn around your cardboard template approximately thirty times, then slide it off and tie tightly at one end. Cut through the loops at the opposite end to create flowing fringe.
Create a wrapped section below the tie point by winding yarn tightly around the tassel’s “neck” several times. This technique produces that classic boho tassel shape that’s currently trending in home decor magazines. Repeat until you have enough tassels to span your desired length.
Thread completed tassels onto twine, spacing them evenly or clustering them in color groups. These decorative garlands work beautifully draped across mantels, hung behind beds, or strung along nursery walls.
5. Decorative Book Stack

- Old hardcover books
- Chalk paint
- Foam brush
- Twine or leather cord
- Decorative accent piece
Transform thrift store books into decorative display pieces that add height and texture to vignettes throughout your home. Remove any dust jackets and apply two coats of chalk paint directly to the covers and spines.
Neutral colors like white, cream, or soft gray create a cohesive collected appearance. Stack your painted books in groups of three or five, securing them with wrapped twine or leather cord tied in a simple bow.
Top your stack with a small succulent, vintage doorknob, or seasonal accent piece for added interest. These versatile stacks work on coffee tables, shelves, or as risers beneath other decor items.
The chalk paint finish photographs beautifully and gives any book an expensive, curated aesthetic regardless of its original condition.
6. Woven Wall Basket Display

- Assorted woven baskets
- Picture hanging hooks
- Hammer and nails
- Measuring tape
Create an eye-catching gallery wall using collected woven baskets in various sizes, shapes, and textures. Lay your baskets on the floor first, arranging them until you achieve a balanced composition.
Snap a photo of your arrangement for reference during installation. Mount baskets using simple picture hooks, starting with the largest piece and working outward. The natural textures and organic shapes add warmth and dimension that framed art alone cannot provide.
This technique works particularly well in entryways, dining rooms, or above sofas. Mix circular baskets with oval or rectangular shapes for visual variety. Include pieces with different weave patterns and fiber colors ranging from natural tan to dyed terracotta or black.
See also: 12 Creative Candle Container Ideas You Already Have at Home
7. Painted Terra Cotta Pots

- Terra cotta pots
- Acrylic paint
- Painter’s tape
- Foam brushes
- Clear sealant spray
Elevate basic terra cotta pots with bold color blocking or delicate hand-painted designs. Clean pots thoroughly and allow them to dry completely before painting.
Apply painter’s tape to create crisp geometric lines or dipped-edge effects. Use foam brushes for smooth, even coverage without visible brush strokes. Two thin coats of acrylic paint produce better results than one thick application.
Popular design choices include color-blocked bases, simple polka dots, or abstract brush strokes. Seal finished pots with a clear protective spray to prevent paint from chipping or fading.
Your customized planters become instant focal points on windowsills, patios, or grouped on plant stands.
8. Simple Rope Coasters

- Cotton rope (1/4 inch diameter)
- Hot glue gun
- Scissors
- Fabric dye (optional)
Coil cotton rope into functional coasters that protect surfaces while adding nautical charm to your table settings. Begin by forming a tight spiral with the rope end, applying hot glue as you wind each layer around the previous one.
Continue until your coaster reaches approximately four inches in diameter. The key to success lies in keeping your coils tight and flat against one another. Apply glue to the inner edge of each new loop rather than the top surface for invisible bonding.
Tuck the final end underneath and secure firmly. Create sets of four or six for cohesive table styling. Dip finished coasters in diluted fabric dye for an ombre effect that adds sophisticated color gradients to your natural rope creations.
9. Pressed Flower Frames

- Floating glass frames
- Pressed flowers and leaves
- Tweezers
- Small brush
Preserve nature’s beauty in elegant floating frames that showcase delicate botanical specimens. If you don’t have pre-pressed flowers, microwave fresh blooms between paper towels for thirty seconds to quickly flatten and dry them.
Handle dried botanicals gently with tweezers to prevent breakage. Arrange your pressed flowers between the two glass panels, experimenting with asymmetrical compositions or structured grid patterns. Use a small brush to dust away any debris before sealing the frame closed.
Group multiple frames in varying sizes to create a botanical gallery wall that brings outdoor beauty inside year-round. These handmade pieces make thoughtful gifts and preserve memories from special occasions like weddings or garden harvests.
See also: 25 Fun Home Crafts to Make This Weekend (No Experience Needed)
10. Upcycled Tin Can Organizers

- Clean tin cans
- Spray paint
- Decorative paper or fabric
- Mod Podge
- Wood board (optional)
Transform empty food cans into stylish desk organizers or bathroom storage solutions. Remove labels and wash cans thoroughly, filing down any sharp edges with sandpaper.
Apply two coats of spray paint in your chosen color, allowing adequate drying time between applications. Alternatively, wrap cans in decorative paper or fabric using Mod Podge for a patterned finish. Smooth carefully to eliminate wrinkles and air bubbles.
Cluster finished cans in groups of three or mount them on a painted board for wall-hanging storage. These upcycled organizers work beautifully for corralling makeup brushes, craft supplies, kitchen utensils, or fresh herbs on windowsills.
11. Macrame Plant Hangers

- Macrame cord (4mm)
- Wooden ring or dowel
- Scissors
- Measuring tape
- Small pot for sizing
Learn basic knotting techniques to create stunning macrame plant hangers that bring vertical dimension to your greenery displays. Cut eight lengths of cord, each measuring approximately eight times your desired finished length.
Fold cords in half and attach them to your ring using lark’s head knots. Practice square knots by crossing the outer cords over the center ones in a specific pattern.
Create a series of these knots in groups of four cords, then switch groupings to form the basket section that cradles your pot. Gather all cords at the bottom with a gathering knot, leaving decorative fringe tails. Trim ends evenly or at angles for different aesthetic effects.
These handmade hangers add bohemian elegance to any corner.
12. Cork Board Memo Display

- Cork board or cork tiles
- Frame or decorative trim
- Fabric or paint
- Staple gun or glue
Create a customized memo board that serves both organizational and decorative purposes. Cover your cork surface with fabric that coordinates with your room’s color scheme, wrapping edges tightly around the back and securing with staples or strong adhesive.
Frame your covered board with decorative molding, painted wood strips, or even thick washi tape borders. The fabric covering transforms functional cork into an attractive display piece worthy of prominent wall placement.
Use decorative pushpins to hang photos, inspirational quotes, or important reminders. Your personalized memo board becomes a functional focal point in home offices, kitchens, or entryways.
13. Decorative Drawer Liners

- Patterned contact paper or wallpaper
- Scissors
- Measuring tape
- Ruler
Add unexpected delight to dresser drawers with decorative liners that make everyday routines feel special. Measure your drawer interiors precisely, then cut paper to fit with slight overlap on all sides.
Peel backing slowly while smoothing paper into place. Choose bold patterns like geometric prints, florals, or tropical motifs that contrast beautifully against drawer contents. This simple upgrade transforms even basic furniture into something that feels custom and intentional.
Extend this concept to shelves, cabinet interiors, or the backs of bookcases for surprising pops of pattern and color throughout your home.
14. Scented Wax Sachets

- Soy wax flakes
- Essential oils
- Silicone molds
- Dried flowers
- Ribbon for hanging
Create beautiful wax sachets that freshen closets, drawers, and small spaces without open flames. Melt soy wax in a microwave-safe container, stirring in your favorite essential oils once liquified.
Lavender promotes relaxation while citrus scents energize and uplift. Pour scented wax into silicone molds, embedding a ribbon loop before it sets completely. While still tacky, press dried flowers, herbs, or small botanicals into the surface for decorative appeal.
Once hardened, your scented sachets release fragrance gradually over several months. Create seasonal varieties using peppermint for winter, rose for spring, or eucalyptus for year-round freshness.
15. Statement Tray Styling

- Plain wooden or metal tray
- Spray paint or contact paper
- Decorative hardware (handles)
- Felt pads
Transform an ordinary tray into a styling piece that anchors vignettes on coffee tables, ottomans, or bathroom counters. Apply spray paint in metallic gold, matte black, or crisp white for instant sophistication.
Multiple light coats prevent drips and ensure smooth coverage. Upgrade the tray further by replacing basic handles with decorative hardware featuring interesting textures or finishes. Leather straps, brass pulls, or ceramic knobs all add distinctive character.
Attach felt pads to the bottom to prevent surface scratches. Your customized tray corrals candles, books, and decorative objects into cohesive arrangements that look intentionally designed.
See also: Coffee Table Styling Tips for Every Design Aesthetic
16. Fabric Scrap Bookmarks

- Fabric scraps or ribbon
- Cardstock
- Fabric glue
- Scissors or pinking shears
- Embellishments (optional)
Craft charming fabric bookmarks that make thoughtful handmade gifts for book lovers. Cut cardstock into strips approximately two inches wide and six inches long. Wrap coordinating fabric around the cardstock, securing with fabric glue along the edges.
Use pinking shears to create decorative edges that resist fraying. Add ribbon tails, tassels, or small charms to the top for extra personality and easy page-finding functionality.
Create sets featuring different patterns from the same fabric collection for coordinated gift bundles. Package them with a favorite book for meaningful presents that cost almost nothing to make.
17. Painted Rock Accents

- Smooth river rocks
- Acrylic paint pens
- Clear acrylic sealer
- Pencil for sketching
Transform ordinary stones into painted rock accents that add whimsy to gardens, shelves, or desk spaces. Select smooth, flat rocks and clean them thoroughly before painting.
Sketch designs lightly in pencil before committing to permanent marks. Acrylic paint pens offer precision and control for creating detailed patterns like mandalas, inspirational words, or miniature landscapes.
Work from the center outward on symmetrical designs, allowing each section to dry before adding adjacent details. Seal finished rocks with clear acrylic spray for weather resistance if displaying outdoors. These small creations make perfect paperweights, garden markers, or meditation stones.
18. Embellished Photo Mats

- Pre-cut photo mats
- Washi tape or paint
- Stamps and ink
- Metallic markers
Customize plain white photo mats to create frames that feel uniquely personal. Use washi tape to create patterned borders, or paint watercolor washes directly onto mat surfaces.
Metallic markers add elegant flourishes and hand-lettered captions. Rubber stamps work beautifully for creating repeated patterns or corner embellishments.
Practice your design on scrap paper first to perfect placement and pressure before stamping your final mat. These personalized mats transform inexpensive frames into custom art displays that highlight your photos while reflecting your unique style sensibility.
19. Copper Pipe Hooks

- Copper pipe pieces
- Pipe fittings (elbows)
- Wall anchors and screws
- Pipe straps
Create sleek copper pipe hooks that add industrial elegance to entryways or bathrooms. Cut pipes into six-inch lengths, or have your hardware store make cuts for you.
Connect pieces with elbow fittings to form hook shapes that protrude from walls. Mount using pipe straps secured with appropriate wall anchors for your surface type. The warm metallic tones develop a natural patina over time, adding character and depth to these functional fixtures.
Install in rows for coat storage, or create single hooks in bathrooms for towel hanging. This industrial aesthetic pairs beautifully with both modern and rustic design schemes.
20. Decorative Clothespin Magnets

- Wooden clothespins
- Strong magnets
- Acrylic paint or washi tape
- Hot glue gun
- Clear sealer
Craft functional clothespin magnets that organize refrigerator surfaces while displaying important papers stylishly. Decorate clothespins with painted patterns, washi tape wrapping, or decoupage techniques using decorative paper.
Allow decorations to dry completely before handling. Attach strong disc magnets to the flat back of each clothespin using hot glue. Press firmly and allow the adhesive bond to cure fully before putting magnets to work.
Create themed sets for different purposes: bright colors for children’s artwork display, elegant neutrals for adult spaces, or seasonal patterns that rotate throughout the year. These practical crafts make excellent teacher gifts or housewarming presents.
These 20 home craft projects you can finish in under an hour prove that meaningful creativity fits perfectly into even the busiest schedules.
Each project delivers impressive results using simple materials and straightforward techniques that anyone can master. From elegant macrame hangers to rustic mason jar lanterns, your handmade touches transform ordinary spaces into personalized havens that reflect your unique style.
Grab your supplies and start creating! Transform your living space one quick project at a time, building confidence and skills with each completed piece. Share your favorite ideas in the comments below, and let us know which projects you’re most excited to try first.
Rate this post and bookmark it for future crafting inspiration whenever creativity calls!