How to Make Scented Candles With Essential Oils (And What to Avoid)
Have you ever lit a store-bought candle only to be disappointed by its synthetic, overpowering scent? You’re not alone. Making your own scented candles with essential oils gives you complete control over the fragrance, intensity, and ingredients.
Plus, it’s one of the most rewarding fun crafts to make at home that produces beautiful, usable results. Learning how to make scented candles with essential oils isn’t complicated, but there are crucial dos and don’ts that can make or break your project. In this guide, you’ll discover everything from choosing the right wax and wicks to understanding which essential oils work best—and which ones you should absolutely avoid.
Whether you’re crafting candles for yourself or creating thoughtful presents, this step-by-step tutorial will set you up for fragrant success.
Why Choose Essential Oils for Homemade Candles?

Essential oils offer a natural alternative to synthetic fragrance oils. They’re derived from plants, flowers, and herbs, providing authentic aromatherapy benefits alongside pleasant scents. Many crafters prefer them because they avoid the artificial chemicals found in commercial candles.
However, essential oils behave differently than fragrance oils when heated. They have lower flash points and can evaporate quickly if not handled properly. Understanding these characteristics is key to creating candles that smell amazing without safety risks.
Benefits of using essential oils include:
- Natural aromatherapy properties (lavender for relaxation, peppermint for focus)
- No synthetic additives or phthalates
- Customizable scent blends you won’t find in stores
- Perfect for those with sensitivities to artificial fragrances
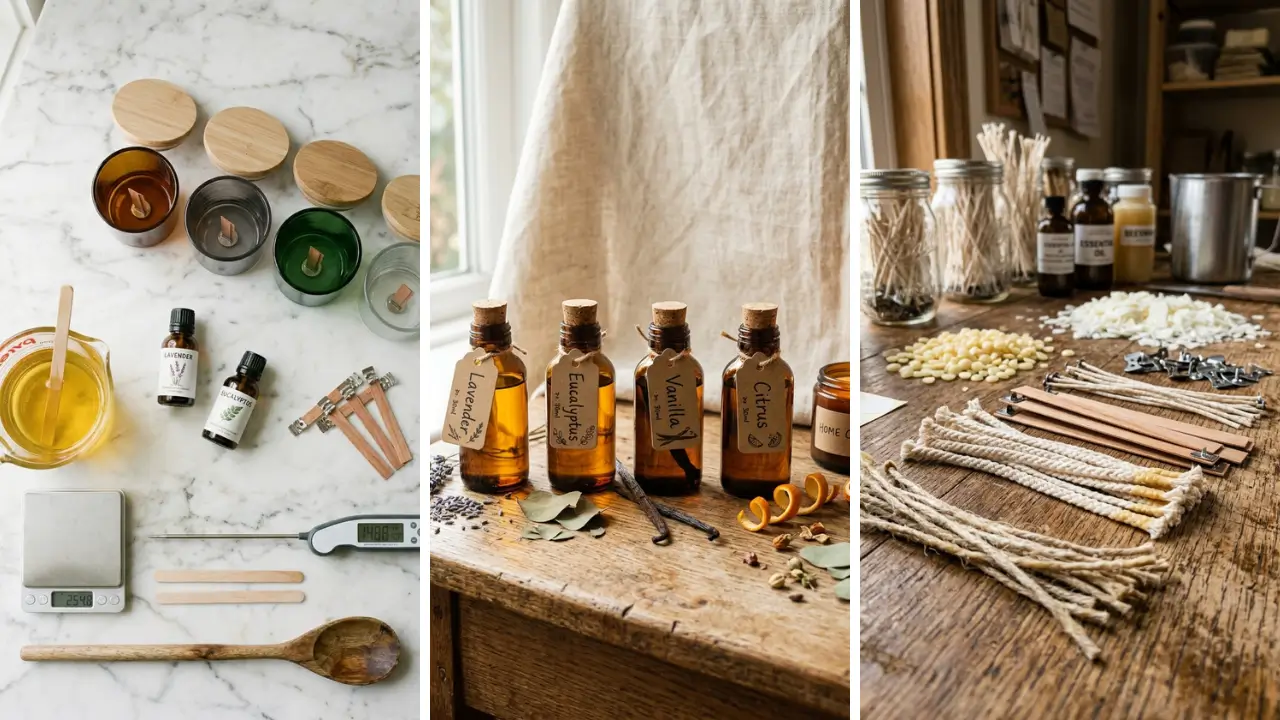
Essential Supplies You Need to Make Scented Candles With Essential Oils

Before diving into the process, gather your materials. Having everything ready makes the experience smoother and more enjoyable. This is one of those home craft projects quick enough to complete in an afternoon once you’re prepared.
Wax Options
Soy wax is the most popular choice for essential oil candles. It burns cleanly, holds scent well, and has a lower melting point that’s gentler on delicate oils. Beeswax is another excellent natural option with its own subtle honey scent.
Coconut wax blends beautifully with essential oils and creates a luxurious finish. Avoid paraffin wax if you’re going the all-natural route. It’s petroleum-based and can release potentially harmful compounds when burned.
Wicks Matter More Than You Think

Choose cotton or wood wicks for the cleanest burn. The wick size must match your container diameter—too small and you’ll get tunneling, too large and the candle burns too hot. Most suppliers provide sizing charts, so measure your containers before purchasing.
Containers and Tools
Heat-safe glass jars, ceramic vessels, or tin containers work well. You’ll also need a double boiler (or makeshift version), thermometer, stirring utensil, and wick centering device. A kitchen scale helps measure wax accurately.
Step-by-Step Guide: How to Make Scented Candles With Essential Oils

Now for the exciting part—actually making your candles. Follow these steps carefully for the best results.
Step 1: Prepare Your Workspace
Cover your surface with newspaper or a silicone mat. Wax spills happen, and cleanup is much easier with protection. Secure your wicks to the bottom of clean, dry containers using a wick sticker or small dab of melted wax.
Step 2: Melt the Wax Properly
Use a double boiler to melt your wax slowly and evenly. Direct heat can scorch wax and create fire hazards. Heat soy wax to approximately 170-180°F (76-82°C).
Monitor temperature constantly with your thermometer. Pro tip: Never leave melting wax unattended. It can overheat quickly and become dangerous.
Step 3: Add Essential Oils at the Right Temperature
This step is where many beginners go wrong. Remove melted wax from heat and let it cool to around 130-140°F (54-60°C) before adding essential oils. Adding oils to wax that’s too hot causes them to evaporate, leaving you with a weak-scented candle.
Use approximately 1 ounce of essential oil per pound of wax (about 6% ratio). Stir gently for two full minutes to ensure even distribution.
Step 4: Pour and Cure
Pour the scented wax slowly into your prepared containers. Keep wicks centered using a centering device or pencil laid across the top. Allow candles to cool at room temperature for 24-48 hours.
Curing is crucial. Let your candles sit for at least one week before burning. This allows the essential oils to fully bind with the wax, creating a stronger scent throw.
Best Essential Oils for Candle Making

Not all essential oils perform equally in candles. Some throw scent beautifully while others disappear when heated. Here are the top performers: Excellent choices:
- Lavender – classic, calming, and holds scent well
- Eucalyptus – refreshing with strong throw
- Lemongrass – citrusy and long-lasting
- Cedarwood – warm, woodsy, and stable at higher temperatures
- Peppermint – invigorating with excellent cold and hot throw
- Orange – sweet citrus that blends well with other oils
These oils are popular for DIY handmade gifts because they create candles that genuinely fill a room with fragrance.
What to Avoid When Making Essential Oil Candles

Understanding what NOT to do is just as important as knowing the right steps. These mistakes can ruin your candles—or create safety hazards.
Essential Oils to Skip
Some oils are too volatile or simply don’t perform well in candles:
- Rose – extremely expensive and scent evaporates quickly
- Jasmine – doesn’t throw well and loses fragrance
- Neroli – too delicate for candle making temperatures
- Most citrus oils alone – evaporate fast; blend with base notes instead
Common Mistakes That Ruin Candles
Adding oil to hot wax: Temperatures above 180°F destroy essential oil compounds. Always wait for proper cooling. Using too much oil: More isn’t better.
Excessive oil can cause smoking, poor burning, and even fire hazards. Stick to the 6% maximum ratio. Skipping the cure time: Burning candles immediately results in weak scent throw.
Patience pays off with stronger fragrance. Ignoring flash points: Every essential oil has a flash point—the temperature at which it can ignite. Research your specific oils and never heat wax beyond their flash points.
Creating Custom Scent Blends

One of the joys of making your own candles is crafting unique fragrance combinations. When exploring handmade gift craft ideas, custom-blended candles stand out as thoughtful, personalized presents.
Blending Basics
Think of essential oils in three categories: top notes (first impression, fades quickly), middle notes (heart of the blend), and base notes (lasting foundation). A balanced candle includes all three. Example blend for relaxation:
- Top: Bergamot (2 drops)
- Middle: Lavender (4 drops)
- Base: Cedarwood (3 drops)
Energizing morning blend:
- Top: Lemon (3 drops)
- Middle: Peppermint (3 drops)
- Base: Rosemary (2 drops)
Test small batches before committing to large quantities. What smells perfect in the bottle might behave differently once burned.
Budget-Friendly Tips for Candle Making

Essential oils can be pricey, but smart shopping keeps costs manageable. Look for dollar store crafts ideas to find affordable containers—mason jars, teacups, and small tins often cost much less than specialty candle vessels. Money-saving strategies:
- Buy wax in bulk—prices drop significantly for larger quantities
- Purchase essential oils from reputable wholesale suppliers
- Start with versatile oils like lavender and eucalyptus that work alone or in blends
- Save and reuse containers from finished candles
- Shop end-of-season sales for jars and decorative vessels
Troubleshooting Common Problems
Even experienced candle makers encounter issues. Here’s how to fix the most frequent problems: Weak scent throw: Increase cure time, ensure proper oil temperature when adding, or try a different wax that holds fragrance better. Tunneling: Your wick is too small.
On first burn, let the melt pool reach all edges of the container. Frosting on soy wax: This natural crystallization doesn’t affect performance. Warm your containers slightly before pouring to minimize it.
Wet spots: Caused by wax pulling away from glass. Pour at lower temperatures and avoid moving candles while cooling.
Conclusion
Learning how to make scented candles with essential oils opens up a world of creative possibilities. You control the ingredients, customize the fragrances, and create candles that are both beautiful and beneficial. Remember the key principles: use quality natural wax, add oils at the right temperature, respect proper ratios, and always allow adequate cure time.
The mistakes to avoid are equally important—never add oils to hot wax, don’t exceed safe oil percentages, and research flash points for safety. With practice, you’ll develop an intuition for what works and create signature scents that store-bought candles simply can’t match. Whether you’re making candles for your own home or crafting heartfelt gifts, this skill brings satisfaction with every successful pour.
The gentle glow and natural fragrance of homemade essential oil candles transform any space into something special. Ready to start your candle-making journey? Gather your supplies this weekend and create your first batch.
Share your favorite essential oil combinations in the comments below—we’d love to hear what scents you’re experimenting with!
FAQ
Q: How much essential oil should I use when making scented candles? A: Use approximately 1 ounce of essential oil per pound of wax, which equals about a 6% ratio. Using more can cause smoking, poor burning, and safety issues.
Some potent oils like peppermint may require less—start conservatively and adjust based on results. Q: Why do my essential oil candles have weak scent throw? A: The most common cause is adding oils when the wax is too hot, which evaporates the fragrance.
Always wait until wax cools to 130-140°F. Also ensure you’re curing candles for at least one week before burning to allow proper oil-wax bonding. Q: Can I use any essential oil to make scented candles with essential oils?
A: Not all essential oils work well for candles. Delicate florals like rose and jasmine lose their scent when heated. Citrus oils evaporate quickly and work best blended with base notes.
Lavender, eucalyptus, cedarwood, and peppermint are reliable choices with good scent throw. Q: What’s the difference between essential oils and fragrance oils for candles? A: Essential oils are natural plant extracts with aromatherapy benefits but can be tricky to work with due to low flash points.
Fragrance oils are synthetic, designed specifically for candles with stronger throw and more consistent results. Essential oils appeal to those wanting all-natural products. Q: How long should homemade essential oil candles cure before burning?
A: Allow a minimum of one week curing time, though two weeks produces even better results. During curing, essential oils fully bind with the wax molecules, dramatically improving both cold throw (unlit scent) and hot throw (burning scent). Patience truly makes a difference in final fragrance quality.