How to Make Wax Melts at Home in Under 30 Minutes
Have you ever walked into a home that smells absolutely divine and wondered how they achieve that cozy, inviting atmosphere? The secret is often wax melts—and here’s the exciting part: you can learn how to make wax melts at home in under 30 minutes without any prior crafting experience. These little fragrant wonders are not only cheaper to make than store-bought versions, but they also allow you to customize scents to match your exact preferences.
Whether you want to fill your living space with the warm aroma of vanilla, the fresh scent of eucalyptus, or a unique blend that’s entirely your own, this guide will walk you through everything. You’ll discover the essential supplies needed, step-by-step instructions, and pro tips that will have you creating professional-quality wax melts in no time. Ready to transform your home’s ambiance while saving money?
Let’s dive in.
Why Make Your Own Wax Melts at Home?

Before we get into the how-to, let’s talk about why making wax melts at home is absolutely worth your time. First, cost savings are significant. A pack of six store-bought wax melts typically costs $5-10, while homemade versions cost roughly $0.50-1 per batch to produce.
Second, you gain complete control over ingredients. Many commercial wax melts contain synthetic fragrances and additives that some people prefer to avoid. When you make your own, you choose exactly what goes in—natural essential oils, high-quality fragrance oils, or a combination of both.
Third, homemade wax melts make exceptional DIY handmade gifts that friends and family genuinely appreciate. There’s something special about receiving a beautifully packaged, personally crafted gift that someone made with you in mind. Finally, the creative possibilities are endless.
You can experiment with colors, scent combinations, and mold shapes to create something truly unique.
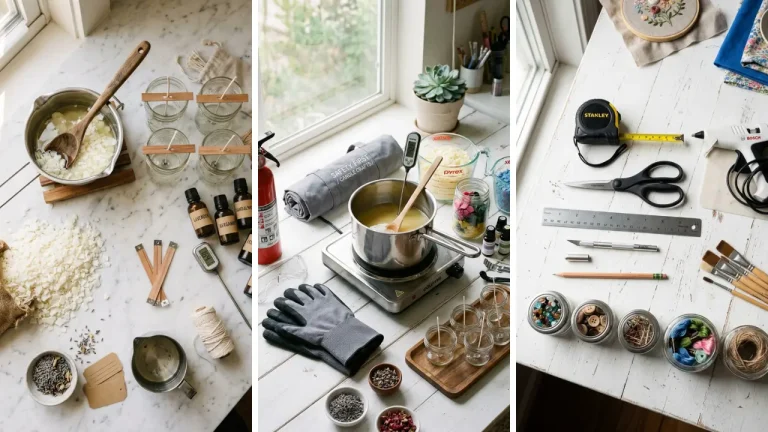
Essential Supplies for Making Wax Melts in Under 30 Minutes

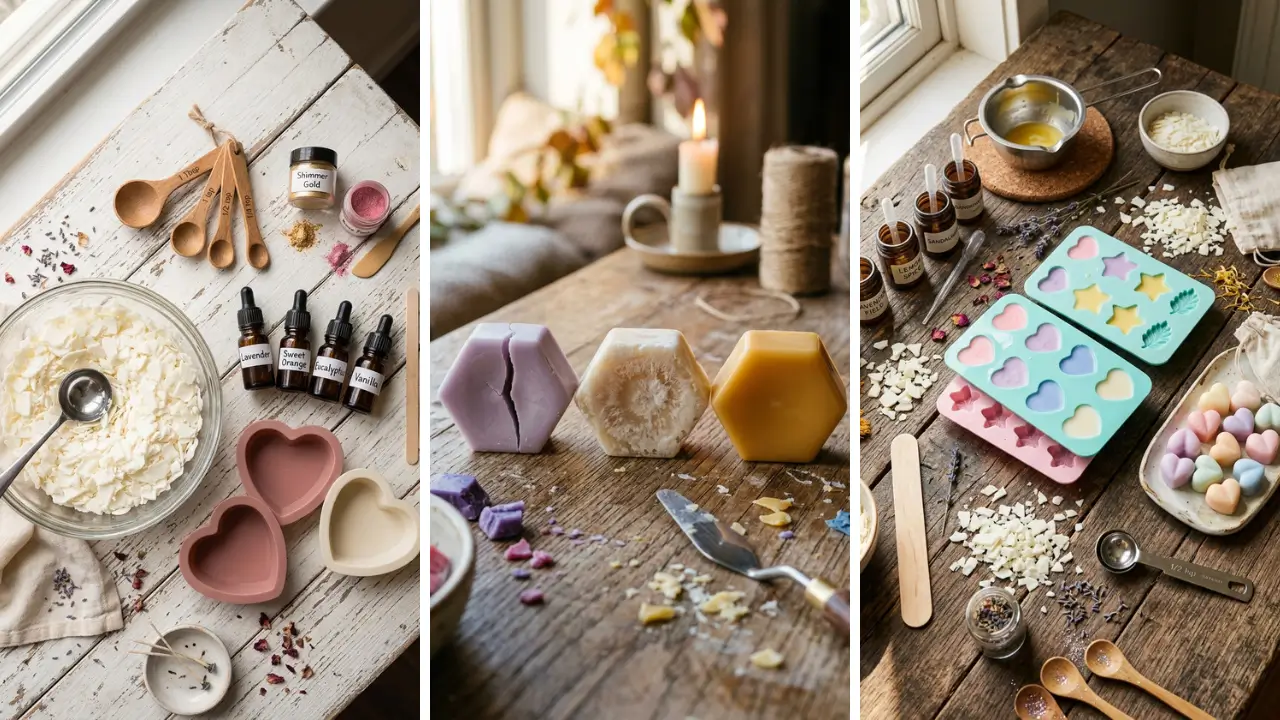
Gathering your supplies beforehand is crucial for completing this project quickly. Here’s everything you’ll need: Wax Options:
- Soy wax flakes (beginner-friendly, clean burning)
- Paraffin wax (stronger scent throw)
- Beeswax (natural option, subtle honey scent)
- Coconut wax blend (excellent fragrance retention)
Fragrance Choices:
- Fragrance oils specifically designed for wax melts
- Essential oils (use sparingly—they’re potent)
Equipment:
- Microwave-safe container or double boiler
- Silicone molds (clamshell, hearts, stars, or any shape you love)
- Thermometer (optional but helpful)
- Stirring utensil (wooden stick or silicone spatula)
- Wax dye blocks or liquid dye (optional)
If you’re looking for budget-friendly supplies, check out these dollar store crafts ideas that can help you find affordable molds and containers without compromising quality.
How to Make Wax Melts at Home: Step-by-Step Instructions

Now for the main event. Follow these steps carefully, and you’ll have gorgeous wax melts ready in under 30 minutes.
Step 1: Measure Your Wax (2 Minutes)
Measure out your wax flakes based on the size and number of molds you’re using. A general rule: one pound of wax fills approximately 10-12 standard clamshell cavities. For a small batch, start with 4-6 ounces of wax.
Pro tip: Weigh your wax rather than measuring by volume for consistent results every time.
Step 2: Melt the Wax (5-8 Minutes)
")
Microwave method: Place wax in a microwave-safe container. Heat in 30-second intervals, stirring between each interval until completely melted. This typically takes 2-3 minutes total.
Double boiler method: Fill a pot with 2 inches of water. Place a heat-safe container with wax on top. Heat over medium until wax melts completely, stirring occasionally.
The ideal temperature for adding fragrance is between 170-180°F (76-82°C). If you’re using a thermometer, wait until your wax reaches this range before proceeding.
Step 3: Add Color (1 Minute)
If you want colored wax melts, now is the time to add dye. Start with a small amount—dyes are concentrated, and you can always add more. Stir thoroughly until the color is evenly distributed.
Remember that the final color will appear lighter once the wax solidifies. Adding a bit more dye than you think necessary often yields better results.
Step 4: Add Fragrance (2 Minutes)
This is where the magic happens. The standard fragrance load for wax melts is 6-10% of the wax weight. For 8 ounces of wax, that’s approximately 0.5-0.8 ounces of fragrance oil.
Pour your chosen fragrance into the melted wax and stir continuously for at least two minutes. This ensures the fragrance bonds properly with the wax, resulting in a stronger scent throw when you eventually warm your melts.
Step 5: Pour Into Molds (3 Minutes)
Carefully pour the scented wax into your prepared molds. Work steadily but not rushed—spilled hot wax is frustrating to clean up. Fill each cavity to just below the rim.
If air bubbles appear on the surface, gently tap the mold on your work surface to release them.
Step 6: Let Them Set (15-20 Minutes)
Here’s where patience pays off. Allow your wax melts to cool and harden completely. Room temperature cooling takes about 2-3 hours, but you can speed this up significantly.
Quick-set trick: Place your filled molds in the refrigerator for 15-20 minutes. The wax will harden completely, and you can pop them out immediately. Just don’t put them in the freezer—rapid temperature changes can cause cracking.
Step 7: Remove and Store (2 Minutes)
Once solid, gently flex your silicone molds to release the wax melts. They should pop out easily. Store in airtight containers or bags to preserve the fragrance until you’re ready to use them.
This entire process easily fits into a half-hour window, making it one of the best home craft projects quick enough for busy weekends or evening relaxation.
Best Scent Combinations for Homemade Wax Melts

Creating unique scent blends is half the fun. Here are some tried-and-true combinations to inspire you: Cozy & Warm:
- Vanilla + Cinnamon + Clove
- Brown Sugar + Maple + Butter
- Coffee + Hazelnut + Caramel
Fresh & Clean:
- Eucalyptus + Peppermint + Tea Tree
- Lemon + Lavender + Rosemary
- Ocean Breeze + Sea Salt + Driftwood
Seasonal Favorites:
- Pumpkin Spice + Vanilla (Fall)
- Pine + Cedarwood + Orange (Winter)
- Peony + Gardenia + Fresh Cut Grass (Spring)
- Coconut + Mango + Pineapple (Summer)
Don’t be afraid to experiment. Some of the best scent combinations come from unexpected pairings.
Troubleshooting Common Wax Melt Problems

Even experienced crafters encounter issues sometimes. Here’s how to fix the most common problems: Weak scent throw: You likely didn’t add enough fragrance, or the wax was too hot when you added it. Try increasing your fragrance percentage and ensuring wax is at 170-180°F before adding scent.
Frosting (white crystalline coating): This is purely cosmetic and doesn’t affect performance. It’s common with soy wax. To minimize it, cool your wax melts more slowly at room temperature.
Sinkholes or uneven tops: This happens when wax cools too quickly on the surface while still liquid underneath. Pour at a slightly cooler temperature, or save some wax to do a second pour once the first layer has partially set. Wet spots (areas where wax pulls away from the mold): Again, cosmetic only.
Caused by uneven cooling. Ensure your molds are at room temperature before pouring.
Creative Ideas for Presenting Your Wax Melts

Presentation matters, especially if you’re making wax melts as gifts. Here are some ideas: Package them in small mason jars with ribbon and a handwritten label listing the scent. Use clear cellophane bags tied with twine for a rustic look.
Create themed gift sets—like a “spa day” collection with lavender, eucalyptus, and chamomile scents. Wax melts are among the most popular handmade gift craft ideas because they’re practical, customizable, and universally appreciated. Everyone loves a good-smelling home.
If you’re looking for more creative weekend activities, making wax melts pairs wonderfully with other fun crafts to make at home like soap making or bath bomb creation.
Tips for Perfecting Your Wax Melt Recipe

As you gain experience, these advanced tips will help you create even better wax melts: Keep detailed notes. Write down exact measurements, temperatures, and fragrance combinations for each batch. When you create something amazing, you’ll want to replicate it.
Cure your wax melts. While you can use them immediately, letting wax melts cure for 1-2 weeks allows the fragrance to fully bind with the wax, resulting in a stronger scent throw. Invest in quality fragrance oils.
Not all fragrance oils are created equal. Oils specifically formulated for wax have better “throw” than general-purpose craft fragrances. Test your combinations.
Before making a large batch, create small test melts to ensure the scent and color meet your expectations.
Conclusion: Start Making Beautiful Wax Melts Today
Learning how to make wax melts at home in under 30 minutes opens up a world of creative possibilities. You’ve now got everything you need—from supply lists to step-by-step instructions to troubleshooting tips—to start creating beautiful, fragrant wax melts that rival anything you’d find in stores. The beauty of this craft lies in its simplicity and accessibility.
You don’t need expensive equipment or years of experience. With basic supplies and a half-hour of your time, you can produce dozens of wax melts customized to your exact preferences. Whether you’re making them for your own home, as thoughtful gifts, or even to sell at craft fairs, homemade wax melts offer incredible value.
Remember to start simple, experiment with scents and colors, and most importantly—have fun with the process. Ready to give it a try? Gather your supplies this weekend and experience the satisfaction of filling your home with a fragrance you created yourself.
Once you start, you’ll wonder why you ever bought commercial wax melts in the first place!
Frequently Asked Questions
Q: How long do homemade wax melts last when stored? A: Properly stored wax melts maintain their fragrance for 6-12 months. Keep them in airtight containers away from direct sunlight and heat.
The scent may fade slightly over time, but they remain effective for extended periods. Q: Can I make wax melts at home using old candles? A: Absolutely!
Repurposing leftover candle wax is an excellent way to make wax melts at home. Simply melt down old candles, add fresh fragrance if the scent has faded, and pour into molds. This is eco-friendly and cost-effective.
Q: What’s the best wax type for beginners learning how to make wax melts at home in under 30 minutes? A: Soy wax is ideal for beginners. It melts at lower temperatures, cleans up easily with soap and water, and has a forgiving learning curve.
It also holds fragrance well and produces clean-burning melts. Q: How many times can I reuse wax melts before replacing them? A: A single wax melt typically provides 8-12 hours of fragrance, depending on the wax type and fragrance load.
Once the scent has fully dissipated, remove the wax from your warmer and replace with fresh melts. Q: Are essential oils or fragrance oils better for homemade wax melts? A: Fragrance oils specifically designed for wax melts generally provide stronger scent throw.
Essential oils work but require higher concentrations and may not perform as consistently. For beginners, fragrance oils are the easier choice.