How to Make a Resin Epoxy River Table: Beginner Guide
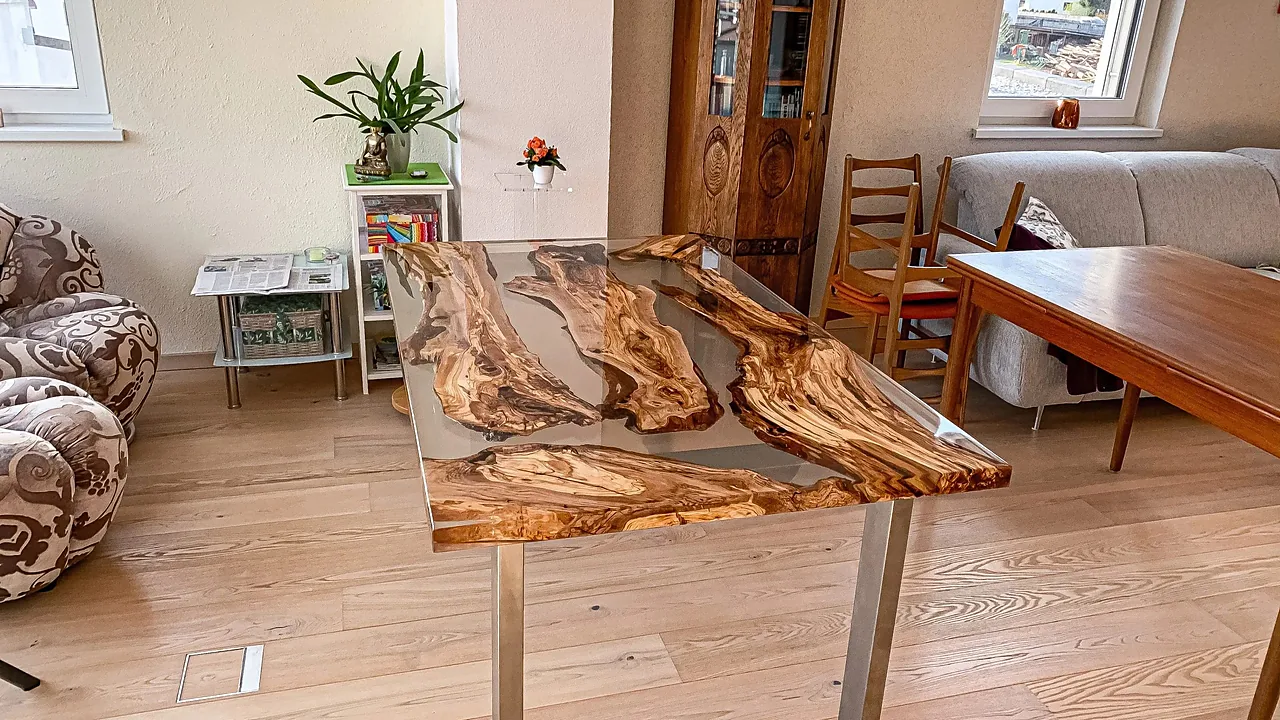
Have you ever seen one of those stunning tables with a glowing blue or teal “river” running through the center of a live-edge slab and thought, there’s no way I could make that? The good news: you absolutely can. Learning how to make a resin epoxy river table for beginners is more approachable than it looks, and the results are jaw-dropping. Whether you want a unique centerpiece for your living room or a one-of-a-kind gift, this project delivers serious wow-factor. In this guide, you’ll learn everything from the materials you need, the exact steps to follow, and the common mistakes to avoid so your first pour comes out beautifully.
What Is a Resin Epoxy River Table?
A river table is a piece of furniture, usually a dining table or coffee table, made from two live-edge wood slabs with a channel of colored epoxy resin running between them, mimicking the look of a flowing river. The effect is dramatic, modern, and surprisingly versatile. You can go for a deep ocean blue, a dramatic black, a pearlescent white, or even a glowing teal depending on your pigment choices.
These tables have exploded in popularity over the last few years, and for good reason. They combine natural woodworking with modern resin casting in a way that’s genuinely artistic. And because every wood slab is unique, no two river tables ever look exactly alike.
If you enjoy fun crafts to make at home, a resin river table is one of those projects that looks far harder than it actually is, making it incredibly satisfying to complete.
Tools and Materials You’ll Need Before You Start
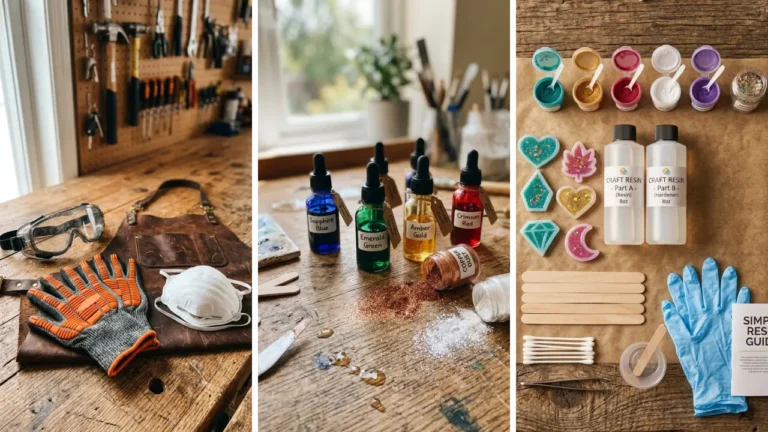
Getting your workspace and materials ready before you begin is the single most important prep step. Rushing into a pour without the right supplies leads to bubbles, leaks, and frustration. Here’s what you’ll need:
- Two live-edge wood slabs (matched pair works best)
- Epoxy resin and hardener (table-top or deep-pour formula depending on depth)
- Pigment powder or alcohol ink for coloring the resin
- Melamine-coated boards for building your mold
- Silicone caulk to seal mold edges and prevent leaks
- Heat gun or torch to pop surface bubbles
- Mixing cups, stir sticks, and gloves
- Orbital sander with multiple grit pads (80 to 400)
- Safety glasses and respirator mask
Don’t skip the safety gear. Epoxy fumes can be strong, especially in enclosed spaces, so always work in a ventilated area and wear your respirator. Your lungs will thank you.
How to Make a Resin Epoxy River Table for Beginners: Step-by-Step
Now for the main event. Follow these steps carefully and you’ll have a beautiful river table ready to finish within a few days.
Step 1: Prepare Your Wood Slabs
Start by flattening both slabs using a router sled or hand planer. Any high spots will cause gaps in your mold and uneven resin distribution. Once flat, sand both slabs up to 120 grit, then blow off all dust with compressed air. Seal any knots or cracks with a thin coat of epoxy the day before your pour, this prevents air trapped in the wood from creating bubbles in your final piece.
Step 2: Build the Mold
Your mold is essentially a rectangular box made of melamine-coated boards (epoxy doesn’t stick to melamine). Cut your base and side panels to size, then assemble them with screws. Place your wood slabs inside with the gap between them forming the “river” channel. Seal every seam with silicone caulk and let it cure fully, at least 2 hours, before pouring any resin. A leak mid-pour is a nightmare you really want to avoid.
Step 3: Mix and Color Your Epoxy Resin
Follow your resin manufacturer’s exact mixing ratio, typically 2:1 or 1:1 by volume. Mix slowly for 3 to 4 minutes, scraping the sides and bottom of the cup. Undermixing is the number one cause of sticky, uncured resin. Once mixed, add your pigment. A little goes a long way, start with a small amount and build up to the opacity you want. Pearlescent pigments create an especially stunning river effect.
Step 4: Pour the Resin
Pour your colored resin slowly into the channel between the slabs. If you’re filling more than 1.5 inches deep, use a deep-pour formula and pour in multiple layers, allowing each layer to reach a gel stage (usually 12 to 24 hours) before adding the next. After pouring, use your heat gun or torch held about 6 inches from the surface in slow sweeping motions to pop any bubbles. Cover the mold loosely with a sheet of plastic to keep dust off while it cures.
Step 5: Demold and Sand
After the resin has fully cured (usually 48 to 72 hours), unscrew your mold carefully. The slab should pop free without too much effort thanks to the melamine coating. Now comes the satisfying part, sanding. Start with 80 grit to level any high spots, then work your way up through 120, 180, 220, and finally 400 grit. The surface will go from cloudy to crystal clear as you progress through the grits.
Step 6: Apply a Top Coat
For a glass-like finish, apply a final flood coat of clear epoxy resin over the entire table top. Mix carefully, pour thin, and spread with a foam brush or spreader. Pop bubbles one more time with your torch. Once cured, you’ll have a surface that looks almost too good to put a coffee cup on.
This kind of hands-on creation is one of the most rewarding home craft projects quick enough to complete over a weekend, yet with results that look like they came straight out of a designer furniture store.
Choosing the Right Epoxy Resin for Your River Table
Not all epoxy resins are created equal. For river tables, you’ll typically choose between two types:
- Table-top epoxy: Best for thin flood coats and finishing layers. Self-levels beautifully but shouldn’t be poured deeper than about 1/4 inch per layer.
- Deep-pour epoxy: Designed for casting thick sections. Can be poured up to 2 to 4 inches deep in a single pour depending on the brand, making it ideal for the actual river channel.
Look for a resin with a long working time (at least 30 to 40 minutes) so you have time to mix, color, pour, and pop bubbles without it gelling on you mid-process. UV-resistant formulas are worth the extra cost if the table will be near a window, they resist yellowing over time significantly better.
Common Mistakes Beginners Make (and How to Avoid Them)
Even experienced woodworkers hit snags on their first river table. Here are the pitfalls that catch beginners most often:
- Not sealing the mold properly: Leaks ruin hours of work. Always do a water test before pouring resin.
- Wrong mixing ratio: Always measure by weight or volume as specified. Eyeballing it doesn’t work with epoxy.
- Pouring too deep in one go with table-top resin: This causes excessive heat buildup that can crack, yellow, or even warp the resin.
- Skipping grit stages when sanding: Jumping from 80 to 220 grit leaves deep scratches that are hard to remove later.
- Working in a cold environment: Epoxy cures poorly below 70°F (21°C). Keep your workspace warm for best results.
A river table is genuinely one of the best DIY handmade gifts you can make for someone, unique, functional, and completely personal. Imagine gifting a custom coffee table made with someone’s favorite color palette. That’s the kind of present people remember forever.
Budget Tips: Making a River Table Without Breaking the Bank
A full river table build can cost anywhere from $150 to $600+ depending on the size of the slabs and the epoxy brand you choose. But there are smart ways to keep costs down. Buying smaller slabs for a coffee table instead of a dining table cuts both material and epoxy costs significantly. Local lumber yards often sell live-edge offcuts at a fraction of the cost of full slabs.
For pigments and smaller supplies, you might be surprised how far a little creativity goes, and there are plenty of dollar store crafts ideas that can inspire affordable approaches to decorating and staging your finished piece beautifully without overspending.
If you’re already into creative making projects and looking for more ideas, exploring handmade gift craft ideas can spark inspiration for pairing your new river table with complementary handmade decor pieces that tie a room together.
Finishing and Caring for Your River Table
Once your table is fully sanded and top-coated, attach your legs, hairpin legs are a popular modern choice that pairs beautifully with the organic look of live-edge slabs. For the wood portions, apply a food-safe oil or hardwax oil to nourish and protect the grain. This keeps the natural wood color rich and deep while the epoxy handles the heavy-duty surface protection.
To maintain your river table long-term, avoid placing extremely hot items directly on the resin surface. While cured epoxy is durable, sustained heat above 120°F can cause soft spots. Use coasters and placemats, and clean with a gentle, non-abrasive cleaner. Properly cared for, a well-made resin river table will last decades.
Deep pours release more fumes than a small craft project, so it is worth reading the guide to resin art safety before mixing a large batch. For product choices, the best epoxy resin for beginners compares the formulas described above, and epoxy resin table top ideas shows what other builders have made with the same technique.
Conclusion
Learning how to make a resin epoxy river table for beginners is one of those projects that rewards patience and preparation. From choosing the right slabs and building a leak-proof mold, to mixing your resin correctly and achieving that glass-smooth finish, every step builds on the last. The process takes a few days, but the result, a one-of-a-kind piece of functional art, is completely worth it.
The most important takeaway? Don’t let the aesthetics intimidate you. River tables look complex, but once you break the process into steps, it’s entirely manageable for a first-time builder. Start small with a coffee table, get comfortable with your materials, and you’ll be ready to tackle a full dining table build before you know it.
So gather your materials, prep your workspace, and take that first pour. Your future river table is waiting, and it’s going to look incredible.
Ready to start your build? Drop a comment below with the color you’re planning for your river, or share a photo when your table is done.
Frequently Asked Questions
Q: How long does it take to make a resin epoxy river table for beginners?
A: The full process typically takes 3 to 5 days from start to finish. The actual hands-on work is only a few hours total, but you need to factor in cure times between resin pours (24 to 72 hours each). Planning your build over a long weekend with cure time overnight works well for most beginners.
Q: What is the best epoxy resin for a beginner’s river table?
A: Look for a clear, low-viscosity, UV-resistant deep-pour epoxy with a working time of at least 30 minutes. Brands like TotalBoat, Pro Marine Supplies, and Stone Coat Countertops are frequently recommended by beginners for their clarity, reliability, and good customer support documentation.
Q: How do I prevent bubbles in my resin river table?
A: The key steps are: seal your wood before pouring, mix your resin slowly to minimize air incorporation, and use a propane torch or heat gun to pop surface bubbles immediately after pouring. Working in a warm room (above 70°F) also helps resin flow more freely, reducing bubble formation significantly.
Q: Can I make a resin epoxy river table for beginners without a router sled?
A: Yes, though it requires more manual effort. A hand planer, a belt sander, or even careful use of a circular saw with a straight-edge guide can flatten your slabs without a router sled. The goal is simply to ensure both mating surfaces are flat so your mold seals properly and the finished table sits level.
Q: Is a river table a good DIY handmade gift idea?
A: Absolutely. It’s one of the most impressive and personal gifts you can make. A custom resin river table made with someone’s favorite colors or meaningful wood species carries a level of thoughtfulness that store-bought furniture simply can’t match. It also makes a stunning wedding, housewarming, or anniversary gift that the recipient will showcase for years.