How to Make Beeswax Candles: Natural Paraffin Alternative
Have you ever wondered what you’re actually breathing in when you light that pretty candle from the store? Most commercial candles are made with paraffin wax, a petroleum byproduct that releases potentially harmful chemicals when burned. That’s why learning how to make beeswax candles: a natural alternative to paraffin isn’t just a fun craft—it’s a healthier choice for your home and family.
Beeswax candles have been used for centuries, and for good reason. They burn cleaner, last longer, and even help purify the air by releasing negative ions. Plus, the warm honey scent of pure beeswax creates an ambiance that synthetic fragrances simply can’t match.
In this guide, you’ll discover everything you need to create beautiful beeswax candles at home. From gathering your supplies to troubleshooting common issues, we’ll walk through the entire process together. Whether you’re a complete beginner or looking to refine your candle-making skills, you’ll find practical tips that actually work.
Why Choose Beeswax Over Paraffin Candles?

Before diving into the how-to, let’s understand why beeswax deserves a spot in your candle-making journey. The differences between beeswax and paraffin are significant. Beeswax burns up to 5 times longer than paraffin candles of the same size.
This makes them incredibly cost-effective despite the higher initial material cost. A single beeswax candle can provide dozens of hours of beautiful, warm light. Unlike paraffin, beeswax is completely natural and renewable.
Bees produce it to build their honeycomb, and responsible beekeepers harvest it sustainably. When you burn beeswax, you’re not releasing the soot and toxins associated with petroleum-based candles.
Beeswax also has a naturally high melting point (around 145°F), which means:
- Slower, more even burning
- Less dripping and mess
- Better scent throw if you add essential oils
- Safer around children and pets
If you enjoy fun crafts to make at home, beeswax candle-making is one of the most rewarding projects you can try. The results are genuinely impressive, even on your first attempt.
Essential Supplies for Making Beeswax Candles

Gathering the right materials is crucial for success. Here’s what you’ll need to get started with your beeswax candle project.
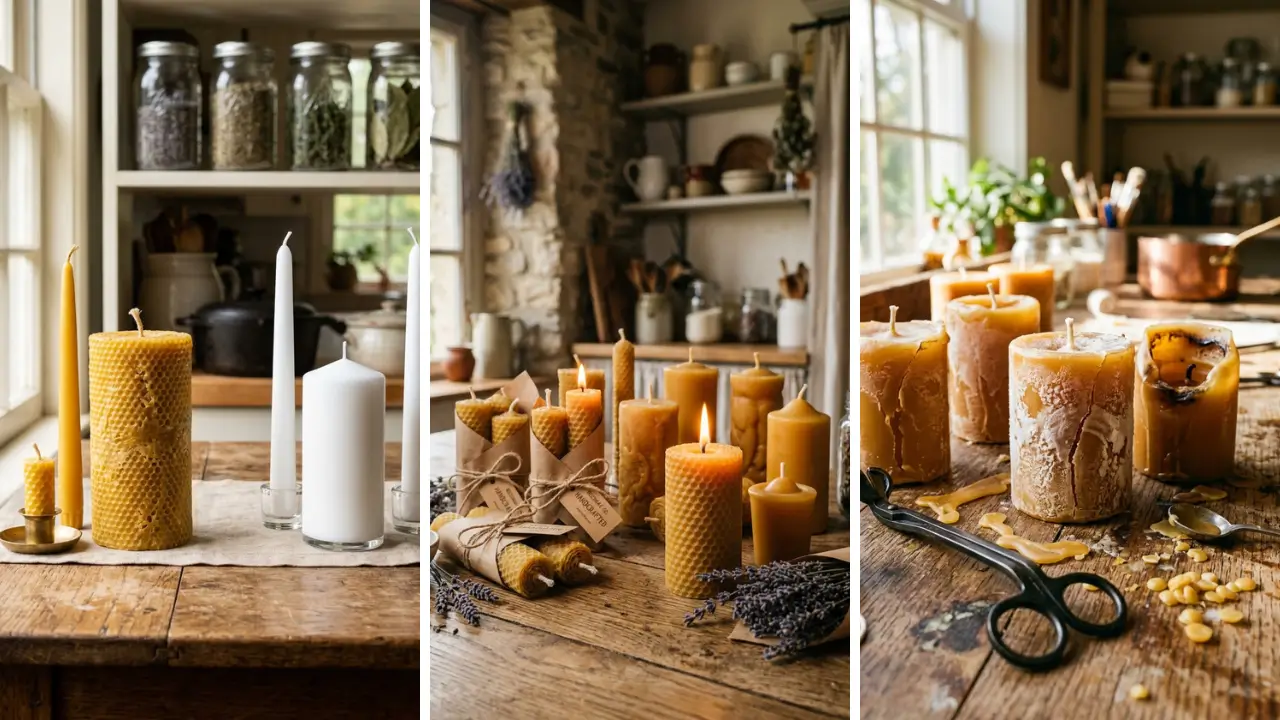
Beeswax Options
You can purchase beeswax in several forms: blocks, pellets, or pastilles. Pellets are ideal for beginners because they melt quickly and evenly. Look for 100% pure, cosmetic-grade beeswax for the best results.
Yellow beeswax retains its natural honey color and subtle scent. White beeswax has been naturally filtered and works better if you plan to add dyes or want a neutral base for essential oils.
Wicks and Wick Accessories

Choosing the right wick size is critical. For beeswax, you’ll typically need a wick one size larger than what you’d use for paraffin. Cotton or hemp wicks work best—avoid zinc-core wicks. You’ll also need:
- Wick tabs (metal bases that anchor the wick)
- Wick stickers or hot glue
- Wick holders or pencils to keep wicks centered
Containers and Molds
Heat-resistant glass jars, tin containers, or silicone molds all work wonderfully. Mason jars are a popular choice for beginners. If you’re exploring dollar store crafts ideas, you can find affordable containers that look surprisingly elegant.
Melting Equipment
Never melt beeswax directly over a flame—it’s flammable! Use a double boiler setup or a dedicated wax melter. A candy thermometer helps you monitor temperature accurately.
Step-by-Step Guide: How to Make Beeswax Candles

Now for the exciting part! Follow these steps to create your first batch of beautiful beeswax candles.
Step 1: Prepare Your Workspace

Cover your work surface with newspaper or a silicone mat. Beeswax is notoriously difficult to clean once it hardens. Have all your supplies within reach before you begin melting.
Keep a fire extinguisher nearby and never leave melting wax unattended. Safety first, always.
Step 2: Prepare Your Containers
Clean your containers thoroughly and dry them completely. Any moisture can cause the wax to sputter or create air bubbles. Attach a wick tab to your wick, then secure it to the center bottom of your container using a wick sticker or a dab of hot glue.
Lay a pencil or wick holder across the top to keep the wick straight and centered.
Step 3: Melt the Beeswax
Fill the bottom pot of your double boiler with a few inches of water. Place your beeswax in the top pot or a heat-safe pouring pitcher. Heat the water to a simmer, not a boil.
Beeswax melts between 144-149°F. Stir occasionally with a dedicated wooden spoon or silicone spatula. Patience is key—rushing this step leads to overheating.
Step 4: Add Optional Ingredients
Once your beeswax is fully melted, you can add coconut oil (about 1 tablespoon per cup of wax) for a smoother finish. For scented candles, add essential oils when the wax cools to about 130°F—typically 1 ounce of oil per pound of wax. Skip synthetic fragrance oils.
They can create uneven burning and defeat the purpose of making natural candles.
Step 5: Pour the Wax
Let the wax cool slightly to around 160-170°F before pouring. This reduces sinkholes and improves adhesion to the container walls. Pour slowly and steadily in a single, continuous stream.
Leave about half an inch of space at the top. Reserve some wax for touch-ups.
Step 6: Cure and Finish
Allow your candles to cool completely—this takes 24-48 hours for best results. You may notice a small sinkhole around the wick. Simply reheat your reserved wax and pour a thin layer to fill it.
Trim your wick to about ¼ inch before lighting. This promotes clean, even burning.
Troubleshooting Common Beeswax Candle Problems

Even experienced candle makers encounter issues. Here’s how to solve the most common problems. Tunneling: If your candle burns straight down the middle, your wick is too small.
Use a larger wick size next time. For the current candle, wrap aluminum foil around the top edge to reflect heat and melt the outer wax. Frosting: Those white, crystalline patterns on beeswax candles are completely natural.
They don’t affect performance and many people find them charming. If you prefer a smooth look, warm your containers before pouring. Smoking or flickering: Trim your wick!
A wick that’s too long causes excessive smoke and uneven burning. Keep it at ¼ inch. Poor scent throw: Beeswax naturally competes with added scents.
Try increasing your essential oil ratio slightly, or embrace the natural honey aroma.
Creative Ideas for Beeswax Candles as Natural Gifts

Handmade beeswax candles make thoughtful presents that people genuinely appreciate. When you’re looking for handmade gift craft ideas, candles should be at the top of your list. Seasonal variations: Add cinnamon and clove essential oils for fall, peppermint for winter, or lavender for spring.
Match your container choices to the season for extra visual appeal. Themed gift sets: Create a relaxation set with lavender candles and bath salts, or a cozy night-in bundle with candles and hot cocoa mix. Personalized labels: Design custom labels for weddings, baby showers, or holidays.
A beautifully packaged beeswax candle feels luxurious yet personal. These candles are perfect additions to your collection of DIY handmade gifts. They’re practical, beautiful, and show the recipient you put genuine thought and effort into their present.
Tips for Making Beeswax Candles Successfully Every Time

After making dozens of beeswax candles, here are the insider tips that make the biggest difference. Temperature matters more than you think. Use a thermometer religiously until you develop an instinct for the right pouring temperature.
Even a 10-degree difference affects your results. Don’t skip the curing time. Fresh candles burn faster and more unevenly.
Give them at least 48 hours—a week is even better for optimal performance. Buy quality beeswax. Cheap beeswax often contains additives or impurities that affect burning.
Source from reputable beekeepers or craft suppliers. Keep notes. Record your wick sizes, container dimensions, pouring temperatures, and results.
This helps you replicate successes and learn from mistakes. For those who love home craft projects quick results, note that beeswax candles do require patience. But the quality of the finished product makes the extra time worthwhile.
Conclusion: Start Your Beeswax Candle Journey Today
Learning how to make beeswax candles: a natural alternative to paraffin opens up a world of creative possibilities. You’ll create healthier candles for your home, give meaningful handmade gifts, and enjoy a satisfying craft that produces genuinely useful results. The process is simpler than it might seem.
With basic supplies, a bit of patience, and the techniques we’ve covered, you can create professional-quality beeswax candles that rival anything you’d find in boutique shops. Remember, your first batch doesn’t need to be perfect. Each candle teaches you something new about the craft.
The natural beauty of beeswax is forgiving—even imperfect candles burn beautifully and fill your space with that incomparable warm glow. Ready to get started? Gather your supplies this weekend and pour your first beeswax candle.
Once you experience the difference between natural beeswax and commercial paraffin candles, you’ll never want to go back. Share your candle-making journey in the comments below—we’d love to hear about your creations!
Frequently Asked Questions
Q: How long do beeswax candles take to make from start to finish? A: The actual hands-on time is about 30-45 minutes per batch. However, you should allow 24-48 hours for complete curing before lighting.
For best results with scented beeswax candles, wait a full week to let the fragrance fully bind with the wax. Q: Why are beeswax candles considered a natural alternative to paraffin? A: Beeswax is produced naturally by honeybees, making it renewable and biodegradable.
Unlike paraffin, which is derived from petroleum and releases chemicals when burned, beeswax burns clean and even releases negative ions that can help purify indoor air. Q: Can I mix beeswax with other waxes when making candles? A: Yes!
Many candle makers blend beeswax with coconut oil or soy wax to lower the melting point and improve scent throw. A popular ratio is 80% beeswax to 20% coconut oil. This maintains most of beeswax’s benefits while making the candles easier to work with.
Q: How do I know what wick size to use for my beeswax candle containers? A: As a general rule, use one wick size larger than paraffin recommendations for the same container diameter. For a 3-inch container, try a medium-sized cotton wick.
Always test burn a candle before making a large batch to ensure proper melt pool formation. Q: Is it cheaper to make beeswax candles at home compared to buying them? A: Initially, purchasing supplies may seem expensive, but homemade beeswax candles cost roughly 40-60% less than comparable store-bought versions over time.
Buying beeswax in bulk significantly reduces your per-candle cost, making it an economical hobby once you’re established.