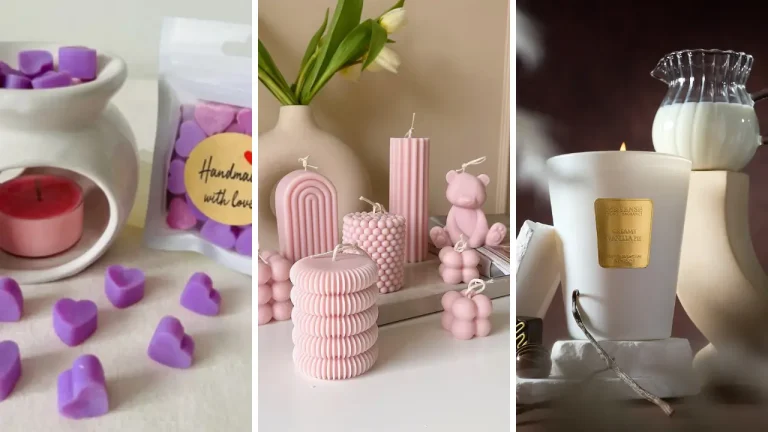
How to Make Soy Candles at Home: Complete Beginner Guide
Have you ever walked into a room filled with the warm glow and intoxicating scent of a beautifully crafted candle? What if you could create that same magic yourself? Learning how to make soy candles at home is easier than you think, and this complete beginner guide will walk you through every step of the process.
Soy candles have become incredibly popular for good reason. They burn cleaner, last longer, and hold fragrance better than traditional paraffin candles. Plus, making them yourself means you control exactly what goes into your candles—no mysterious chemicals or questionable ingredients.
Whether you want to create personalized gifts, start a side business, or simply enjoy a relaxing new hobby, candle making offers endless creative possibilities. By the end of this guide, you’ll have the knowledge and confidence to pour your first perfect soy candle. Let’s dive into the wonderful world of handmade candles!
Why Choose Soy Wax for Your Homemade Candles

Before we get into the how-to, let’s talk about why soy wax is the ideal choice for beginners. Soy wax is derived from soybeans, making it a renewable and biodegradable resource. This natural origin translates to a cleaner burn with significantly less soot than petroleum-based alternatives.
Soy candles also burn 30-50% longer than paraffin candles of the same size. That means more hours of enjoyment from every candle you create. The lower melting point of soy wax makes it safer to work with, which is perfect when you’re just starting out.
Another fantastic benefit? Soy wax has an excellent scent throw. It holds and releases fragrance oils beautifully, filling your space with consistent, long-lasting aroma.
If you’re looking for fun crafts to make at home, soy candle making checks all the boxes for creativity and practicality.
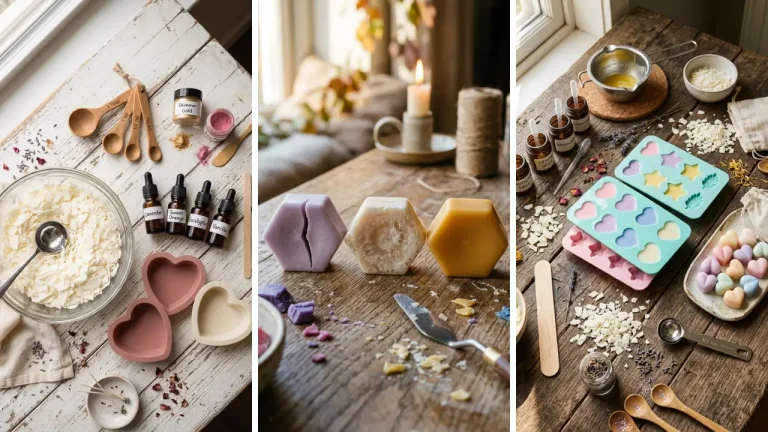
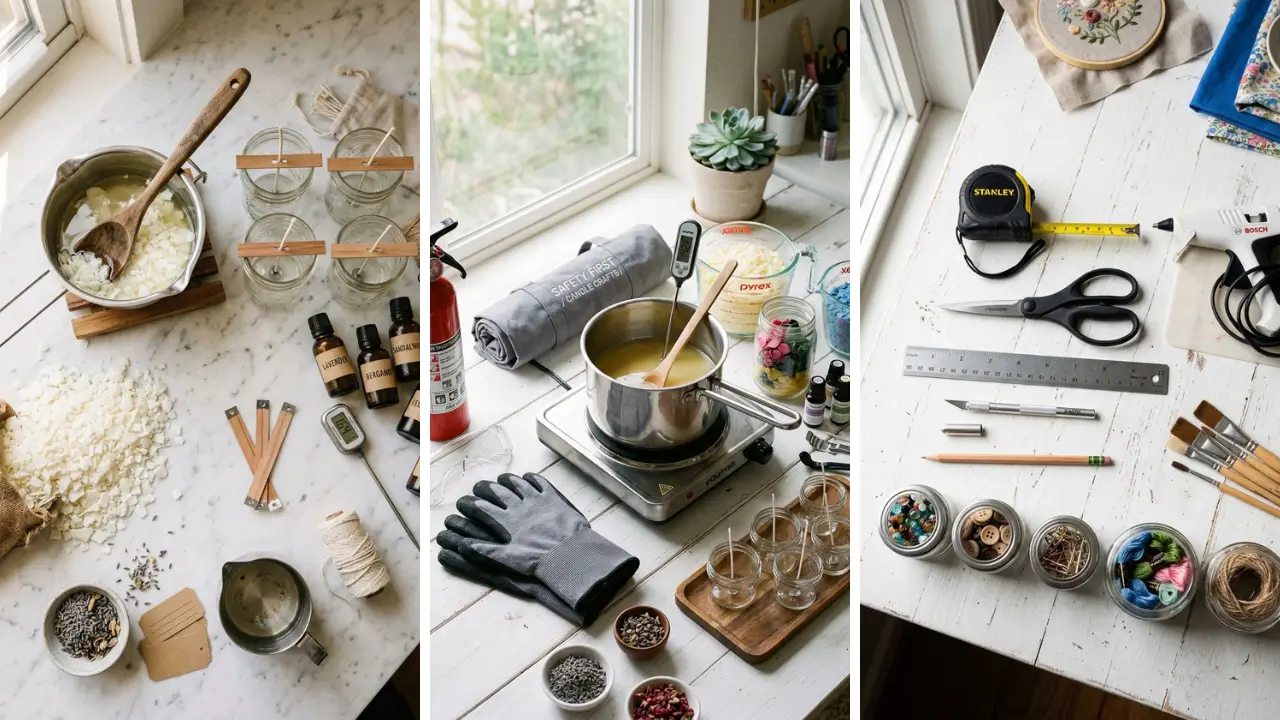
Essential Supplies for Making Soy Candles at Home

Gathering the right supplies is crucial for success. Here’s everything you’ll need to get started with your candle-making journey.
Basic Materials You’ll Need
Soy wax flakes are your foundation. For beginners, look for container-blend soy wax, which adheres well to jars and produces smooth tops. You’ll need approximately one pound of wax for every 20 ounces of container volume.
Choose cotton or wood wicks sized appropriately for your containers. Wick sizing matters—too small and your candle tunnels, too large and it smokes. Most suppliers provide wick size charts based on container diameter.
You’ll also need fragrance oils specifically formulated for candles. Essential oils can work but often have weaker scent throws. Start with 6-10% fragrance load, meaning 1 ounce of fragrance per pound of wax.
Equipment Checklist

- Double boiler or pouring pitcher
- Candy or digital thermometer
- Heat-safe containers (mason jars, tins, or dedicated candle vessels)
- Wick centering devices or chopsticks
- Kitchen scale for accurate measurements
- Stirring utensil (wooden or silicone)
Many of these items can be found at craft stores or even dollar stores. Speaking of budget-friendly options, check out these dollar store crafts ideas for more creative projects that won’t break the bank.
Step-by-Step Process: How to Make Soy Candles at Home

Now for the exciting part—actually making your candles! Follow these steps carefully for professional-looking results every time.
Step 1: Prepare Your Workspace and Containers
Clear a flat, heat-resistant surface and cover it with newspaper or wax paper. Wax spills happen, and preparation saves cleanup time. Make sure your containers are clean and completely dry.
Attach your wick to the bottom center of each container using a wick sticker or a dab of melted wax. Secure the top of the wick with a centering device. Proper wick placement is essential for even burning.
Step 2: Measure and Melt Your Wax
Weigh your soy wax flakes using your kitchen scale. Remember, you’ll need roughly double the weight of wax to fill your containers due to density changes during melting. Create a double boiler by placing a pouring pitcher inside a pot of simmering water.
Add your wax flakes and heat slowly. Never use direct heat—soy wax is flammable at high temperatures. Stir occasionally until completely melted.
Monitor the temperature with your thermometer. Soy wax melts around 120-180°F (49-82°C). Remove from heat once fully liquid and smooth.
Step 3: Add Fragrance at the Right Temperature
This step is where many beginners make mistakes. Let your wax cool to approximately 185°F (85°C) before adding fragrance oil. Adding fragrance to too-hot wax causes the scent to evaporate.
Pour in your measured fragrance oil and stir gently for two full minutes. This ensures the fragrance binds properly with the wax molecules. Don’t rush this step—thorough mixing equals better scent throw.
Step 4: Pour Your Candles
Let the wax cool further to around 135-145°F (57-63°C) before pouring. This temperature range helps prevent sinkholes and promotes better adhesion to your containers. Pour slowly and steadily, leaving about half an inch of space at the top.
Avoid moving your candles while they set. The cooling process takes several hours, and disturbances can cause uneven surfaces.
Step 5: Cure for Best Results
Here’s a secret many tutorials skip: soy candles need curing time. Allow your candles to cure for at least one week before burning. Two weeks is even better.
During this time, the fragrance fully binds with the wax, resulting in stronger scent throw. Store curing candles at room temperature away from direct sunlight. Cover them loosely to prevent dust while allowing airflow.
Troubleshooting Common Soy Candle Problems

Even experienced candle makers encounter issues. Here’s how to solve the most common problems beginners face.
Sinkholes and Uneven Tops
Sinkholes form when wax contracts during cooling. To fix this, save a small amount of wax during your initial pour. Once the candle has cooled and sinkholes appear, reheat your reserved wax and pour a thin layer to fill the gaps.
Pouring at the correct temperature and in a room without drafts also minimizes this issue.
Weak Scent Throw
If your finished candles don’t smell strong enough, several factors could be at play. You might be using too little fragrance oil, adding it at the wrong temperature, or not allowing adequate cure time. Also check your wick size.
A properly sized wick creates a full melt pool, which releases maximum fragrance. If the wick is too small, the candle won’t produce enough heat to throw scent effectively.
Tunneling Issues
Tunneling happens when candles burn down the center, leaving wax stuck to the sides. This is almost always a wick problem. Your wick is likely too small for your container diameter.
The first burn is critical. Always burn your candle long enough for the melt pool to reach all edges—usually one hour per inch of diameter.
Creative Ideas for Your Homemade Soy Candles

Once you’ve mastered the basics, the creative possibilities are endless. Making candles at home opens doors to handmade gift craft ideas that people genuinely love receiving.
Custom Color Combinations
Add candle-safe dyes to create stunning visual effects. Start with small amounts—a little dye goes a long way. You can create layered candles by pouring different colored wax in stages, allowing each layer to partially set before adding the next.
Unique Scent Blends
Don’t limit yourself to single-note fragrances. Experiment with blending two or three complementary scents. Vanilla pairs beautifully with almost anything—try vanilla-lavender for relaxation or vanilla-coffee for a cozy morning vibe.
Keep notes on your combinations and ratios. When you create a winner, you’ll want to recreate it!
Decorative Touches
Add dried flowers, herbs, or coffee beans to the top of your candles for visual appeal. Just remember these are for decoration only—remove them before burning to prevent fire hazards. Custom labels and packaging transform homemade candles into professional-looking gifts.
This craft fits perfectly into home craft projects quick enough to complete in an afternoon but impressive enough to give as gifts.
Safety Tips for Candle Making at Home

Working with hot wax requires attention to safety. Follow these guidelines to protect yourself and your space. Never leave melting wax unattended.
Wax can reach its flash point if overheated, creating a fire hazard. Keep a fire extinguisher nearby—never use water on a wax fire. Work in a well-ventilated area.
While soy wax is natural, fragrance oils can irritate sensitive individuals. If you’re pouring multiple candles, take breaks for fresh air. Protect your skin and surfaces.
Hot wax causes burns, so wear long sleeves and keep pets and children away from your workspace. Clean up spills promptly before they harden.
Taking Your Candle Making to the Next Level

Once you’re comfortable with container candles, consider expanding your skills. Pillar candles, wax melts, and even sculptural candles offer new challenges and creative outlets. Many candle makers eventually turn their hobby into a business.
Handmade soy candles sell well at farmers markets, craft fairs, and online platforms. The skills you’re developing now could become a profitable side hustle. If you enjoy working with your hands, candle making is just one of many DIY handmade gifts you can create.
The satisfaction of making something beautiful and functional never gets old.
Conclusion: Start Your Candle Making Journey Today
Learning how to make soy candles at home is a rewarding skill that combines creativity, science, and self-expression. This complete beginner guide has given you everything you need to create your first beautiful, fragrant candles. Remember, perfection comes with practice.
Your first candles might not be flawless, and that’s completely okay. Each batch teaches you something new about working with wax, fragrance, and wicks. The investment in supplies pays off quickly when you consider the cost of premium candles at retail.
More importantly, you’ll create something unique—candles that reflect your personal style and preferences, made with ingredients you trust. So gather your supplies, clear your workspace, and start melting wax. Your home is about to smell amazing, and you’ll have the satisfaction of saying, “I made this myself.” Ready to light up your creativity?
Share your candle-making experiences in the comments below, and don’t forget to tag your creations on social media. We’d love to see what scent combinations and designs you come up with!
Frequently Asked Questions
Q: How long does it take to make soy candles at home as a beginner? A: Active time for making a batch of soy candles is about 30-45 minutes. However, you’ll need to factor in cooling time (4-6 hours) and curing time (1-2 weeks) before burning for best results.
Q: Is making soy candles at home cheaper than buying them? A: Yes! Once you have basic equipment, supplies cost approximately $2-4 per candle compared to $15-30 for similar quality retail candles.
The savings increase with larger batches. Q: Can I use essential oils instead of fragrance oils in my homemade soy candles? A: You can, but fragrance oils typically perform better in candles.
Essential oils have lower flash points and may produce weaker scent throw. If using essential oils, choose ones specifically rated for candle making. Q: Why do my soy candles have white frost on top?
A: Frosting is a natural characteristic of soy wax and doesn’t affect performance. It occurs due to temperature fluctuations during cooling. To minimize frosting, pour at lower temperatures and avoid moving candles while setting.
Q: What’s the best container for making soy candles at home? A: Heat-resistant glass jars, tins, and ceramic vessels all work well. Avoid containers that might crack under heat or have narrow openings.
Mason jars are a popular, affordable choice for beginners learning how to make soy candles at home.