How to Create a DIY Vertical Garden Fence Wall: A Complete Step-by-Step Guide

Have you ever looked at a bare fence or blank wall and thought, “There has to be something better I can do with this space”? You’re not alone. Millions of homeowners and apartment dwellers are discovering that learning how to create a DIY vertical garden for a fence or wall is one of the most rewarding — and surprisingly affordable — home improvement projects you can tackle on a weekend.
Whether you have a sprawling backyard fence or a tiny balcony wall, a vertical garden transforms dead space into a thriving, living display of greenery, herbs, or flowers. In this guide, you’ll learn everything you need to know: the best materials to use, which plants thrive in vertical setups, step-by-step building instructions, and tips to keep your garden looking lush all season long. Let’s dig in.
Why a DIY Vertical Garden for a Fence or Wall Is Worth Your Time

Vertical gardens aren’t just beautiful — they’re practical. They maximize growing space in small areas, improve air quality, reduce heat absorption on walls, and can even boost your home’s curb appeal significantly. Studies show that green walls can reduce surrounding temperatures by up to 5°C, making them a smart choice for urban environments.
Beyond the environmental benefits, building a vertical garden is genuinely fun. It’s one of those fun crafts to make at home that combines creativity with practicality. You end up with something beautiful, functional, and completely personalized to your taste and space.
The best part? You don’t need to be an expert gardener or a skilled carpenter. Most vertical garden builds require only basic tools, a few hours of time, and a modest budget.
Materials You’ll Need to Build a Vertical Garden

Before you start building, it’s important to gather the right supplies. The materials you choose will depend on your wall or fence type, your budget, and the style you’re going for. Here’s a general breakdown:
- Structure: Wooden pallets, PVC pipes, wire mesh panels, fabric pocket planters, or repurposed wooden frames
- Containers: Plastic pots, terracotta pots, mason jars, tin cans, or hanging fabric pockets
- Mounting hardware: Screws, wall anchors, zip ties, S-hooks, or cable ties
- Soil: Lightweight potting mix (avoid heavy garden soil for wall-mounted planters)
- Irrigation: A drip irrigation kit or simple watering can — your choice depends on the scale of your garden
- Tools: Drill, level, measuring tape, and safety gloves
If you’re working on a tight budget, don’t worry. You’d be amazed at how many of these materials can be sourced cheaply. Checking out dollar store crafts ideas can help you find containers and small tools that look far more expensive than they actually are — perfect for keeping costs low without sacrificing style.
Choosing the Right Plants for Your Vertical Garden

Plant selection is everything. The wrong plants will struggle, wilt, and make maintenance feel like a chore. The right ones will thrive with minimal effort and reward you with color, fragrance, or even fresh produce.
Best Plants for a Sunny Wall or Fence
If your wall or fence gets 6+ hours of direct sunlight, you have plenty of great options. Succulents, lavender, petunias, strawberries, and thyme all love full sun and handle the dry conditions that vertical gardens sometimes create. Herbs like basil, rosemary, and oregano are especially popular for sunny kitchen garden walls.
They’re low-maintenance, smell amazing, and give you fresh ingredients right outside your door.
Best Plants for a Shady Wall or Fence

Shady spots are trickier but absolutely workable. Ferns, begonias, hostas, and impatiens thrive in low-light conditions. Shade-loving herbs like mint and parsley also do well in partial shade.
For a dramatic, lush look on a shaded fence, try combining different leaf textures — large tropical-style leaves alongside delicate trailing vines create a visually stunning layered effect.
Step-by-Step: How to Create a DIY Vertical Garden for a Fence or Wall

Ready to build? Follow these steps carefully and you’ll have a stunning vertical garden up in a single afternoon.
Step 1 — Plan Your Layout
Measure your wall or fence section and sketch out a basic layout. Decide how many rows of plants you want, and whether you’ll use a single structure (like a pallet) or individual mounted containers. Planning ahead prevents costly mistakes and wasted materials.
Step 2 — Prepare Your Structure

If you’re using a wooden pallet, sand it down and apply a coat of weatherproof sealant to protect it from moisture. For wire mesh panels, cut them to size using wire cutters and attach a wooden frame border for a cleaner finish. Make sure whatever structure you use is sturdy enough to hold the weight of soil and fully watered plants — this is a common mistake beginners make.
Step 3 — Mount the Structure Securely
Use appropriate wall anchors and screws for your fence or wall type. For wooden fences, standard wood screws work perfectly. For masonry walls, you’ll need masonry anchors and a hammer drill.
Always use a level to ensure your structure hangs straight — a crooked vertical garden is frustrating to correct after planting.
Step 4 — Add Landscape Fabric (Optional but Recommended)
Line the back and sides of any open-frame structure with landscape fabric before adding soil. This holds the soil in place while still allowing water to drain freely. Staple or zip-tie the fabric securely so it doesn’t sag under the weight of wet soil.
Step 5 — Fill with Lightweight Potting Mix
Use a lightweight, well-draining potting mix rather than heavy garden soil. You can also mix in perlite or coconut coir to improve drainage and reduce overall weight. Fill each pocket or container to about 1 inch below the rim to prevent soil from washing out when you water.
Step 6 — Plant and Arrange Your Greenery
Start planting from the bottom row upward to avoid disturbing already-placed plants. Gently loosen root balls before placing each plant, then firm the soil around the roots. Water lightly after planting to help settle the soil.
Step 7 — Set Up Watering and Maintenance Routine
Vertical gardens dry out faster than traditional ground beds, so consistent watering is key. Drip irrigation systems are the most efficient option for larger setups. For smaller walls, a long-nozzle watering can or a simple hand-held hose attachment works great.
Check moisture levels every 1–2 days during hot or dry periods.
Budget Tips and Creative Ideas for Your Vertical Garden
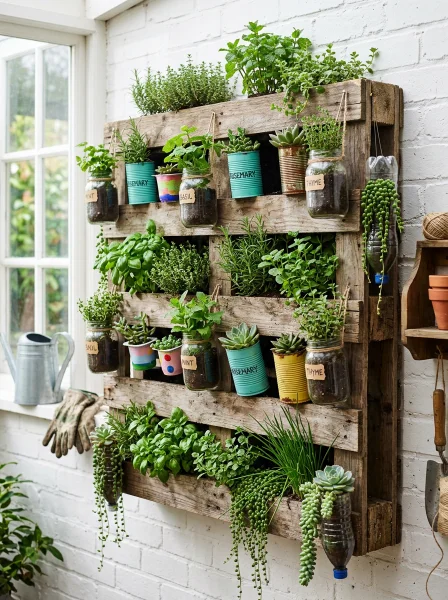
One of the best things about this project is how flexible it is with your budget. You can build a stunning vertical garden for under $30 if you get creative with materials. Repurposed wooden pallets are often free from local businesses.
Old gutters mounted horizontally make surprisingly elegant planter rows. Even repurposed kitchen colanders with coco-liner inserts can become charming wall planters. This project fits perfectly into the world of home craft projects quick that anyone can finish over a single weekend without prior experience.
The satisfaction of stepping back and looking at a wall you completely transformed is genuinely hard to beat. If you’re also looking for ways to extend your creative energy indoors, exploring DIY handmade gifts is a natural next step — many of the same crafting skills and tools translate beautifully between garden projects and personalized gifts for friends and family.
Common Mistakes to Avoid When Building a Vertical Garden
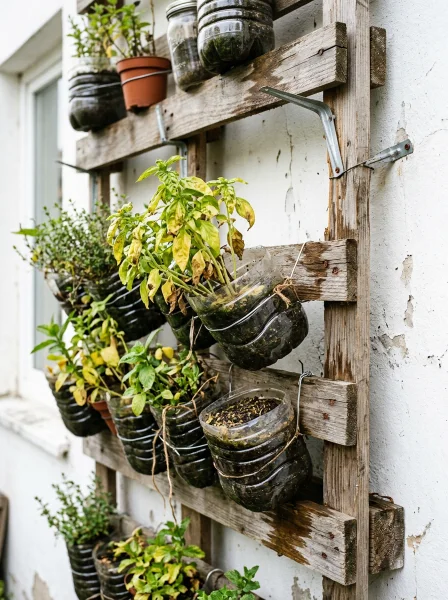
Even straightforward projects have pitfalls. Here are the most common mistakes people make — and how to sidestep them:
- Overloading the structure: Always calculate the weight capacity of your mounting system before filling containers with soil and water.
- Ignoring drainage: Poor drainage leads to root rot. Always ensure containers have holes and that water can escape freely.
- Choosing the wrong plants: Match plants to your specific light conditions. Putting sun-loving plants in deep shade is a recipe for disappointment.
- Skipping the sealant: Untreated wood exposed to constant moisture will rot quickly. Always seal wooden structures before mounting.
- Underestimating watering needs: Vertical gardens are exposed to more air circulation and evaporate moisture faster — plan your watering schedule accordingly.
Turning Your Vertical Garden Into a Gift or Social Project
A vertical herb wall makes a genuinely thoughtful and unique gift for a gardening-loving friend or family member. You can pre-plant a small pallet frame with culinary herbs and present it as a complete, ready-to-hang kitchen garden. It’s the kind of personalized, meaningful present that store-bought gifts simply can’t match.
If you enjoy giving creative handmade presents, you’ll find plenty of inspiration in handmade gift craft ideas — from garden-themed gifts to seasonal decorations that pair beautifully with a living plant wall aesthetic.
Conclusion
Learning how to create a DIY vertical garden for a fence or wall is one of the most satisfying weekend projects you can take on. It transforms underused vertical space into something genuinely beautiful, improves your outdoor environment, and gives you the creative satisfaction of building something with your own hands. The key takeaways: plan your layout carefully, choose plants that suit your light conditions, use lightweight soil, and stay consistent with watering.
Whether you spend $20 on repurposed materials or $150 on a polished modular system, the result is always worth the effort. Start small if you’re new to this — a single row of herb pockets on a sunny fence is all you need to catch the vertical gardening bug. Once you see how manageable and rewarding it is, you’ll be planning your next wall before the first one is even finished.
Ready to get started? Share your vertical garden photos in the comments below — we’d love to see what you create! And if you’re looking for more hands-on project inspiration, drop a comment with your next project idea.
Frequently Asked Questions
Q: How to create a DIY vertical garden for a fence on a very tight budget? A: You can build a beautiful vertical garden for under $30 by using free wooden pallets, repurposed tin cans, or plastic bottles as containers. Source free pallets from local hardware stores or businesses, and use seeds instead of established plants to cut costs further.
A little creativity goes a long way — the structure matters more than expensive materials. Q: What is the best structure to use when building a DIY vertical garden for a wall? A: Wooden pallets and fabric pocket planters are the two most popular options for beginners.
Pallets are sturdy, free or cheap, and easy to customize. Fabric pocket planters are lightweight, affordable, and great for renters since they can be removed without damaging walls. Your choice depends on your wall type and how permanent you want the installation to be.
Q: How often do vertical gardens need to be watered? A: Vertical gardens typically need watering every 1–2 days during warm weather because they dry out faster than ground-level beds. During cooler months or in shadier spots, every 2–3 days may be sufficient.
Installing a simple drip irrigation system on a timer is the most efficient solution for larger vertical gardens. Q: Can I grow vegetables in a vertical garden on a fence? A: Yes, absolutely.
Compact vegetables like lettuce, spinach, kale, cherry tomatoes (with support), strawberries, and radishes work exceptionally well in vertical setups. Stick to shallow-rooted varieties and ensure containers are deep enough — at least 6–8 inches — to support healthy root development. A sunny south-facing fence is ideal for edible vertical gardens.
Q: Is a DIY vertical garden suitable for apartment balconies? A: Vertical gardens are actually perfect for balconies because they maximize limited space without taking up floor area. Use lightweight fabric pocket systems or small modular planters that mount on balcony railings.
Always check your building’s rules about wall mounting before drilling. Freestanding vertical planter frames are a great no-drill alternative for renters.