How to Make a Macrame Wall Hanging From Scratch (Full Tutorial)
Have you ever walked into a beautifully decorated room and noticed that stunning woven wall art that instantly catches your eye? That’s macrame magic at work. Learning how to make a macrame wall hanging from scratch is easier than you might think, and this full tutorial will guide you through every knot and twist.
Whether you’re a complete beginner or someone looking to expand your crafting skills, macrame offers a therapeutic and rewarding creative outlet. The best part? You only need a few basic supplies and a couple of hours to create something truly impressive.
In this comprehensive guide, you’ll discover the essential materials needed, learn fundamental knots step-by-step, and follow along as we create a beautiful wall hanging together. By the end, you’ll have both a gorgeous piece of decor and the confidence to tackle more complex projects. Let’s dive into the wonderful world of macrame!
Essential Materials for Your Macrame Wall Hanging

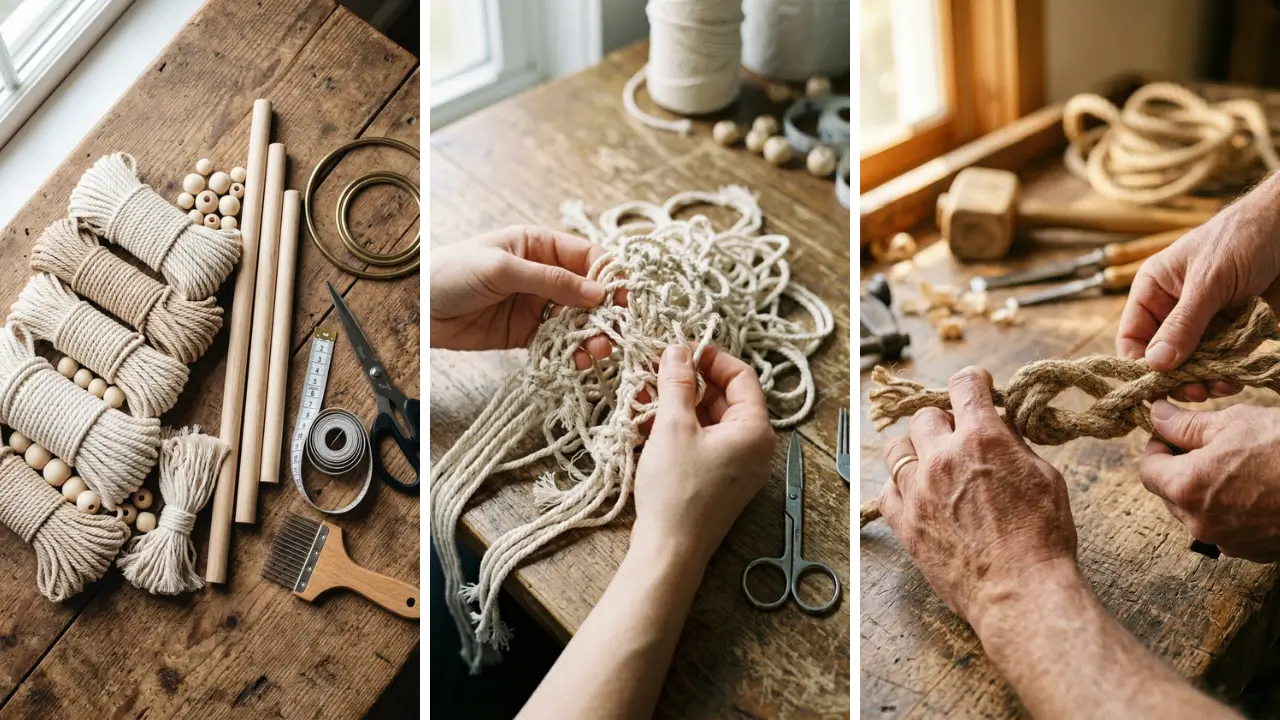
Before we start knotting, let’s gather everything you need. The beauty of macrame lies in its simplicity—you won’t need expensive tools or complicated equipment.
Choosing the Right Cord
The cord you select will dramatically impact your finished piece. For beginners, I recommend 3mm or 4mm cotton macrame cord. It’s soft on your hands, easy to work with, and creates beautiful defined knots.
You have two main options: single-strand or three-ply twisted cord. Single-strand cord is perfect for projects where you’ll be brushing out fringe, while twisted cord holds its shape better for cleaner, more structured designs. For a standard wall hanging measuring about 12 inches wide and 24 inches long, you’ll need approximately 100-150 feet of cord.
Always buy more than you think you need—it’s better to have extra than to run short mid-project.
Additional Supplies You’ll Need
Here’s your complete supply list:
- Wooden dowel or branch: 14-18 inches long for mounting
- Scissors: Sharp fabric scissors work best
- Measuring tape: For cutting consistent cord lengths
- Comb or brush: For creating fringe later
- Mounting tape or hook: To secure your work while knotting
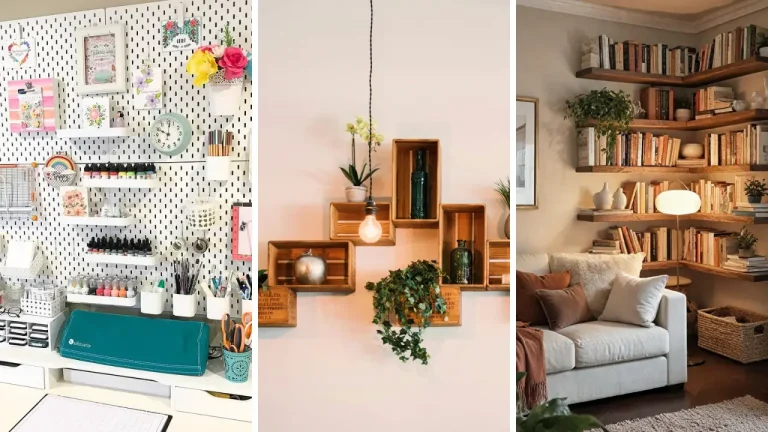
If you’re looking for more fun crafts to make at home, macrame is an excellent starting point that requires minimal investment.
How to Make a Macrame Wall Hanging: Mastering Basic Knots

Every macrame masterpiece relies on just a handful of fundamental knots. Once you master these three essential techniques, you can create virtually any design imaginable.
The Lark’s Head Knot (Mounting Knot)
This is how you’ll attach your cords to the dowel. It’s incredibly simple and creates a clean, uniform top edge. Step-by-step instructions:
- Fold your cord in half to find the center point
- Place the folded loop over the front of your dowel
- Pull the loop down behind the dowel
- Thread both cord ends through the loop
- Pull tight to secure
That’s it! Repeat this process for each cord you’re mounting. For our project, you’ll create 12-16 lark’s head knots depending on how dense you want your design.
The Square Knot

This is the backbone of most macrame designs. The square knot uses four cords—two outer working cords and two inner filler cords. Here’s how to tie it:
- Take the left cord and cross it over the two middle cords, creating a “4” shape
- Pass the right cord over the left cord’s tail
- Bring the right cord behind the middle cords and through the loop of the “4”
- Pull both outer cords to tighten—this is half your square knot
- Now reverse: right cord over middle cords, left cord over right tail
- Left cord behind middle cords and through the loop
- Tighten to complete your square knot
Practice this knot until it feels natural. You’ll be making dozens of them!
The Spiral Knot (Half Square Knot)
Want to add visual interest? The spiral knot is simply repeating the first half of a square knot over and over. The result is a beautiful twisted rope effect that adds texture and movement to your piece.
These projects make wonderful DIY handmade gifts for friends and family who appreciate unique, personalized decor.
Step-by-Step Tutorial: Creating Your Wall Hanging

Now that you understand the basics, let’s create your first complete macrame wall hanging. This beginner-friendly design incorporates all three knots you’ve learned.
Preparing Your Cords
Cut 16 pieces of cord, each measuring approximately 8 feet long. This might seem excessive, but macrame uses up cord quickly, and you’ll appreciate the extra length. Mount all 16 cords onto your dowel using lark’s head knots.
Space them evenly across the center 10-12 inches of your dowel. You now have 32 working cords hanging down.
Creating the First Row

Starting from the left, group your cords into sets of four. With each group, create one square knot positioned about 2 inches below the dowel. You should end up with 8 square knots across your first row.
Keep your tension consistent—too tight and your piece will curl, too loose and it’ll look messy.
Building the Alternating Pattern
This is where the magic happens. For row two, skip the first two cords and start your groupings from cords 3-6. This creates the signature diagonal pattern that makes macrame so visually appealing.
Continue alternating between regular rows and offset rows. Create 6-8 rows total, maintaining about 1-1.5 inches between each row of knots.
Adding Spiral Sections
To add variety, select two or three cord groups and create spiral sections instead of square knots. Create 6-8 half knots in a row, and you’ll see the beautiful twist forming. This technique is popular among home craft projects quick enthusiasts because it adds visual complexity without requiring advanced skills.
Advanced Design Elements to Elevate Your Piece

Once you’re comfortable with the basics, these additional techniques will take your wall hanging to the next level.
Creating a V-Shape or Diamond Pattern
Instead of straight rows, try building your pattern into a V-shape. Start with your center four cords and work outward, dropping down slightly with each new knot. This creates elegant geometric shapes.
For a diamond, create a V-shape, then reverse the pattern—working from the outside edges back toward the center. Diamonds are stunning focal points in any macrame design.
Incorporating Gathering Knots
Gathering knots bundle multiple cords together, creating clean visual breaks in your design. Simply wrap one cord tightly around a group of cords 3-4 times, then thread the end through the back to secure.
Adding Beads and Accessories
Wooden beads, crystals, or metal rings can transform a simple design into something extraordinary. Thread beads onto individual cords between knots, or use large wooden rings as structural elements. You can find affordable supplies at craft stores, and if you’re budget-conscious, check out dollar store crafts ideas for creative alternatives that still look amazing.
Finishing Touches for a Professional Look

The finishing stage is crucial. This is where amateur projects are transformed into pieces that look professionally made.
Trimming Your Fringe
Decide on your fringe style before cutting. Options include:
- Straight edge: Classic and clean
- V-shaped: Modern and dramatic
- Diagonal: Asymmetrical and artistic
- Layered: Multiple lengths for depth
Always cut longer than you think you need—you can always trim more, but you can’t add length back.
Brushing Out Fringe
If you used twisted cord, you can unravel the strands and brush them out for a feathery, bohemian look. Work in small sections, brushing from top to bottom. A pet brush or wide-tooth comb works perfectly.
After brushing, give your fringe a final trim to even out any straggly ends. Some crafters use fabric stiffener spray to reduce frizz and maintain shape.
Mounting and Display
Add hanging cord to either end of your dowel if you haven’t already. Consider the weight of your piece when choosing hooks—macrame wall hangings can be surprisingly heavy. Display your creation in areas with indirect light to prevent fading.
Avoid humid spaces like bathrooms unless you’ve used synthetic cord.
Troubleshooting Common Macrame Mistakes

Even experienced crafters encounter challenges. Here’s how to handle the most common issues.
Uneven Tension
If your piece is curling or looking wonky, your tension is inconsistent. Practice maintaining even pressure as you pull each knot tight. Some crafters find it helpful to count to three while tightening each knot.
Running Out of Cord
If one cord runs short, you can splice in additional cord by placing a new piece alongside the short one and incorporating both into your next few knots. The join will be invisible once completed.
Crooked Patterns
Measure frequently as you work. Use a ruler to ensure your knots are evenly spaced. Some crafters draw guidelines on paper and work over it for reference.
If you enjoy learning new handmade gift craft ideas, troubleshooting is simply part of the creative journey.
Conclusion: Your Macrame Journey Starts Now
You now have everything you need to understand how to make a macrame wall hanging from scratch. This full tutorial has walked you through materials, essential knots, step-by-step construction, and professional finishing techniques. Remember, macrame is a skill that improves with practice.
Your first piece doesn’t need to be perfect—it just needs to be started. Each knot you tie builds muscle memory and artistic intuition. The beauty of this craft lies in its accessibility and endless creative possibilities.
Once you’ve completed your first wall hanging, you’ll likely find yourself eyeing blank walls throughout your home, imagining the possibilities. Don’t let this tutorial gather digital dust. Grab some cord, find a dowel, and start knotting today.
Share your finished creation in the comments below—I’d love to see what you create! If this guide helped you, pass it along to a friend who might enjoy discovering their own macrame passion.
FAQ
Q: How long does it take to make a macrame wall hanging from scratch? A: For beginners following this full tutorial, expect to spend 3-5 hours on your first project. As you gain experience, you’ll complete similar pieces in 1-2 hours.
Complex designs with intricate patterns may take 8-10 hours or more. Q: What’s the best cord for beginners learning how to make a macrame wall hanging? A: Start with 3mm or 4mm cotton macrame cord.
It’s soft on your hands, affordable, and shows knots beautifully. Avoid slippery synthetic cords until you’ve mastered basic techniques. Q: Can I make a macrame wall hanging without a dowel?
A: Absolutely! Natural branches, copper pipes, driftwood, metal rings, or even vintage drawer pulls make excellent alternatives. Choose something sturdy enough to support your cord’s weight.
Q: How much cord do I need for a standard wall hanging? A: For a medium-sized piece (12″ wide by 24″ long), plan for 100-150 feet of cord. Individual cords should be cut 8-10 times the desired finished length to account for knotting.
Q: How do I fix mistakes in my macrame project? A: Unlike knitting, macrame is forgiving. Simply untie your knots back to the mistake point and redo them.
Work slowly and check your progress frequently to catch errors early before they become difficult to fix.