20 DIY Lamp Makeover Ideas That Transform Thrift Store Finds
Have you ever walked past an ugly lamp at a thrift store and wondered what it could become? Those dusty, outdated fixtures hiding on secondhand shelves hold incredible potential. With simple techniques and affordable supplies, you can transform any thrift store lamp into a stunning statement piece.

This guide presents 20 DIY lamp makeover ideas that transform thrift store finds into beautiful home lighting. From modern minimalist designs to bohemian masterpieces, there’s something for every style. Let’s dive in…
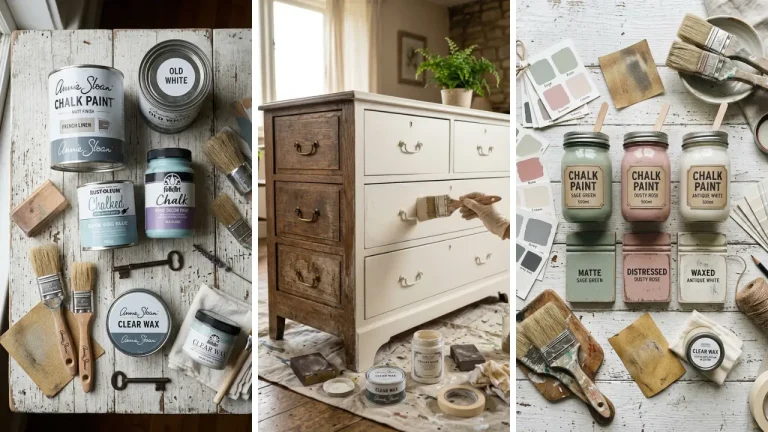
1. Sleek Chalk Paint Transformation

Materials Needed:
- Chalk paint in desired color
- Clear matte sealer
- Fine-grit sandpaper
- Quality paintbrush
Chalk paint works magic on outdated ceramic and metal lamp bases. This technique requires no priming and covers almost any surface beautifully. The matte finish creates an elegant, modern aesthetic.
Start by lightly sanding the lamp base to remove glossy finishes. Apply two thin coats of chalk paint, allowing each layer to dry completely. Seal with matte clear coat for durability.
2. Textured Rope Wrapped Base

Materials Needed:
- Thick jute or sisal rope
- Hot glue gun
- Scissors
- Painter’s tape
Transform any lamp base into a nautical-inspired masterpiece using rope wrapping techniques. This method covers imperfections while adding incredible texture. Coastal and farmhouse decor enthusiasts love this affordable approach.
Secure the rope end at the base with hot glue. Wrap tightly in rows, adding glue every few inches. Continue until you achieve your desired coverage height.
3. Glamorous Gold Leafing
Materials Needed:
- Gold leaf sheets
- Adhesive sizing
- Soft brush
- Clear sealer spray
Nothing elevates a thrift store lamp faster than gold leaf application. This luxurious technique transforms plain bases into high-end looking fixtures. The metallic shimmer catches light beautifully.
Apply adhesive sizing to clean surfaces and wait until tacky. Gently press gold leaf sheets onto the adhesive. Brush away excess with a soft bristle brush and seal thoroughly.
4. Decoupage Fabric Covering

Materials Needed:
- Mod Podge
- Fabric scraps
- Foam brush
- Sharp scissors
Give tired lamp bases new life with fabric decoupage. This technique allows endless pattern possibilities using remnants you already own. Coordinating your lamp with room textiles creates cohesive design.
Cut fabric pieces slightly larger than needed. Apply Mod Podge to the lamp surface and smooth fabric firmly. Add a topcoat of sealant for protection and durability.
If you enjoy these creative transformations, you’ll also love exploring fun crafts to make at home for more weekend project inspiration.
5. Modern Color Block Design

Materials Needed:
- Two contrasting spray paints
- Painter’s tape
- Drop cloth
- Primer spray
Create eye-catching color blocked lamps using simple taping techniques. This modern approach works on any shaped base. Bold color combinations make stunning statement pieces.
Prime the entire base first for best paint adhesion. Apply your first spray paint color and let dry completely. Tape off sections and apply your second contrasting shade.
6. Vintage Map Covering

Materials Needed:
- Old maps or atlas pages
- Decoupage medium
- Sponge brush
- Clear acrylic sealer
Travel lovers adore map-covered lamp bases. This technique transforms ordinary lamps into conversation pieces. Feature meaningful destinations or create random vintage appeal.
Tear map pieces for organic edges rather than cutting. Apply decoupage medium to small sections at a time. Overlap pieces and smooth out all air bubbles carefully.
7. Concrete Effect Finish

Materials Needed:
- Concrete texture spray paint
- Gray base coat paint
- Sandpaper
- Sealing spray
Achieve trendy industrial concrete looks without actual cement. Textured spray paints create realistic stone effects on any surface. This technique suits modern and minimalist interiors perfectly.
Apply a gray base coat for color foundation. Use concrete texture spray in light, even passes. Build up layers gradually for the most realistic stone appearance.
8. Boho Macrame Wrapped

Materials Needed:
- Macrame cord
- Wooden beads
- Hot glue
- Scissors
Macrame embellishments add bohemian charm to any lamp base. This technique ranges from simple wrapping to intricate knotting patterns. Natural cotton cord creates warm, textured appeal.
Create basic macrame panels or wraps separately. Attach completed macrame pieces to lamp bases with strategic hot glue. Add wooden bead accents for extra boho flair.
9. Mosaic Tile Embellishment

Materials Needed:
- Mosaic tiles or broken china
- Tile adhesive
- Grout
- Sponge
Transform plain lamp bases into mosaic art pieces using tiles or broken china. This Mediterranean-inspired technique adds incredible visual interest. Each mosaic lamp becomes a unique artwork.
Arrange tiles in your desired pattern before adhering. Apply tile adhesive and press pieces firmly. Fill gaps with coordinating grout and wipe excess clean.
This mosaic technique pairs beautifully with other creative projects. Consider exploring DIY wall art ideas for living room to create matching decor pieces.
10. Ombre Spray Paint Effect

Materials Needed:
- Two to three spray paint shades
- Cardboard spray shield
- Primer
- Clear coat sealer
Create stunning gradient color effects using simple spray paint layering. Ombre lamps add sophisticated color transitions to any room. This technique works best on taller lamp bases.
Start with your lightest color at the top. Gradually blend darker shades toward the bottom using light, overlapping passes. Build color intensity slowly for seamless transitions.
11. Mercury Glass Transformation

Materials Needed:
- Looking glass spray paint
- Vinegar water mixture
- Spray bottle
- Paper towels
Mercury glass effects give thrift store lamps expensive vintage appeal. This technique mimics antique mirrored glass beautifully. Clear glass lamp bases transform into elegant statement pieces.
Mist the inside of glass bases with vinegar water solution. Apply looking glass spray in light coats. Blot with paper towels for authentic aged spotting.
12. Leather Belt Wrapped

Materials Needed:
- Old leather belts
- Strong adhesive
- Utility knife
- Leather conditioner
Repurposed leather belts create masculine, rustic lamp designs. This upcycling technique suits offices and dens perfectly. Thrift store belt finds add character and sustainability.
Cut belts to wrap around your lamp base circumference. Apply strong adhesive and press belts firmly in place. Stack multiple belts or leave gaps for varied visual effects.
13. Stenciled Pattern Design

Materials Needed:
- Adhesive stencils
- Craft paint
- Stencil brush
- Base coat spray paint
Stenciled patterns add intricate designs without freehand skill requirements. Geometric, floral, or moroccan motifs transform plain bases instantly. This technique offers endless customization possibilities.
Apply base coat and let dry completely. Position adhesive stencils carefully to prevent bleeding. Use minimal paint with dabbing motions for crisp pattern edges.
14. Natural Driftwood Accent
Materials Needed:
- Collected driftwood pieces
- Wood glue
- Clear polyurethane
- Sandpaper
Driftwood embellishments bring organic coastal charm to lamp designs. This technique uses beach finds or purchased pieces for natural texture. Each lamp becomes a unique nature-inspired creation.
Arrange driftwood pieces around lamp bases for desired coverage. Secure with strong wood glue and allow curing time. Apply clear protective sealant for lasting beauty.
These natural accents complement many home craft projects quick enough to complete in a single afternoon.
15. Vintage Book Page Covering

Materials Needed:
- Old book pages
- Mod Podge
- Foam brush
- Matte sealer spray
Book page decoupage creates literary-themed lamp makeovers. This technique appeals to readers and vintage aesthetic lovers alike. Sheet music works equally well for musical themes.
Tear pages for organic edges or cut for precise lines. Apply decoupage medium generously under and over pages. Overlap pieces and eliminate all air pockets thoroughly.
16. Faux Marble Painted Effect

Materials Needed:
- White base paint
- Gray and gold craft paints
- Feather or thin brush
- High-gloss sealer
Faux marble finishes transform cheap lamps into elegant designer pieces. This painting technique creates luxurious stone appearances affordably. White marble with gold veining looks particularly sophisticated.
Apply smooth white base coat first. Use feathers or thin brushes to create organic veining patterns. Seal with high-gloss finish for authentic marble shine.
17. Washi Tape Geometric Design

Materials Needed:
- Assorted washi tapes
- Scissors
- Clear acrylic sealer
- Rubbing alcohol for prep
Washi tape transformations offer easy, no-commitment lamp makeovers. This technique suits renters and those who enjoy changing decor frequently. Endless pattern combinations are possible.
Clean lamp surfaces with rubbing alcohol first. Apply washi tape in geometric patterns or stripes. Seal with clear acrylic spray for improved durability.
18. Distressed Farmhouse Finish

Materials Needed:
- Chalk paint
- Dark wax or stain
- Sandpaper
- Soft cloths
Distressed finishes give thrift store lamps authentic farmhouse character. This aging technique creates timeworn appeal perfect for country decor. White and cream bases look particularly charming distressed.
Apply chalk paint in uneven, textured strokes. Sand edges and raised areas after drying. Rub dark wax into crevices and wipe excess for aged patina effects.
19. Beaded Embellishment Design

Materials Needed:
- Assorted beads
- Strong craft glue
- Tweezers
- Base coat paint
Beaded lamp designs add glamorous sparkle and texture. This technique creates eye-catching statement pieces for bedrooms and living areas. Glass beads catch and reflect light beautifully.
Plan your bead pattern before beginning adhesion. Apply strong glue in small sections. Use tweezers for precise bead placement and alignment.
These beaded lamps make wonderful DIY handmade gifts for friends who appreciate unique, thoughtful presents.
20. Chalkboard Paint Functional Finish

Materials Needed:
- Chalkboard spray paint
- Fine-grit sandpaper
- Chalk
- Primer spray
Chalkboard painted lamps add fun, functional surfaces to your decor. Write messages, draw designs, or change artwork seasonally. This technique works especially well in kitchens and kids’ rooms.
Prime and lightly sand surfaces for best paint adhesion. Apply multiple thin coats of chalkboard paint. Condition finished surfaces by rubbing chalk sideways before first use.
For more creative project inspiration, explore handmade gift craft ideas that make meaningful presents for loved ones.
These 20 DIY lamp makeover ideas that transform thrift store finds prove that beautiful lighting doesn’t require expensive purchases. With creativity and basic supplies, any secondhand lamp becomes a stunning custom piece. Grab your paintbrushes, hot glue gun, and favorite supplies and start creating!
Share your favorite lamp transformation ideas in the comments below. Rate this post!