12 Beautiful Home Crafts You Can Make With a Cricut Machine

Have you ever wished you could create stunning, professional-looking home decor without spending a fortune? Your Cricut machine is the secret weapon that transforms ordinary materials into extraordinary masterpieces. Whether you own a Cricut Maker, Explore Air, or Joy, these versatile cutting machines open endless creative possibilities.
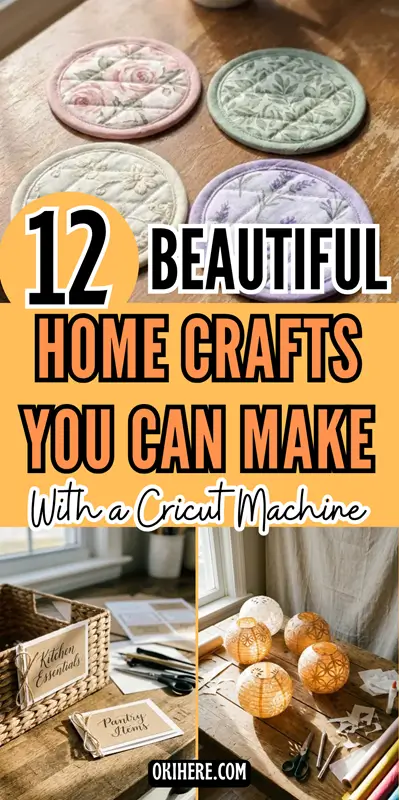
From elegant wall art to personalized gifts, a Cricut handles vinyl, paper, fabric, leather, and even wood with precision. This guide reveals 12 beautiful home crafts you can make with a Cricut machine that will elevate your living space. Let’s dive in…
1. Personalized Welcome Door Sign

- Wooden door sign blank
- Outdoor vinyl
- Transfer tape
- Weeding tools
- Cricut cutting mat
A custom welcome sign instantly adds personality to your front entrance. Your Cricut cuts intricate lettering and decorative flourishes that would take hours to paint by hand. Choose outdoor vinyl for weather resistance that lasts through every season.
Design your sign in Cricut Design Space using elegant script fonts or bold modern typography. Layer multiple vinyl colors to create depth and visual interest. The precision cutting ensures clean edges that look professionally made.
If you enjoy creating DIY handmade gifts, personalized door signs make thoughtful housewarming presents that recipients treasure.
2. Elegant Vinyl Wall Quotes

- Indoor vinyl sheets
- Transfer tape
- Squeegee tool
- Level
- Measuring tape
Transform blank walls into inspiring focal points with custom vinyl quotes. Your Cricut cuts precise lettering in any font, size, or style imaginable. These removable decals work perfectly in living rooms, bedrooms, and home offices.
Choose motivational phrases, song lyrics, or family mantras that resonate with your household. Matte vinyl creates a painted-on appearance while glossy options add modern shine. Position quotes above sofas, beds, or entryway tables for maximum impact.
Exploring DIY wall art ideas for living room spaces opens countless creative possibilities beyond simple quotes.
3. Custom Throw Pillow Covers

- Plain pillow covers
- Heat transfer vinyl (HTV)
- Cricut EasyPress or iron
- Teflon sheet
- Weeding tools
Elevate your sofa or bedroom with personalized throw pillows featuring unique designs. Heat transfer vinyl adheres permanently to fabric, creating durable decorations that withstand washing. Your Cricut cuts intricate patterns impossible to achieve with stencils.
Design geometric shapes, botanical silhouettes, or monogrammed initials for sophisticated results. Layered HTV designs add dimension through contrasting colors and textures. Cotton and polyester blend covers accept vinyl transfers beautifully.
4. Intricate Paper Lanterns

- Cardstock paper
- LED tea lights
- Scoring stylus
- Craft glue
- Light grip cutting mat
Create stunning decorative paper lanterns that cast beautiful shadow patterns across your walls. Your Cricut cuts intricate lace-like designs through cardstock with remarkable precision. Battery-operated LED lights safely illuminate these delicate creations.
Download lantern templates from Design Space or create custom patterns featuring florals, geometric shapes, or seasonal motifs. The scoring function creates perfect fold lines for crisp, professional assembly. These lanterns make enchanting centerpieces for dining tables.
5. Personalized Glass Etching

- Glass items (vases, mirrors, jars)
- Vinyl stencil material
- Etching cream
- Protective gloves
- Foam brush
Achieve the look of expensive etched glassware using Cricut-cut vinyl stencils. This technique creates permanent frosted designs on mirrors, vases, and decorative jars. The results rival professional glass etching at a fraction of the cost.
Cut your design from vinyl and apply it as a reverse stencil on clean glass surfaces. Etching cream works its magic in minutes, leaving beautifully frosted patterns. Monogrammed bathroom mirrors and decorative vases become stunning conversation pieces.
6. Faux Stained Glass Windows

- Transparent window vinyl
- Black vinyl for leading
- Glass cleaner
- Squeegee
- Precision weeding tools
Transform plain windows into stunning faux stained glass masterpieces using layered vinyl techniques. Transparent colored vinyl mimics traditional glass pieces while black vinyl creates authentic-looking lead lines. Your Cricut cuts complex curved shapes with perfect accuracy.
Design nature scenes, geometric patterns, or abstract compositions in Design Space. The layering technique builds depth and richness that catches light beautifully. These removable creations let you change designs seasonally without permanent alterations.
7. Leather Bookmarks and Accessories

- Genuine or faux leather
- Strong grip cutting mat
- Deep-point blade
- Leather conditioner
- Metal bookmark tassels
Craft sophisticated leather accessories that make perfect gifts or personal keepsakes. Your Cricut Maker’s knife blade or deep-point blade cuts leather cleanly without fraying. Bookmarks, keychains, and journal covers gain an artisanal quality.
Design intricate cutout patterns, monograms, or decorative shapes that showcase leather’s natural beauty. Vegetable-tanned leather accepts dye and develops a gorgeous patina over time. These accessories feel luxurious yet cost pennies to create.
Looking for more handmade gift craft ideas? Leather projects consistently impress recipients with their professional appearance.
8. Layered Paper Shadow Boxes

- Various colored cardstock
- Shadow box frame
- Foam adhesive squares
- LED light strip
- Standard grip mat
Build breathtaking 3D shadow box art using layered paper cut with your Cricut. Multiple cardstock layers create depth and dimension that transforms flat designs into sculptural masterpieces. Backlit versions glow magically when illuminated.
Nature scenes, cityscapes, and fantasy landscapes work particularly well for this technique. Each paper layer requires careful spacing using foam squares to create proper shadow effects. These stunning pieces become instant focal points in any room.
9. Custom Fabric Coasters

- Cork-backed fabric
- Rotary blade
- Fabric grip mat
- Iron-on vinyl
- Heat press or iron
Create sets of matching decorative coasters that protect surfaces while adding style. Your Cricut’s rotary blade cuts fabric and cork materials cleanly for professional results. Personalized coasters make thoughtful hostess gifts or wedding favors.
Design monograms, seasonal motifs, or patterns that complement your existing decor. Cork backing provides excellent moisture absorption and surface protection. Heat transfer vinyl adds colorful designs that withstand daily use.
These projects qualify as home craft projects quick enough to complete in a single afternoon.
10. Decorative Plant Markers

- Acrylic sheets or wood stakes
- Permanent outdoor vinyl
- Transfer tape
- Fine-point blade
- Weeding tools
Organize your indoor garden or herb collection with stylish plant markers cut on your Cricut. Clear acrylic stakes with vinyl lettering create modern, sophisticated labels. Wooden markers offer rustic charm for country-style kitchens.
Design markers featuring plant names, care instructions, or decorative botanical illustrations. Outdoor-rated vinyl withstands moisture and sunlight without fading. These markers transform ordinary potted plants into curated displays.
11. Personalized Storage Labels

- Vinyl sheets (various colors)
- Clear storage containers
- Transfer tape
- Label templates
- Fine-point blade
Organize your pantry, bathroom, or craft room with beautiful custom labels that bring order to chaos. Cricut-cut vinyl labels transform mismatched containers into a cohesive storage system. The professional appearance motivates maintaining organization long-term.
Create matching label sets using consistent fonts, sizes, and decorative elements. Waterproof vinyl works perfectly in kitchens and bathrooms where moisture is present. Clear containers with elegant labels make finding items effortless.
Discovering fun crafts to make at home often starts with practical projects that improve daily life.
12. Seasonal Wreath Decorations

- Foam or grapevine wreath base
- Cardstock in seasonal colors
- Hot glue gun
- Ribbon
- Vinyl accents
Design interchangeable wreath elements that celebrate every holiday and season. Your Cricut cuts paper flowers, leaves, and decorative shapes that attach to a basic wreath base. Swap elements monthly without buying new wreaths.
Create rolled paper roses, layered poinsettias, or delicate autumn leaves depending on the season. Cardstock flowers crafted with your Cricut look remarkably realistic when properly shaped. Vinyl lettering adds personalized greetings or family names.
These 12 beautiful home crafts you can make with a Cricut machine prove that professional-quality decor is achievable at home. From personalized signs to intricate shadow boxes, your Cricut transforms simple materials into stunning creations. Grab your cutting machine, gather your supplies, and start creating today!
Share your favorite project ideas in the comments below, and don’t forget to rate this post!