18 Ways to Repurpose Old Furniture Instead of Throwing It Away
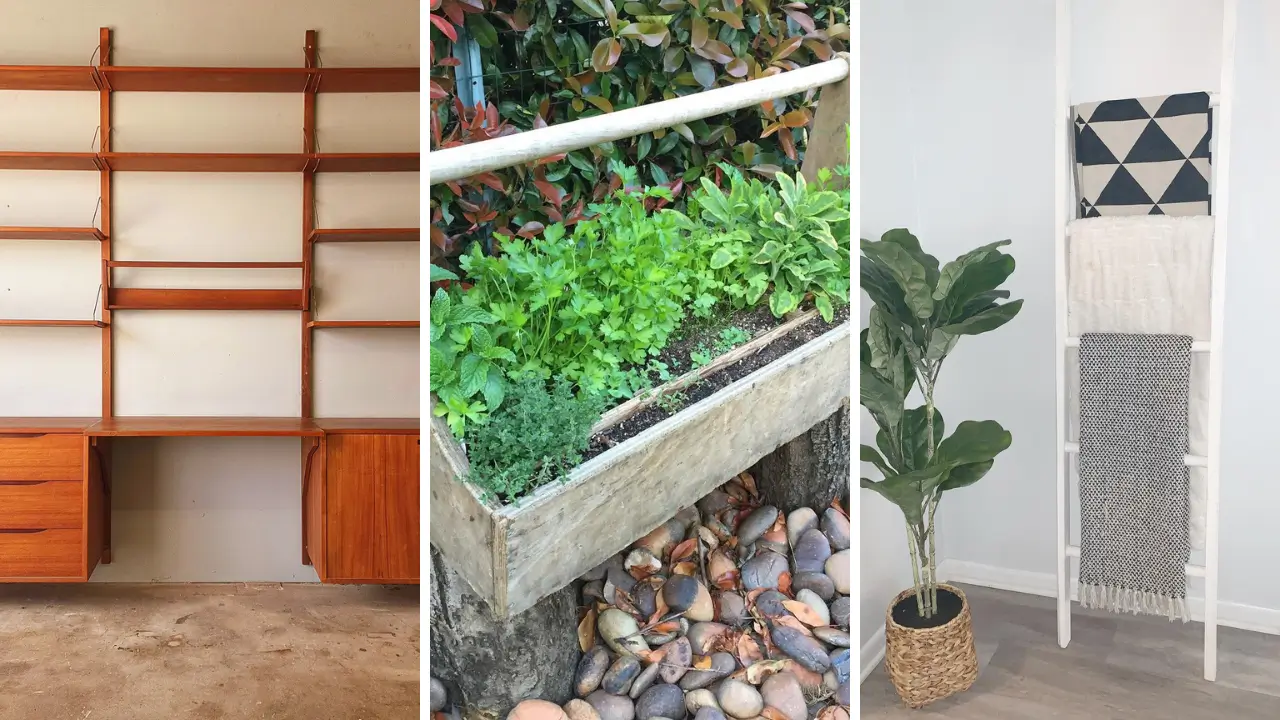
Do you have old furniture collecting dust in your garage or basement? Before you haul it to the curb, consider the incredible potential hiding beneath that worn surface. Repurposing old furniture saves money, reduces waste, and creates unique pieces you simply cannot buy in stores.
Whether you have an outdated dresser, a wobbly chair, or a scratched coffee table, there are countless ways to breathe new life into these forgotten treasures. These 18 ways to repurpose old furniture instead of throwing it away will inspire your next creative project. Let’s dive in…
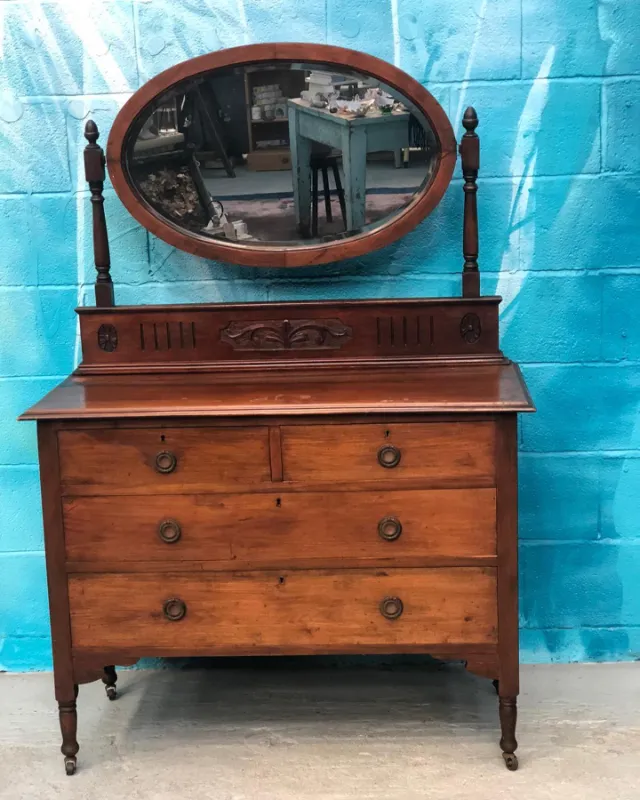
1. Vintage Dresser Turned Kitchen Island
- Old dresser
- Butcher block or wooden countertop
- Chalk paint
- New hardware pulls
- Wood screws
Transform that bulky bedroom dresser into a functional kitchen island with character. Remove the top surface and replace it with a beautiful butcher block for food preparation. Sand down the entire piece and apply two coats of durable chalk paint.
The existing drawers provide excellent storage for kitchen towels, utensils, and small appliances. Add caster wheels to the bottom for easy mobility around your cooking space. Update the drawer pulls with modern hardware for a fresh look.
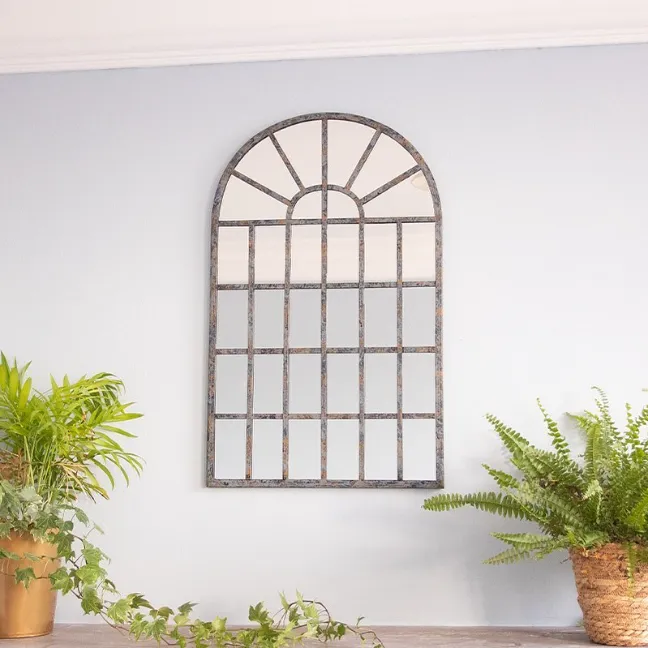
2. Charming Window Frame Mirror
- Old window frame
- Mirror cut to size
- Mirror adhesive
- Sandpaper
- Hanging hardware
Salvaged window frames make stunning decorative mirrors for any room. Measure each pane opening carefully and have mirrors cut to fit at your local hardware store. Clean the frame thoroughly and decide whether to preserve the rustic patina or refinish it.
Apply mirror adhesive to secure each piece firmly in place. This project works beautifully in entryways, bathrooms, or above fireplace mantels. The divided panes create an architectural focal point that adds depth and light to your space.
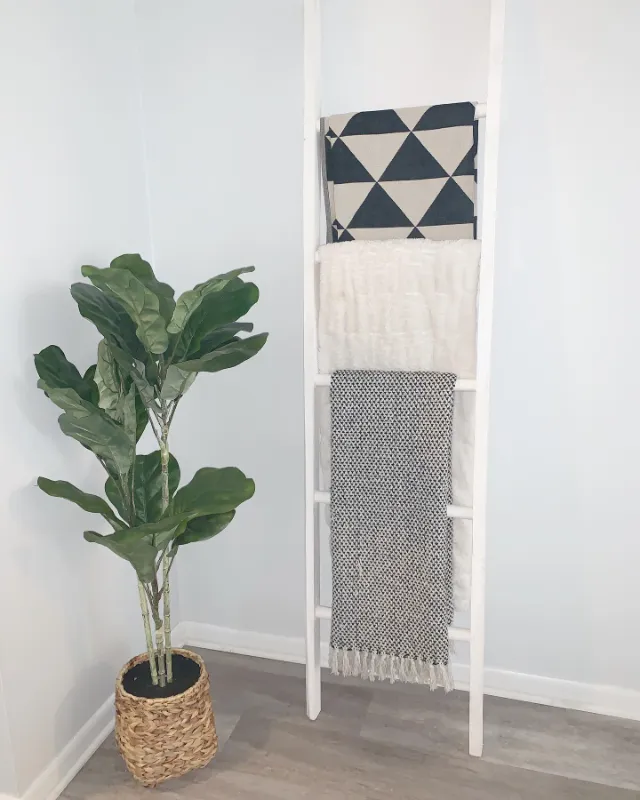
3. Ladder Blanket Storage Rack
- Wooden ladder
- Sandpaper
- Wood stain or paint
- Wall anchors
- L-brackets
An old wooden ladder becomes a stylish blanket display that adds vertical interest to living rooms. Sand away any splinters and apply your chosen finish. Lean it against the wall or secure it with brackets for safety.
Drape cozy throws and quilts over each rung for easy access during movie nights. This storage solution keeps blankets organized while showcasing your textile collection. The rustic ladder aesthetic works perfectly in farmhouse, bohemian, or eclectic interiors.
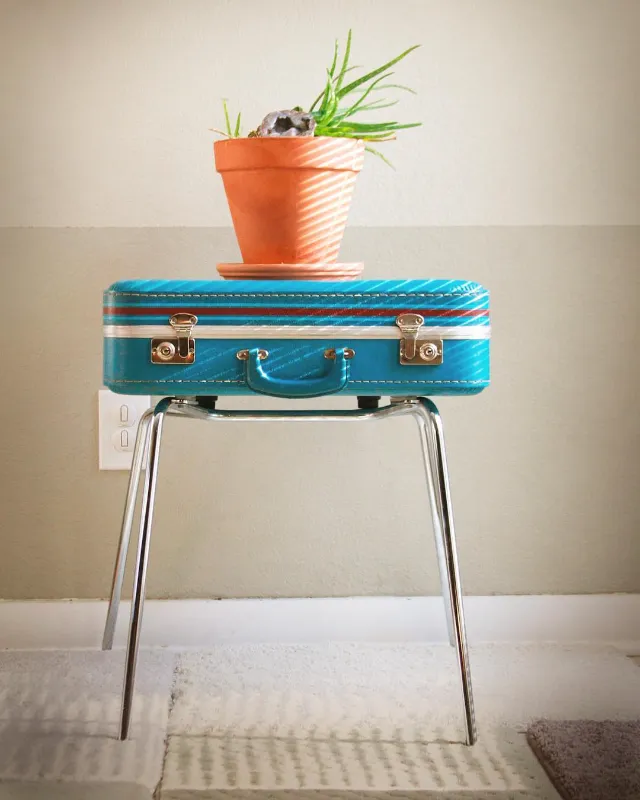
4. Suitcase Side Table Creation
- Vintage suitcase
- Wooden furniture legs
- Mounting plates
- Screws
- Level
Stack vintage suitcases or add legs to create a unique side table with hidden storage. Attach mounting plates to the suitcase bottom and screw in decorative furniture legs. Check with a level to ensure stability.
The interior provides perfect storage for magazines, remote controls, or seasonal items. Choose suitcases with interesting patterns, labels, or leather details. This conversation piece brings nostalgic travel vibes to bedrooms and living areas.
If you enjoy fun crafts to make at home, this project takes only an afternoon to complete.
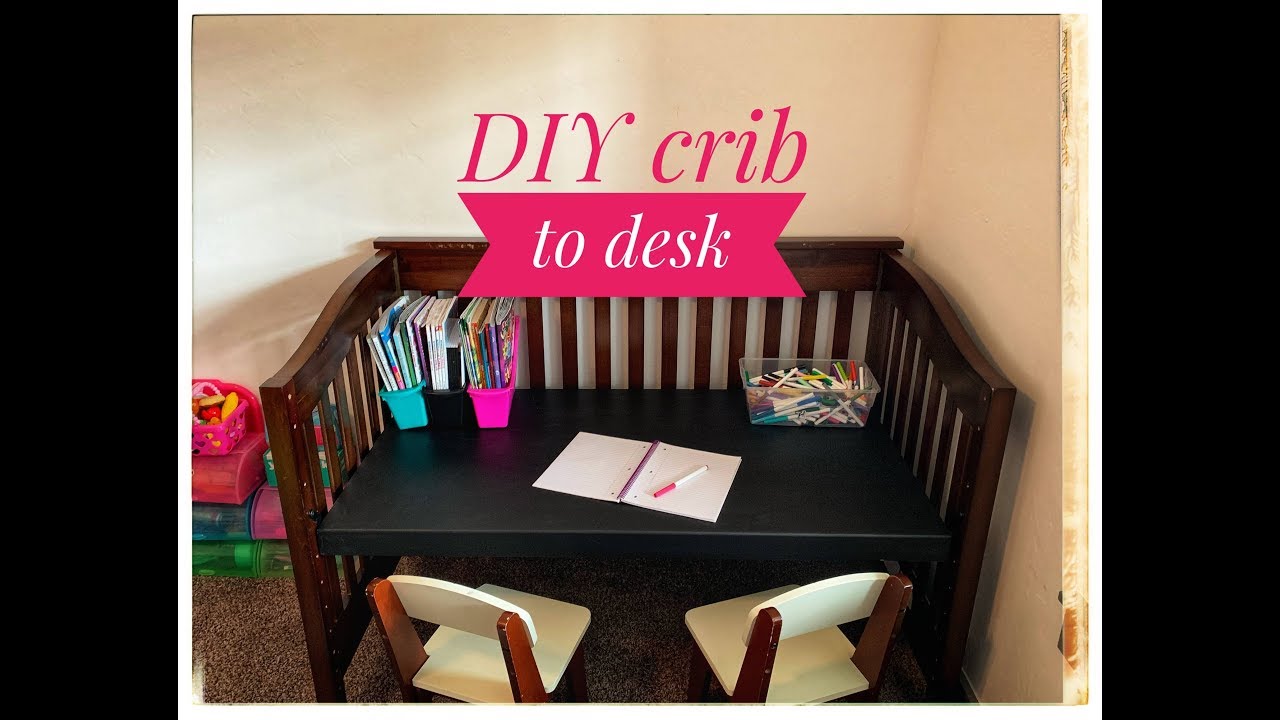
5. Crib Transformed Into Desk
- Wooden crib
- Plywood desktop
- Paint or stain
- Drawer slides
- Baskets
Repurpose your child’s outgrown crib into a functional homework station. Remove one long side and lower the mattress support to desk height. Cut plywood to create a smooth desktop surface.
The remaining rails work as built-in organizers for hanging supplies and artwork. Add baskets underneath for book storage. This sentimental transformation preserves precious memories while serving a practical new purpose.
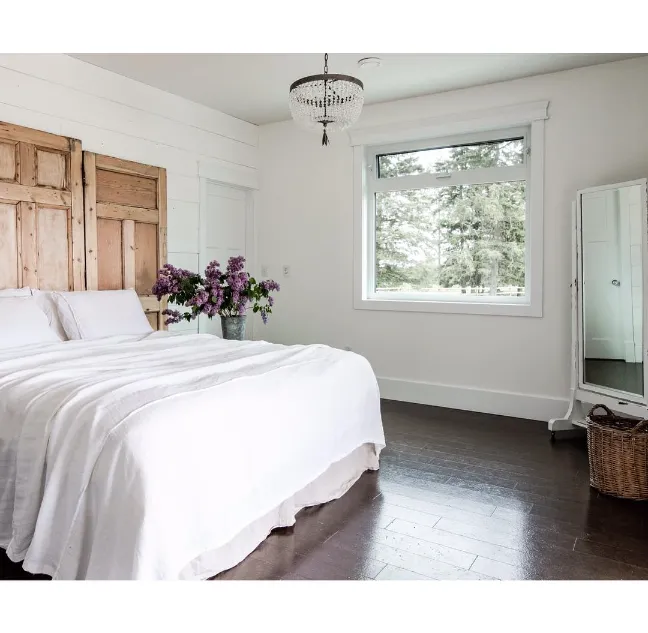
6. Door Headboard Statement Piece
- Old wooden door
- Sandpaper
- Paint or wood stain
- Wall mounting hardware
- Polyurethane sealant
Vintage doors create dramatic architectural headboards that anchor your bedroom design. Clean and sand the door surface, preserving interesting details like panels and original hardware. Apply paint or stain to match your decor.
Mount the door horizontally behind your bed using heavy-duty wall anchors. The raised panel details add texture and visual dimension to plain walls. Consider leaving original paint for distressed farmhouse appeal.
7. Drawer Wall Shelving System
- Old dresser drawers
- Paint
- Heavy-duty picture hangers
- Level
- Decorative paper or fabric
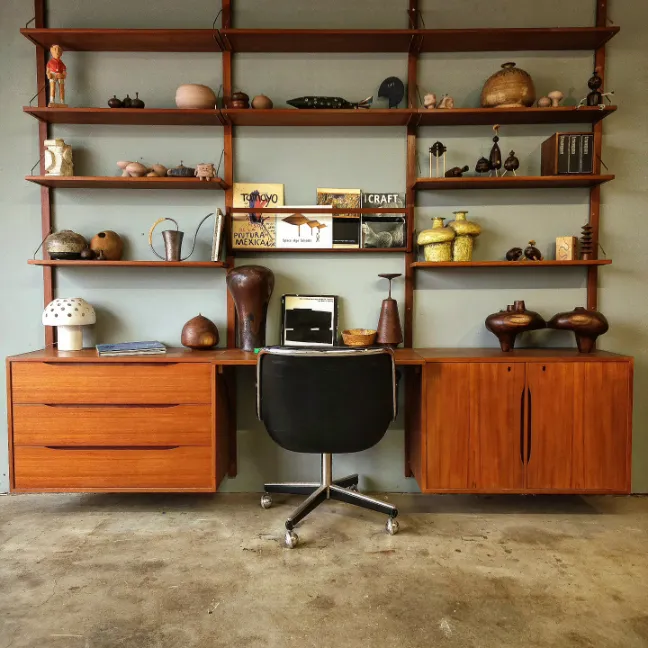
Salvage drawers from broken dressers to create shadowbox-style shelves. Paint the exterior and line the interior with decorative paper or fabric. Arrange multiple drawers in creative configurations on your wall.
These deep shelves beautifully display collections, plants, and decorative objects. Mount them at various heights for dynamic visual interest. The drawer pulls become charming hooks for lightweight items like keys or jewelry.
8. Coffee Table Ottoman Conversion
- Old coffee table
- Foam padding
- Batting
- Upholstery fabric
- Staple gun
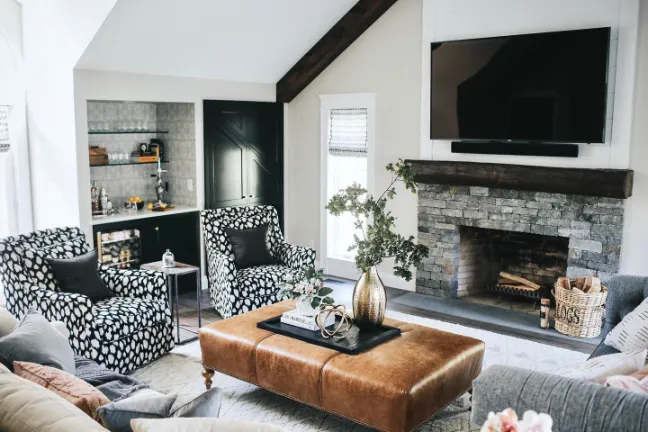
Convert a tired coffee table into a plush upholstered ottoman for comfortable seating. Cut foam padding to fit the tabletop and wrap with batting for softness. Stretch durable upholstery fabric over the top and staple securely underneath.
This transformation adds soft texture to living rooms while providing extra seating for guests. Choose a stain-resistant fabric if you plan to use it as a footrest. The original table legs give your ottoman a furniture-quality appearance.
9. Bookshelf Bench Entryway Piece
- Small bookshelf
- Plywood seat
- Seat cushion
- Paint
- Baskets
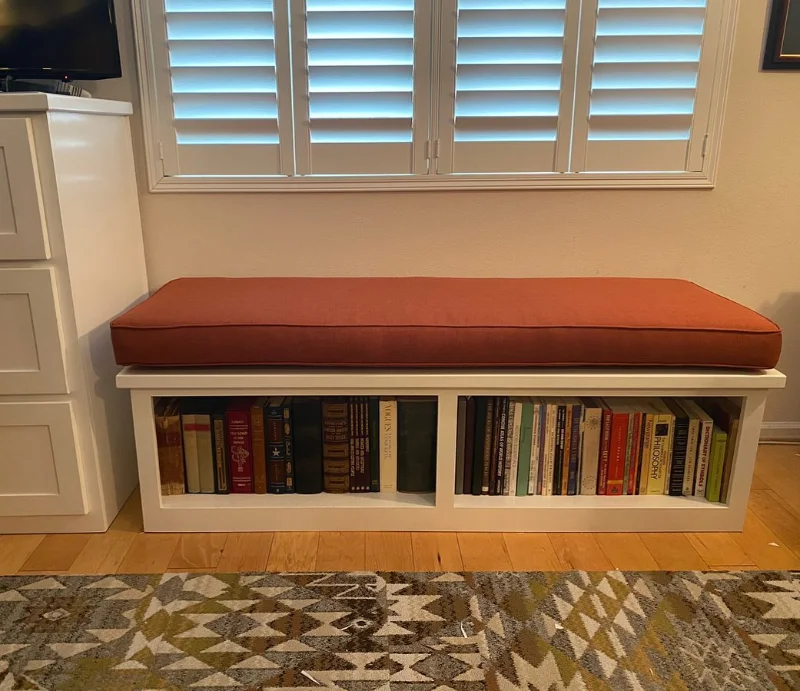
Turn a short bookshelf on its side to create an instant entryway bench. Add a sturdy plywood top and comfortable cushion for seating. The shelf compartments become perfect cubbies for shoe storage.
Paint the entire piece to match your entryway decor and add woven baskets for organization. This practical solution provides seating and storage without purchasing expensive entryway furniture. It works beautifully in mudrooms and closets too.
10. Chair Back Coat Rack Design
- Wooden chair backs
- Mounting board
- Paint
- Hooks
- Wall anchors
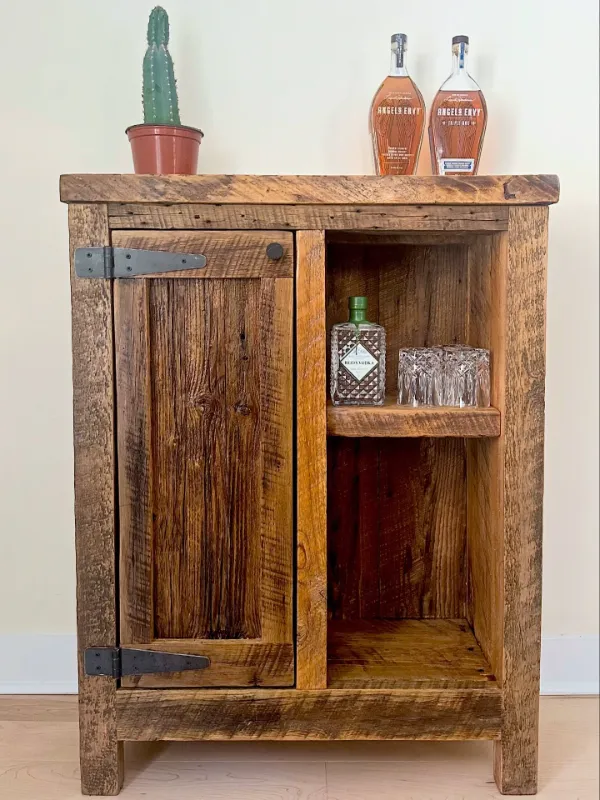
Save decorative chair backs from broken seats to create a charming coat rack. Cut the backs at the seat line and sand all edges smooth. Mount multiple backs onto a long board for unified installation.
The chair spindles and curves become natural hanging points for coats, bags, and scarves. Add small hooks between chair backs for additional hanging capacity. This upcycled piece adds whimsy to entryways and bedrooms.
For more creative project ideas, explore home craft projects quick tutorials.
11. Piano Bar Cabinet Transformation
- Old upright piano
- LED strip lights
- Glass shelves
- Wine rack insert
- Paint
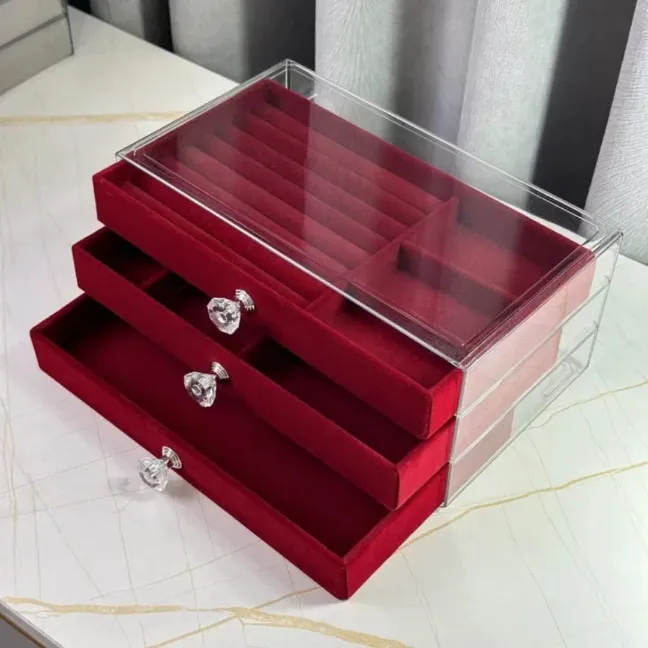
Transform a non-working piano into a stunning home bar that impresses every guest. Remove the internal mechanism while preserving the beautiful exterior cabinet. Install glass shelves where the strings once lived.
Add LED lighting to showcase your liquor collection dramatically. The keyboard area becomes a perfect serving surface for mixing drinks. This showstopping conversation piece preserves the piano’s elegant silhouette.
12. Shutter Jewelry Organizer Display
- Wooden window shutter
- Small hooks
- Paint
- Picture hanging hardware
- Small baskets
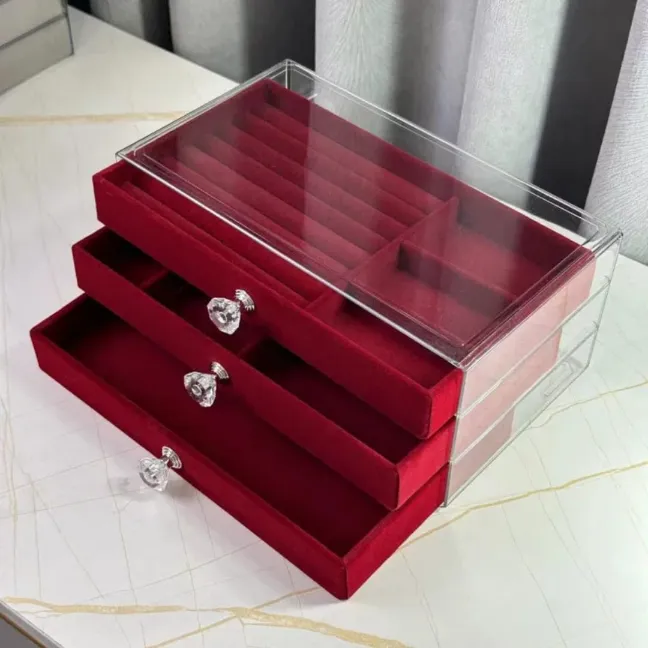
Old window shutters become beautiful jewelry organization systems. The slats perfectly hold earrings when you simply slide posts between them. Add small hooks along the frame for necklaces and bracelets.
Paint the shutter to coordinate with your bedroom or closet decor. This wall-mounted solution keeps jewelry visible and tangle-free. Attach small baskets to hold rings and delicate pieces safely.
13. Bathtub Sofa Garden Planter
- Cast iron or porcelain bathtub
- Outdoor paint
- Drainage gravel
- Potting soil
- Plants
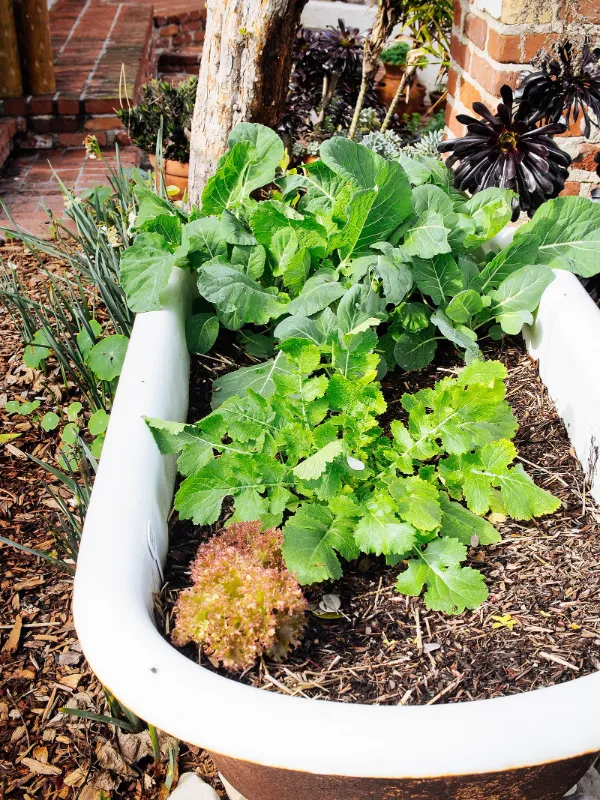
Vintage bathtubs make spectacular garden planters with dramatic visual impact. The existing drain provides perfect water drainage for healthy plants. Position the tub in a sunny garden spot before filling with heavy soil.
Layer drainage gravel in the bottom and add quality potting mix. Plant flowers, vegetables, or herbs in your unique garden vessel. Clawfoot tubs add elegant structure to cottage gardens and patios.
14. Toolbox Herb Garden Container
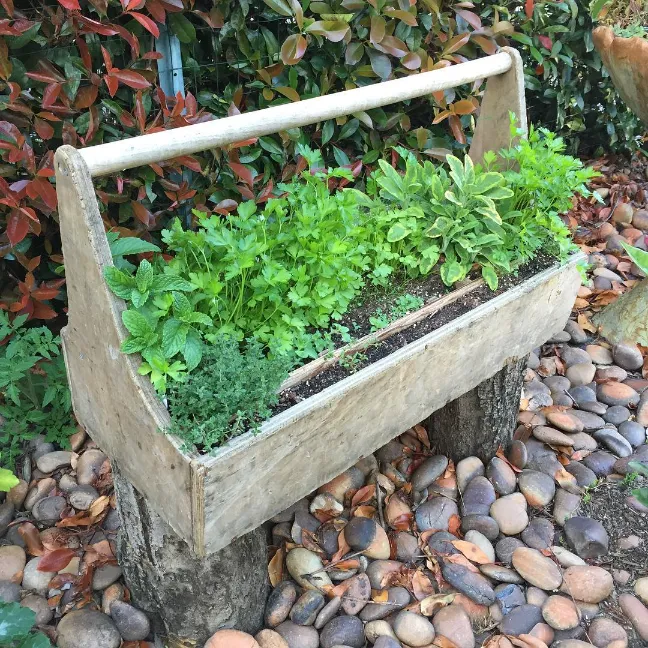
- Vintage metal toolbox
- Drill with metal bit
- Drainage rocks
- Potting soil
- Herb seedlings
Metal toolboxes become charming portable herb gardens perfect for kitchen windowsills. Drill drainage holes in the bottom to prevent root rot. Line with small rocks before adding potting soil.
Plant compact herbs like basil, thyme, and parsley in your rustic container. The toolbox handle makes moving your garden between sunny spots effortless. This functional piece adds farmhouse charm while providing fresh cooking ingredients.
Consider making one as part of your handmade gift craft ideas for gardening friends.
15. Filing Cabinet Raised Garden Bed
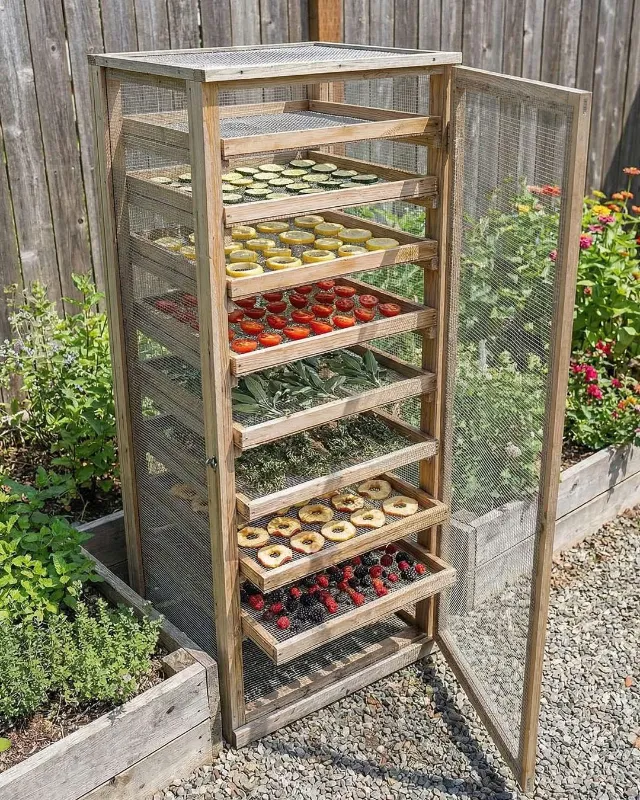
- Metal filing cabinet
- Rust-proof spray paint
- Landscaping fabric
- Garden soil
- Vegetable seedlings
Lay old filing cabinets on their backs to create instant raised garden beds. Remove the drawers to create deep planting compartments. Apply rust-proof paint to protect the metal from moisture damage.
Line each section with landscaping fabric to retain soil while allowing drainage. Each drawer opening becomes a separate planting zone for different vegetables. Stack multiple cabinets for tiered gardening interest.
16. Pallet Vertical Garden Wall
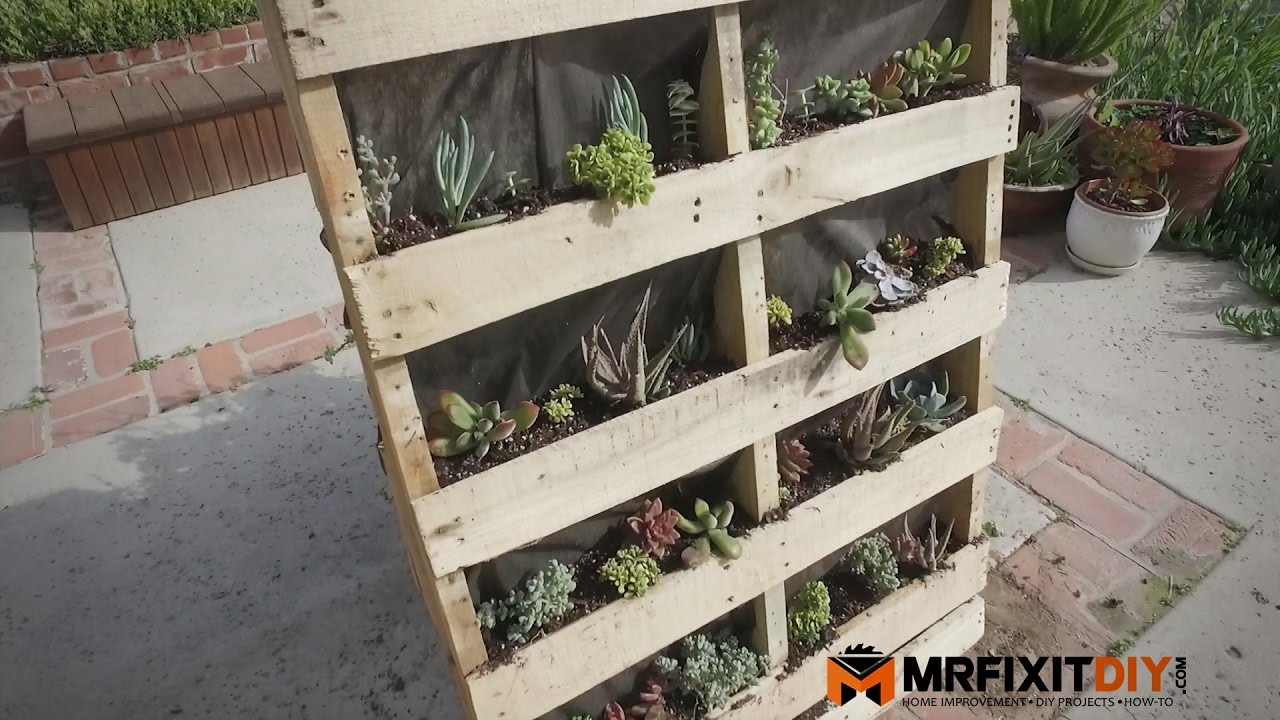
- Wooden shipping pallet
- Landscaping fabric
- Staple gun
- Potting soil
- Succulent plants
Shipping pallets transform into living wall gardens perfect for small outdoor spaces. Secure landscaping fabric across the back and bottom to create planting pockets. Leave the front slat openings accessible for inserting plants.
Fill with soil and plant succulents, strawberries, or trailing flowers. Lean against a fence or mount securely on exterior walls. This vertical gardening solution maximizes growing space in apartments and small yards.
17. Headboard Chalkboard Message Center
- Wooden headboard
- Chalkboard paint
- Primer
- Hooks
- Small shelf brackets
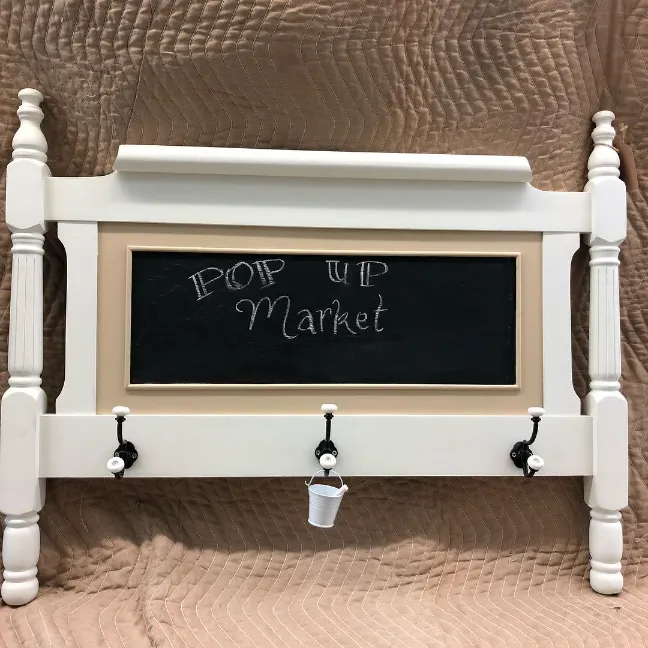
Convert an ornate headboard into a family command center for your kitchen or entryway. Apply primer followed by multiple coats of chalkboard paint to the flat center panel. Preserve decorative carved details with contrasting paint.
Add hooks along the bottom for keys and bags. Install a small shelf for chalk storage and mail organization. This functional piece keeps your family coordinated while adding architectural interest to walls.
Those who love DIY canvas wall art ideas will appreciate this creative upcycling approach.
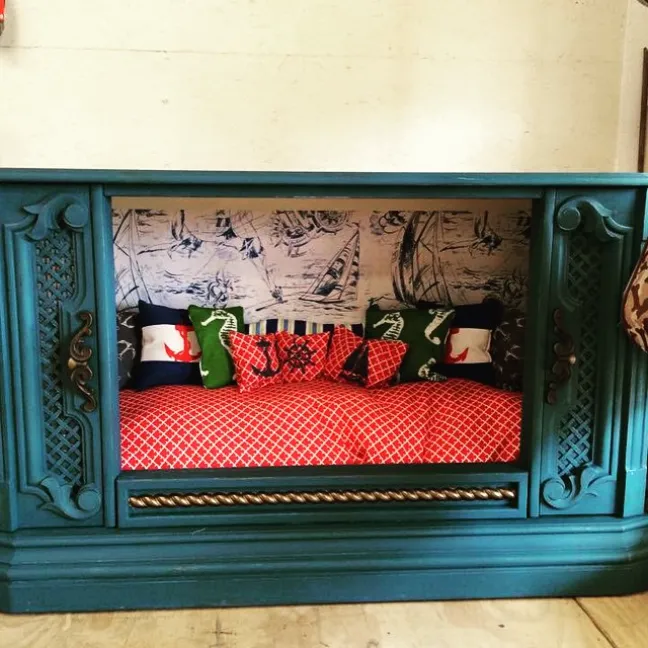
18. TV Console Pet Bed Retreat
- Old TV console or cabinet
- Pet-safe paint
- Foam cushion
- Washable fabric cover
- Decorative trim
Vintage TV consoles become luxurious pet beds that double as stylish furniture. Remove doors or shelves to create an open sleeping nook. Sand and paint with pet-safe finishes in colors matching your decor.
Add a custom-fitted cushion with a removable washable cover for easy cleaning. Your pet gets a cozy den while you gain attractive storage on top. The enclosed design provides security that nervous pets especially appreciate.
These 18 ways to repurpose old furniture instead of throwing it away prove that worn pieces deserve second chances. Each transformation saves money, reduces landfill waste, and creates one-of-a-kind home decor with personal meaning. For more inspiration, explore DIY handmade gifts that make use of repurposed materials.
Grab your paintbrushes, power tools, and creativity to start transforming today! Share your favorite repurposing ideas in the comments below and rate this post!