How to Make a Braided Rag Rug From Old Clothes
Have you ever filled a bag with worn out shirts and bedsheets, got as far as the charity shop door, and realised none of it was good enough to donate? That pile is a rug. A braided rag rug needs no loom, no machine, and no pattern, and the whole technique comes down to three strips of fabric and a coil. This guide covers how to make a braided rag rug from start to finish, including how much fabric it actually takes, which fabrics behave and which fight back, and the two mistakes that turn a flat rug into a bowl.
What a Braided Rag Rug Needs
The materials list is short, which is most of the appeal.
- Fabric: old cotton sheets, shirts, pillowcases, and light jersey. Avoid anything thick, slippery, or stretchy in one direction only.
- Scissors or a rotary cutter. A rotary cutter and mat make tearing into strips far faster, but scissors work.
- Heavy thread and a curved upholstery needle. The curved needle is the one tool worth buying, because it lets you stitch through the side of a coil without turning the whole rug over.
- Safety pins or a clipboard to anchor the braid while you work.
Everything else is optional. If you are stocking up on basics anyway, the beginner craft supplies list covers which scissors and needles are worth the money.
How Much Fabric You Actually Need
This is the question that stalls most first attempts, because a rug swallows far more fabric than it looks like it should.
- A 60cm round mat takes roughly 2.5kg of fabric, or about six double bedsheets worth of strips.
- A 90cm round rug takes around 5kg.
- A 120cm by 80cm oval takes about 7kg.
Weigh the pile before starting rather than counting garments, because a heavy denim shirt and a thin cotton one are not the same thing at all. Gather the whole amount before you begin. Running out halfway means the second half of the rug is visibly a different set of colours, which looks like a mistake rather than a design.
Choosing Fabric That Behaves
Fabric choice decides whether this is pleasant or infuriating.
- Best: woven cotton. Bedsheets, shirting, and quilting cotton all tear in straight lines and braid evenly.
- Workable: cotton jersey from tee shirts. It curls into a tube as you pull it, which actually makes a soft rug, but it stretches so keep the tension loose.
- Avoid: fleece, towelling, denim, and anything synthetic and slippery. Fleece and towelling are too bulky to braid tightly, denim is too stiff to coil, and synthetics slide apart as you stitch.
Wash and dry everything before cutting. Fabric that shrinks after the rug is built will pull the coils out of flat, and there is no way to correct it afterwards.
If the pile is short, charity shops sell sheets for very little and the pattern does not matter once it is cut into strips. Where to buy cheap craft supplies online covers the other end of it, which is thread and needles.
Step 1: Cut the Strips
Cut strips about 5cm wide for medium cotton, narrower for thick fabric and wider for thin. Aim for a braid roughly as thick as your thumb once the three strands are together.
For sheets, snip the edge and tear along the grain rather than cutting. Tearing follows the weave exactly, it is many times faster, and the slightly frayed edge tucks itself in as you braid. Shake the strips outside, because tearing throws out a surprising amount of lint.
Quick tip: keep strip width consistent within one rug. Mixed widths make a braid that thickens and thins along its length, and that shows as a wobbly edge in the finished coil.
Step 2: Join the Strips
You will join strips constantly, so use the method that leaves no lump. Cut a small slit near the end of both strips, lay one over the other so the slits align, pass the far end of the under strip up through both slits, and pull. The join locks flat with no sewing.
Quick tip: stagger the joins between the three strands so they never land in the same place. Three joins side by side make a thick spot that will not sit flat in the coil.
Step 3: Braid
Pin the three strand ends together and anchor them to something solid. Braid as you would hair, keeping the tension firm and even.
Fold the raw edges of each strip inward as you work so the cut edge faces the inside of the braid. It takes slightly longer and it is the single thing that separates a rug that looks made from one that looks like scraps.
Quick tip: braid a long length before you start coiling, at least two metres. Stopping to braid every half metre makes it very hard to keep the tension matched across the join.
Step 4: Coil and Stitch
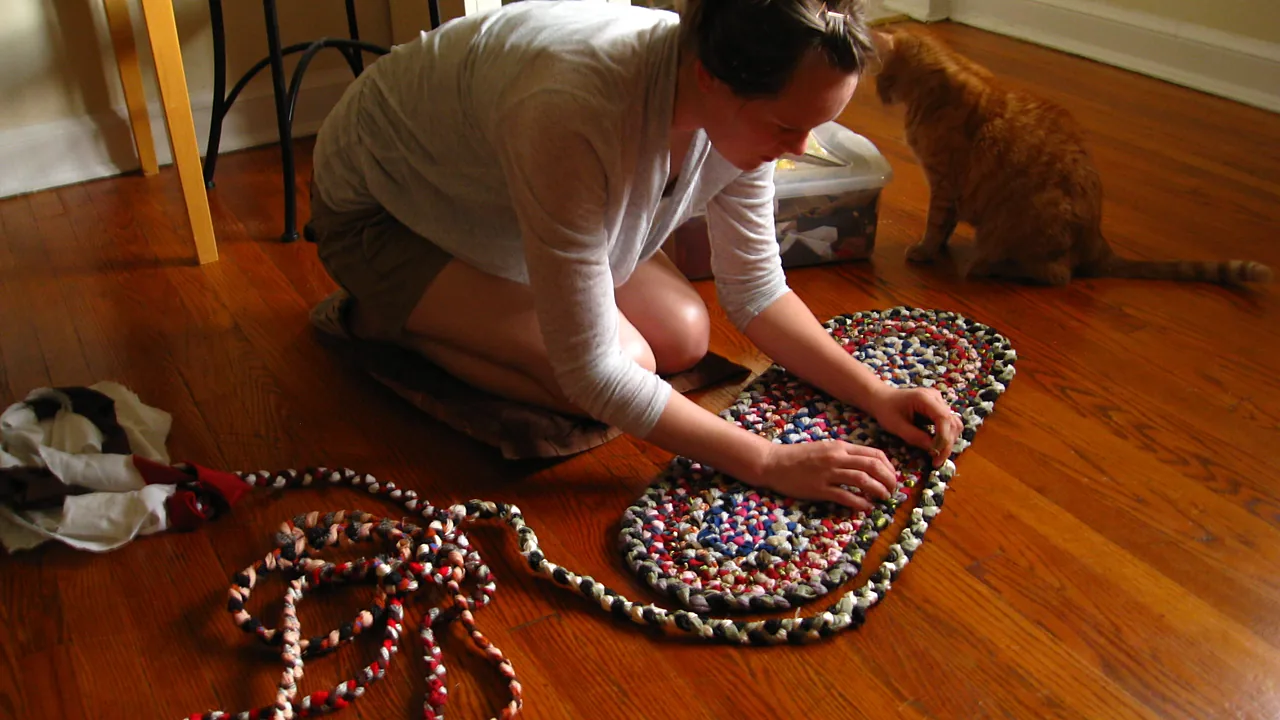
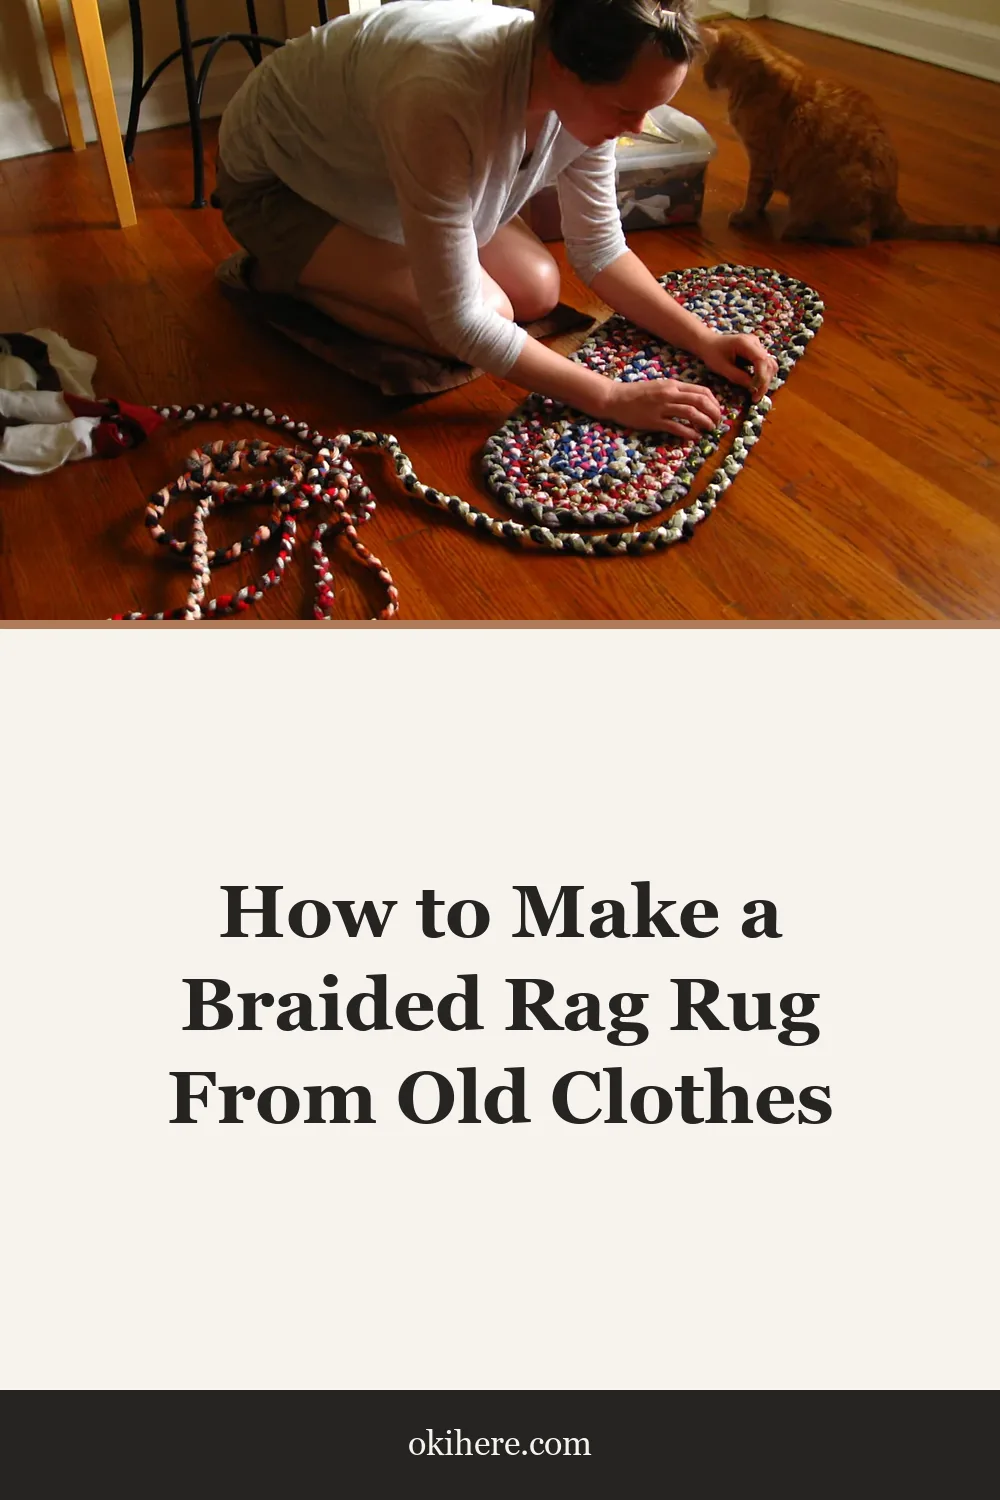
Start the centre by folding the first few centimetres of braid back on itself and stitching the two lengths together through their sides. Then coil the braid around that centre, stitching as you go.
Stitch through the side of the braid, catching the edge loop of the new coil and the edge loop of the previous one. Do not stitch through the face of the braid, because that shows on the surface and pulls the rug out of shape.
Quick tip: work on a flat floor, not your lap. A rug coiled on a lap comes out domed every single time, and it cannot be flattened afterwards.
Step 5: Keep It Flat
This is where most rugs fail, and it is purely a question of ease on the curves.
On the tight inner rounds, ease slightly more braid into each turn than feels natural. As the rug grows and the curve relaxes, pull the coil in a little firmer. Too tight at the centre makes the rug cup upward into a bowl; too loose at the outside makes the edge ripple and wave.
Quick tip: lay the rug flat every few rounds and look across it at eye level. Cupping and rippling are both obvious from that angle and almost invisible from above, which is why people only notice at the end.
Step 6: Finish the Edge
Taper the last 20cm by trimming each of the three strips progressively narrower, so the braid thins to nothing rather than stopping abruptly.
Tuck the tapered end down into the previous coil and stitch it firmly in several directions. Go back over the last half metre of stitching and add a second pass, since the outer edge takes the most strain from feet and vacuum cleaners.
Making an Oval Instead of a Round
An oval suits a hallway or a kitchen run far better than a circle, and the only change is at the centre.
Instead of coiling from a folded point, start with a straight length of braid the same size as the difference between the finished length and width. For a rug 120cm long and 80cm wide, that straight centre is 40cm. Coil around that straight spine rather than around a point, and the rug grows as an oval naturally.
How Long It Actually Takes
Nobody finishes a rug in an evening, and knowing the real numbers stops the project being abandoned at the halfway point.
- Cutting and tearing: about two hours for enough strips to make a 60cm mat, less with a rotary cutter.
- Braiding: roughly an hour for every three metres of finished braid, which is slow but can be done in front of a television.
- Coiling and stitching: the longest part, around four hours for a 60cm mat and a good deal more as the rounds get longer.
Call it a weekend for a small mat and several weeks of evenings for a large oval. Braid in batches and coil in batches rather than alternating, because switching between the two constantly is what makes the job feel endless. Other projects that work the same way, a little at a time, are gathered in beginner sewing projects for home decor.
Caring for a Rag Rug
- Vacuum without the beater bar or use the upholstery attachment. A rotating brush catches the braid edges and pulls stitches out.
- Spot clean rather than washing. A full wash is possible for small cotton mats in a pillowcase on a gentle cycle, but anything above about 60cm is too heavy wet and the stitching strains.
- Dry flat. Hanging a wet rag rug stretches the coils permanently out of round.
- Use a rug pad underneath on hard floors. Braided rugs slide, and the pad also stops the underside abrading.
Mistakes That Ruin a Braided Rug
- Coiling on your lap. It produces a bowl. Work on the floor.
- Raw edges left facing out. The rug sheds and looks unfinished within weeks. Fold them in as you braid.
- Joins stacked together. Stagger them across the three strands.
- Mixing fabric weights. A braid of thin cotton next to a braid of heavy denim will never lie flat against each other.
- Not gathering enough fabric first. The colour shift halfway through is the giveaway of a rug made in two sittings from two different piles.
Conclusion
Start with a small round mat, around 50cm, for a doormat or a spot beside a bed. It uses one or two sheets, teaches the tension on the inner curves where it matters most, and takes an evening or two rather than a month.
Once that one sits flat, scale up. The technique does not change at all between a 50cm mat and a 120cm oval, only the quantity of fabric and the patience. If you enjoy working with offcuts, no sew fabric crafts and handmade pillow cover ideas both use the same leftovers, and DIY boho home decor ideas covers what sits well alongside a rug like this.
Frequently Asked Questions
Q: How much fabric does a braided rag rug take?
A: About 2.5kg for a 60cm round mat and around 5kg for a 90cm rug. Weigh the pile rather than counting garments, because fabric weight varies enormously, and gather the whole amount before starting so the colours stay consistent throughout.
Q: What fabric is best for a braided rag rug?
A: Woven cotton, especially old bedsheets and shirts, because it tears in straight lines and braids evenly. Cotton jersey from tee shirts also works and makes a softer rug. Avoid fleece, towelling, denim, and synthetics.
Q: Why does a braided rug curl up at the edges?
A: The coil is too tight somewhere, usually on the inner rounds. Ease more braid into the tight central curves and pull slightly firmer as the rug widens. Checking at eye level every few rounds catches it before it is built in.
Q: Can a braided rag rug be washed?
A: Small cotton mats can go in a pillowcase on a gentle cycle, but anything over about 60cm becomes too heavy when wet and strains the stitching. Spot clean larger rugs instead, and always dry flat rather than hanging.