How to Organize Craft Supplies So You Actually Use Them

Be honest—when was the last time you actually finished a craft project without spending 30 minutes hunting for scissors? If your craft supplies are scattered across random drawers, shoeboxes, and that mysterious corner of your closet, you’re not alone. The truth is, disorganized supplies don’t just waste time.
They kill creativity before it even starts. That’s why learning how to organize your craft supplies so you actually use them is a game-changer for every crafter. Here’s the thing: organization isn’t about being perfect or Pinterest-worthy.
It’s about creating a system that makes grabbing your supplies effortless. When everything has a home and you can see what you own, something magical happens—you actually want to create. In this guide, you’ll discover practical strategies to declutter, categorize, and store your craft supplies in ways that inspire action, not overwhelm.
Whether you’re into scrapbooking, knitting, painting, or making DIY handmade gifts for loved ones, these tips will transform your creative space. Let’s dive in and build a system that works for YOUR crafting style.
Why Most Craft Organization Systems Fail

Before we fix the problem, let’s understand why it exists. Most crafters fall into the same trap: buying fancy storage containers without a real plan. You stuff everything into bins, label them beautifully, then never open them again.
The core issue? Visibility and accessibility. If you can’t see your supplies at a glance, you forget they exist.
That gorgeous yarn collection buried in a closet? Might as well be on the moon. Those acrylic paints stacked three rows deep?
You’ll buy duplicates because you forgot you had them. Another common mistake is organizing by aesthetics instead of workflow. Sure, color-coded containers look amazing on Instagram.
But if you have to dig through five boxes to find everything you need for one project, you’ll procrastinate instead of create. The secret to organizing craft supplies so you actually use them is building a system around how you craft, not how things look. Let’s explore what that looks like in practice.
Step 1: The Great Craft Supply Purge

You can’t organize clutter—you can only hide it. The first step in any craft organization journey is honest decluttering. This doesn’t mean throwing everything away.
It means being realistic about what you’ll actually use.
Sort Everything Into Four Piles
Pull out every single craft supply you own. Yes, all of them. Then create these four piles:
- Keep: Items you’ve used in the past six months or have specific plans for
- Donate: Good supplies that no longer match your interests
- Trash: Dried markers, broken tools, fabric scraps too small to use
- Maybe: Items you’re unsure about (we’ll address these)
That “maybe” pile? Put it in a box with today’s date. If you don’t reach for anything in three months, donate the whole box without peeking.
This removes emotional decision-making from the equation.
Be Ruthless With Duplicates

Do you really need seven pairs of scissors? Three nearly-identical shades of blue paint? When you’re excited about fun crafts to make at home, it’s easy to overbuy.
Keep your favorites and let the rest go. Remember: less stuff means less to organize. Every item you remove is one less thing competing for space and attention.
Step 2: Categorize by Project Type, Not Supply Type

Here’s where most organization guides get it wrong. They tell you to store all your paint together, all your paper together, all your adhesives together. Logical, right?
Actually, no. When you want to start a project, you need supplies from multiple categories. If you’re making a card, you need paper, stamps, ink, adhesive, and embellishments.
Why make yourself visit five different storage areas?
Create Project Kits Instead
Think about your most common craft activities. Maybe it’s:
- Card making
- Scrapbooking
- Sewing repairs
- Kids’ art projects
- Gift wrapping
For each activity, create a dedicated kit or zone containing everything you need. Store a complete card-making station in one container. Keep a gift-wrapping caddy with scissors, tape, ribbon, and tags all together.
This approach is especially helpful for home craft projects quick sessions when you only have 20 minutes. Grab one container and you’re ready to go.
The 80/20 Rule for Craft Supplies
You probably use 20% of your supplies for 80% of your projects. Identify that core 20% and give it prime real estate. Your most-used tools should be within arm’s reach.
Specialty items you use once a year? They can live in higher shelves or deeper storage.
How to Organize Your Craft Supplies So You Actually Use Them: Storage Solutions That Work

Now let’s talk about the actual storage. The best containers aren’t necessarily the prettiest ones—they’re the ones that match your space, budget, and crafting habits.
Clear Containers Are Non-Negotiable
Can you see what’s inside? If the answer is no, you won’t use it. Clear plastic bins, glass jars, and transparent drawer organizers let you spot supplies instantly.
No opening, no digging, no forgetting. If you already own opaque containers, add photo labels to the outside showing exactly what’s inside. This takes extra effort but makes a huge difference.
Vertical Storage Maximizes Space
Think up, not out. Pegboards for hanging tools. Wall-mounted shelves for frequently used supplies.
Over-the-door organizers for ribbon, washi tape, or small notions. Vertical storage keeps your workspace clear while keeping supplies visible.
Budget-Friendly Options Actually Work Better
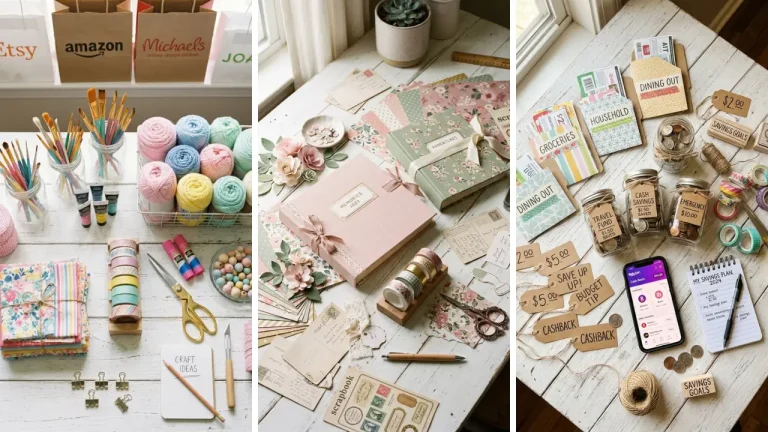
You don’t need expensive craft-specific storage. Some of the best solutions come from unexpected places. Many crafters find amazing deals on dollar store crafts ideas that include organizing supplies too. Consider these affordable alternatives:
- Tackle boxes for beads and small embellishments
- Spice racks for paint bottles
- Shoe organizers for yarn or fabric
- Mason jars for brushes, markers, and pens
- Silverware trays for scissor and tool drawers
The best storage solution is one you’ll actually maintain. Expensive systems you abandon after a month help nobody.
Create Zones That Match Your Workflow

Your craft space should flow naturally from one activity to the next. Think about how you actually work and arrange your supplies accordingly.
The Active Zone
This is your main workspace—your desk, table, or wherever you actually craft. Keep only current project supplies here. Everything else creates visual clutter that distracts and overwhelms.
At the end of each crafting session, take 5 minutes to clear this zone. Return supplies to their homes. This simple habit prevents chaos from building up.
The Ready Zone
Within arm’s reach of your workspace, store your most-used supplies. Basic tools, go-to materials, and frequently accessed items live here. You shouldn’t have to stand up to grab scissors, tape, or your favorite adhesive.
The Storage Zone
Bulk supplies, seasonal items, and specialty materials belong here. This might be a closet, cabinet, or separate storage area. Organize this zone well, but don’t worry about instant access—you’ll make occasional trips here when starting new projects.
Maintaining Your System Long-Term

Organization isn’t a one-time event. It’s an ongoing practice. The good news?
Once you have a solid system, maintenance takes minimal effort.
The One-In-One-Out Rule
Every time you buy new supplies, remove something old. This prevents slow accumulation that eventually overwhelms any system. Before purchasing, ask yourself: do I have space for this?
Will I actually use it?
Monthly 15-Minute Reviews
Set a monthly reminder to spend just 15 minutes on craft organization. Return misplaced items to their homes. Toss anything that’s dried out or damaged.
Adjust your system if something isn’t working. These quick maintenance sessions prevent the need for major overhauls. Small consistent effort beats occasional overwhelming reorganizations every time.
Make Putting Things Away Easier Than Leaving Them Out
This is the secret to long-term success. If returning supplies requires opening three containers and climbing a ladder, you won’t do it. If there’s an obvious, easy spot for everything, putting things away becomes automatic.
When exploring handmade gift craft ideas, having a well-organized space means you can start and finish projects without the friction of searching and cleaning.
Signs Your Organization System Is Working

How do you know if your new system is successful? Look for these indicators:
- You start projects more often because setup is quick
- You stop buying duplicates of supplies you already own
- You actually finish projects instead of abandoning them
- Your workspace stays relatively tidy between sessions
- You feel excited rather than overwhelmed when entering your craft space
If these aren’t happening, don’t be discouraged. Tweak your system. Maybe supplies need different homes.
Maybe you need better visibility. Organization is personal—what works for one crafter might not work for you.
Conclusion: Organization That Inspires Action
Learning how to organize your craft supplies so you actually use them isn’t about achieving Instagram-perfect storage. It’s about removing barriers between you and your creativity. When grabbing supplies takes seconds instead of minutes, you’ll craft more often.
When you can see everything you own, you’ll actually use what you have. Start with the purge—be honest about what you’ll realistically use. Then categorize by how you craft, not by supply type.
Choose storage that prioritizes visibility over aesthetics. Create zones that match your workflow. And most importantly, build maintenance habits that keep your system running smoothly.
Your craft supplies deserve to be used, not buried. Your creativity deserves space to flourish. Take one step today—even if it’s just clearing one drawer or creating one project kit.
Small actions lead to transformed spaces. Ready to get started? Share your biggest craft organization challenge in the comments below.
What’s the one supply category that always becomes a disaster? Let’s troubleshoot together and help each other build systems that actually work!
FAQ
Q: How do I organize craft supplies in a small space? A: Focus on vertical storage—pegboards, wall shelves, and over-the-door organizers maximize limited square footage. Also, be ruthless about keeping only supplies you actively use.
In small spaces, less truly is more. Q: What’s the best way to organize craft supplies so I actually use them daily? A: Keep your most-used supplies visible and within arm’s reach of your workspace.
Create project kits so you don’t have to gather materials from multiple locations. The easier it is to start, the more often you’ll craft. Q: How often should I reorganize my craft supplies?
A: Do a quick 15-minute maintenance session monthly and a deeper reorganization seasonally. If you maintain regularly, major overhauls become unnecessary. The goal is preventing chaos, not constantly fixing it.
Q: Should I organize craft supplies by color or by type? A: Organize by project type or workflow rather than color or supply category. This means grouping everything you need for common activities together, so starting a project requires grabbing one container instead of five.
Q: How can I organize my craft supplies so you actually use them when I have multiple hobbies? A: Create separate zones or kits for each hobby. Store each hobby’s supplies together in its own container or area.
This prevents supplies from getting mixed up and makes switching between crafts seamless.