How to Make Homemade Greeting Cards That Look Professional
Have you ever received a store-bought card that felt completely impersonal? You glance at the generic message, notice the hefty price tag, and think, “I could do better than this.” The truth is, you absolutely can. Learning how to make homemade greeting cards that look professional is easier than you might imagine, and the results are far more meaningful than anything you’ll find on a shelf.
Handmade cards carry a special kind of magic. They show the recipient that you invested time, creativity, and genuine thought into their celebration. Whether it’s a birthday, anniversary, thank-you note, or holiday greeting, a professionally crafted homemade card makes an unforgettable impression.
In this comprehensive guide, you’ll discover essential supplies, proven design techniques, and insider tips that transform simple paper into stunning keepsakes. By the end, you’ll have everything you need to create cards that rival—and often surpass—anything from premium stationery shops.
Essential Supplies for Professional-Looking Homemade Cards

Before diving into techniques, let’s talk about materials. The difference between amateur and professional-looking cards often comes down to supply quality. You don’t need to spend a fortune, but investing in a few key items makes a dramatic difference.
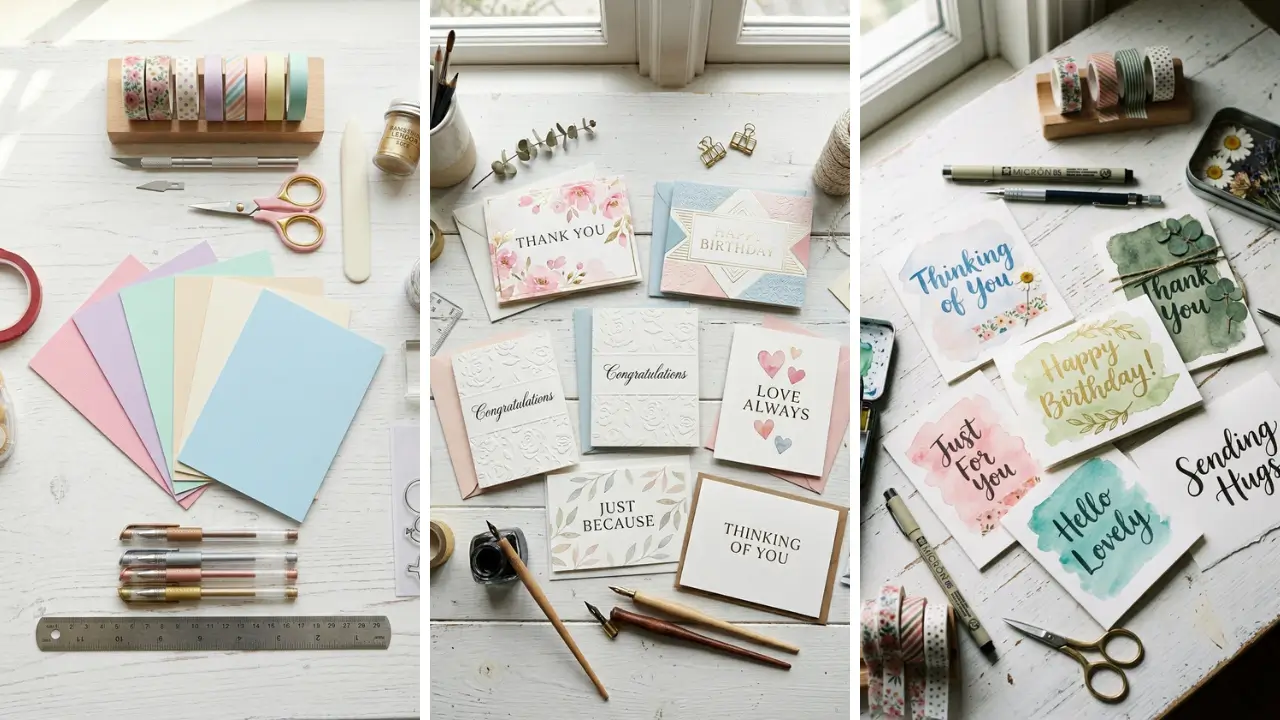
Cardstock is your foundation. Choose paper between 65-110 lb weight for best results. Lighter cardstock bends and warps easily, while heavier options hold embellishments without buckling.
White, cream, and kraft paper serve as versatile bases that complement any design. If you’re looking for dollar store crafts ideas, you’ll be thrilled to know that many discount retailers carry surprisingly decent cardstock, decorative papers, and basic tools that work beautifully for card making.
Must-Have Tools for Clean Results

A paper trimmer or craft knife with a metal ruler produces crisp, straight edges that scream professional. Scissors alone often create uneven cuts that cheapen the final product. Bone folders create sharp, clean folds that lie flat.
This inexpensive tool eliminates the bulky, imprecise creases that plague beginner cards. Simply score along your fold line, then use the bone folder to press the crease flat. Double-sided tape and glue runners provide cleaner adhesion than liquid glue, which can warp paper and leave visible residue.
Foam adhesive squares add dimension to layered elements, creating that polished, three-dimensional look you see in expensive boutique cards.
Design Principles That Make Homemade Greeting Cards Look Professional

Great supplies mean nothing without solid design fundamentals. Professional card makers follow specific principles that create visual harmony and impact. The rule of thirds works beautifully for card layouts.
Imagine your card divided into a 3×3 grid. Placing your focal point where lines intersect creates natural visual interest. This simple technique instantly elevates your designs above typical centered layouts.
White space isn’t wasted space—it’s breathing room. Beginners often cram too many elements onto their cards, creating cluttered, overwhelming designs. Professional cards embrace empty space, allowing key elements to shine.
Color Coordination Secrets
Limit your color palette to 2-3 complementary colors maximum. This creates cohesion rather than chaos. When uncertain, choose colors from the same family or use a color wheel to find harmonious combinations.
Consider the emotion you want to convey. Warm colors (reds, oranges, yellows) feel energetic and celebratory. Cool colors (blues, greens, purples) evoke calm and sophistication.
Neutrals add elegance without overwhelming other elements. These design skills translate wonderfully to other fun crafts to make at home, so you’ll use these principles again and again across different creative projects.
Step-by-Step Techniques for How to Make Homemade Greeting Cards That Look Professional

Now let’s walk through specific techniques that deliver impressive results, even for complete beginners.
The Classic Layered Card
Layering creates instant dimension and sophistication. Start with your base card (typically A2 size: 4.25″ x 5.5″ when folded). Cut a slightly smaller piece of patterned or contrasting paper and center it on the front.
Add a third layer—perhaps a sentiment panel or focal image—slightly smaller than the second layer. This graduated sizing draws the eye inward while creating professional depth. Pro tip: Leave approximately 1/8″ to 1/4″ border between each layer for optimal visual balance.
Too little looks cramped; too much appears disconnected.
Stamping Like a Pro
Rubber and clear stamps transform card making, but technique matters enormously. Always tap your stamp onto the ink pad rather than pressing down—this ensures even ink distribution. Press firmly and evenly when stamping, holding for 2-3 seconds without rocking or shifting.
Rocking creates blurry, double-stamped images that instantly look amateur. For crisp results, stamp onto a mouse pad or craft mat placed beneath your paper. The slight cushion improves ink transfer significantly.
Hand Lettering Alternatives
Not everyone has beautiful handwriting, and that’s perfectly fine. Several alternatives deliver professional-looking sentiments without calligraphy skills. Alphabet stamps and letter stickers provide consistent, attractive lettering.
Rub-on transfers create an almost printed look. For digital options, print sentiments on cardstock using attractive fonts, then trim and layer onto your card. When exploring handmade gift craft ideas, you’ll find that greeting cards pair perfectly with other handcrafted presents for complete, personalized gift packages.
Advanced Embellishment Techniques

Once you’ve mastered basics, embellishments take your cards from nice to extraordinary. However, restraint remains crucial—strategic embellishment beats excessive decoration every time.
Heat Embossing for Raised, Glossy Effects
Heat embossing creates stunning raised, glossy designs that look incredibly professional. The process involves stamping with special embossing ink, sprinkling embossing powder over the wet ink, shaking off excess, and applying heat to melt the powder. Gold and silver embossing powders add elegance to wedding and anniversary cards.
Clear embossing powder creates subtle texture. Colored powders offer endless creative possibilities. This technique requires minimal investment—just embossing ink, powder, and a heat tool.
The results rival expensive letterpress printing at a fraction of the cost.
Die Cutting for Perfect Shapes
Manual die cutting machines create intricate shapes, borders, and letters with precision impossible to achieve by hand. While machines require initial investment, they open endless design possibilities. Start with versatile dies: basic shapes, popular sentiments, and decorative borders.
These foundational pieces work across multiple card styles and occasions.
Adding Texture and Dimension
Texture transforms flat designs into tactile experiences. Consider these options:
- Embossing folders create raised patterns across entire panels
- Ribbon and twine add softness and visual interest
- Buttons, gems, and pearls serve as elegant focal points
- Dried flowers and leaves bring natural beauty
- Washi tape offers quick, colorful accents
Remember: choose one or two embellishment types per card. Combining everything creates visual confusion rather than sophistication.
Quick Tips for Homemade Cards When Time Is Limited

Sometimes you need professional-looking results fast. These shortcuts deliver impressive cards in minimal time. Create card kits in advance.
Pre-cut card bases, layer papers, and organize embellishments by color scheme. When you need a quick card, assembly takes minutes rather than hours. Keep a stash of versatile, pre-made elements: die-cut flowers, stamped sentiments on neutral cardstock, and ribbon lengths.
Mixing and matching these pieces creates countless unique cards. For those who love home craft projects quick, card making kits offer excellent starting points with coordinated supplies and simple instructions. One-layer cards can look stunning when executed well.
A beautiful stamp, quality paper, and single embellishment sometimes outshine complex, multi-layer designs.
Common Mistakes That Make Cards Look Amateur

Avoiding these pitfalls is just as important as learning techniques. Here’s what to watch for: Visible glue immediately cheapens any card. If adhesive shows around edges or through paper, it destroys the professional illusion.
Use appropriate adhesive types and apply sparingly. Crooked elements distract and frustrate viewers. Take extra seconds to align layers properly.
When in doubt, use a ruler or alignment tools. Paper fingerprints leave oily marks on cardstock, especially white or light colors. Handle paper by edges, or wear cotton gloves when working with pristine cardstock.
Inconsistent margins create visual tension. Whether you prefer wide or narrow borders, keep spacing consistent throughout your design. Overwhelming designs confuse rather than impress.
If you can’t identify a clear focal point, remove elements until one emerges.
Creating Cards for Specific Occasions

Different occasions call for different approaches when learning how to make homemade greeting cards that look professional.
Birthday Cards
Birthday cards allow maximum creativity and color. Consider the recipient’s interests, favorite colors, and personality. Balloons, cakes, and candles work universally, but personalized elements—references to hobbies, inside jokes, or milestones—create truly memorable cards.
Wedding and Anniversary Cards
Elegance defines these occasions. Stick to sophisticated color palettes: whites, creams, blush, gold, and silver. Heat embossing, pearl accents, and delicate die cuts elevate these designs.
Quality matters especially here—use premium cardstock and luxurious embellishments.
Sympathy and Get Well Cards
Simplicity and sincerity guide sympathy cards. Avoid overly bright colors or whimsical elements. Soft florals, peaceful landscapes, and heartfelt sentiments offer comfort without overwhelming.
Sometimes, less truly is more. Making cards for others is one of the most thoughtful DIY handmade gifts you can create, combining creativity with genuine personal connection.
Conclusion: Your Journey to Professional Homemade Cards Starts Now
Mastering how to make homemade greeting cards that look professional requires practice, patience, and attention to detail. But the rewards—both personal satisfaction and recipients’ delighted reactions—make every effort worthwhile. Start with quality supplies and foundational techniques.
Learn design principles that create visual harmony. Practice specific methods like layering, stamping, and embossing. Avoid common mistakes that undermine otherwise great cards.
Remember, professional-looking doesn’t mean perfect. Handmade cards carry inherent charm precisely because a human created them. Small variations and personal touches distinguish your work from mass-produced alternatives.
The most important step? Simply begin. Your first cards won’t be masterpieces, and that’s perfectly okay.
Each project teaches something new, builds skills, and brings you closer to creating cards that truly wow. Ready to start your card-making journey? Gather basic supplies this week and create your first card.
Share your creations in the comments below—we’d love to see what you make! And if you found this guide helpful, pass it along to friends who might enjoy discovering their own card-making talents.
Frequently Asked Questions
What is the best paper weight for homemade greeting cards? For professional results, use cardstock between 65-110 lb weight. This range provides enough stiffness to stand properly while remaining easy to fold and embellish.
Heavier cardstock works best for card bases, while lighter weights suit layering elements. How can I make homemade greeting cards that look professional without expensive equipment? Focus on fundamentals: quality cardstock, precise cutting with a ruler and craft knife, clean adhesion with tape runners, and intentional design.
Many stunning cards require only basic supplies. Stamps, while optional, offer excellent value for creating polished, repeatable designs. What’s the easiest technique for beginners learning how to make homemade greeting cards that look professional?
Layered cards offer the best starting point. Simply cutting coordinating papers in graduated sizes and stacking them creates immediate dimension and visual interest. Add a simple sentiment and single embellishment for a polished result with minimal skill required.
How far in advance should I make greeting cards? Creating cards 1-2 weeks before needed events works well. This allows time for any mistakes or creative changes without last-minute stress.
For holidays, begin 4-6 weeks early if making multiple cards. Store completed cards flat in protective sleeves to prevent damage. Can I sell my homemade greeting cards legally?
Yes, you can sell original handmade cards. However, be aware of copyright restrictions on stamps, digital images, and design elements you didn’t create yourself. Many stamp companies specify “angel policies” regarding commercial use.
When in doubt, use original artwork or properly licensed materials.