DIY Wall Art for Beginners: The Only Guide You Need to Start
Staring at blank walls can feel overwhelming, especially when designer art pieces cost hundreds of dollars. But here’s the truth: you don’t need artistic talent or a big budget to create stunning wall decor. DIY wall art for beginners: the only guide you need to start will show you exactly how to transform empty spaces into gallery-worthy displays using simple techniques anyone can master.
Whether you’ve never picked up a paintbrush or you’re looking for budget-friendly alternatives to expensive artwork, this guide covers everything. You’ll discover foolproof projects, essential materials, and insider tips that make creating wall art genuinely enjoyable. By the end, you’ll have the confidence and knowledge to create pieces that look professionally made.
Ready to unlock your creative potential and finally fill those bare walls? Let’s dive into the world of beginner-friendly wall art that will impress everyone who walks into your home.
Why DIY Wall Art Is Perfect for Beginners

Creating your own wall art offers benefits that store-bought pieces simply can’t match. First, there’s the cost factor. A single framed print from home decor stores easily runs $50-200, while DIY projects often cost under $20.
More importantly, handmade art carries personal meaning. Each piece tells your story and reflects your unique style. There’s genuine satisfaction in pointing to something on your wall and saying, “I made that.” The skills you develop transfer to other creative projects too.
Once you master basic techniques, you’ll find yourself exploring fun crafts to make at home beyond just wall art. Creativity has a wonderful way of expanding into other areas of life.
Essential Materials for Your First DIY Wall Art Project

Starting any new hobby means gathering supplies, but don’t let this intimidate you. The beauty of beginner wall art lies in its accessibility. Most materials are already in your home or available at any craft store.
Basic Supplies Every Beginner Needs
Your starter kit should include:
- Canvas panels or stretched canvas – Start with 8×10 or 11×14 sizes
- Acrylic paints – A basic set of primary colors plus black and white
- Brushes – Get a variety pack with different widths
- Painter’s tape – Essential for clean lines and geometric designs
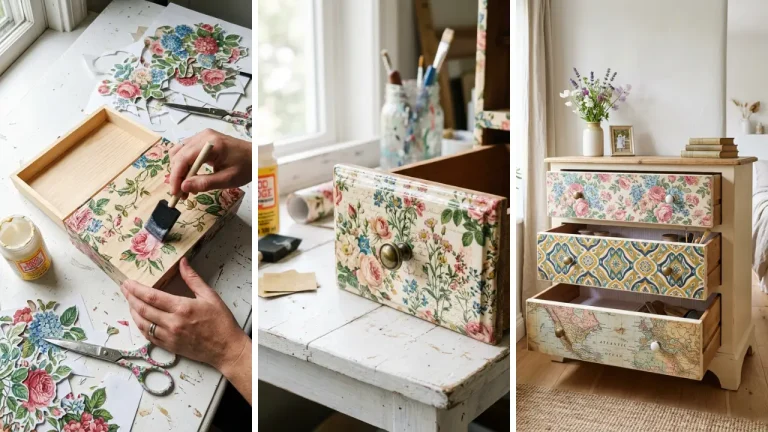
- Mod Podge or craft glue – Perfect for mixed media projects
Don’t overlook everyday items either. Cardboard, old magazines, fabric scraps, and even leaves make excellent art materials. Some of the most stunning pieces come from unexpected sources.
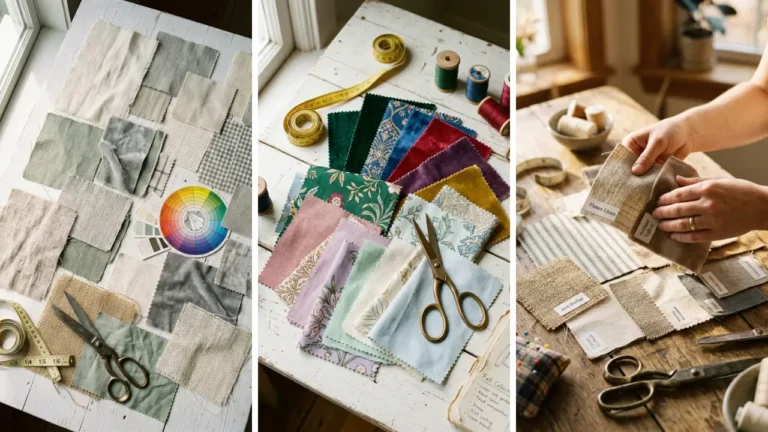
Budget-Friendly Material Sources

You’d be surprised how many incredible projects come from inexpensive supplies. Exploring dollar store crafts ideas opens up possibilities you might never have considered. Picture frames, artificial flowers, and basic craft supplies from budget stores work beautifully for wall art.
Thrift stores are goldmines too. Old frames, vintage fabric, and interesting textures cost pennies compared to craft store prices. Keep an open mind about repurposing items.
5 Easy DIY Wall Art Projects for Complete Beginners

Now comes the exciting part: actual projects you can complete this weekend. These techniques require zero artistic experience and produce results that look sophisticated and intentional.
Project 1: Abstract Acrylic Pour Painting
Pour painting creates mesmerizing swirls and patterns without any brushwork. Simply mix acrylic paint with pouring medium, layer colors in a cup, then flip it onto canvas. Tilt the canvas to spread the paint, and watch magic happen.
This technique is forgiving because there are no mistakes—only happy accidents. Every pour creates something unique. Start with 2-3 coordinating colors that match your room’s palette.
Project 2: Geometric Tape Art
Using painter’s tape, create crisp geometric patterns on canvas. Apply tape in triangles, stripes, or abstract shapes. Paint between the tape lines, let it dry, then peel the tape away to reveal clean edges.
This method works brilliantly because tape does the hard work. You don’t need steady hands or drawing skills. The result looks like modern gallery art.
Project 3: Pressed Flower Frames

Collect flowers or leaves, press them in a heavy book for two weeks, then arrange them between glass in floating frames. This nature-inspired art brings organic beauty indoors with minimal effort. Botanical frames make excellent DIY handmade gifts too.
Create a set of three with different plants for a cohesive gallery wall effect.
Project 4: Fabric-Wrapped Canvas
Choose patterned fabric you love, stretch it over canvas frames, and secure it with a staple gun on the back. Instant wall art that coordinates perfectly with your decor because you selected the fabric. This project takes under 15 minutes per canvas.
Make several in complementary patterns for a curated look. It’s one of those home craft projects quick enough to complete during lunch breaks.
Project 5: Quote Art with Stencils
Paint a canvas in your chosen background color. Once dry, use letter stencils or vinyl letters to add meaningful quotes. This combines personalization with professional-looking typography.
Choose quotes that resonate with you personally. Song lyrics, book passages, or family mottos all work wonderfully. The words transform your space while reflecting your values.
Design Principles That Make DIY Wall Art Look Professional

Understanding a few basic design concepts elevates amateur projects to gallery-quality pieces. These principles apply whether you’re painting, collaging, or creating mixed media art.
Color Theory Basics
Stick to 3-4 colors maximum per piece. Use the 60-30-10 rule: 60% dominant color, 30% secondary color, 10% accent color. This creates visual balance that feels intentional.
Pull colors from existing room elements—throw pillows, rugs, or furniture. This ensures your art coordinates without looking matchy-matchy.
Composition and Balance
The rule of thirds applies to wall art too. Divide your canvas mentally into a 3×3 grid. Place focal points along these lines or at intersections.
This creates visual interest that draws the eye naturally. Negative space matters. Don’t feel compelled to fill every inch.
Empty areas give the eye places to rest and make design elements more impactful.
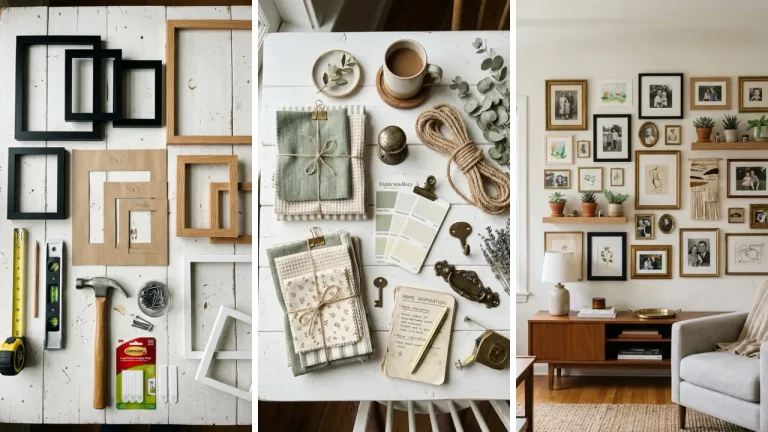
Creating Gallery Wall Arrangements
Multiple pieces displayed together create more impact than single artworks. Lay out your arrangement on the floor first. Take photos from above to visualize how it looks before committing to nail holes.
Mix frame sizes and orientations for dynamic displays. Include odd numbers of pieces—three or five frames feel more natural than even groupings.
Common Mistakes Beginners Make (And How to Avoid Them)
")
Learning from others’ errors saves time and frustration. These are the pitfalls that trip up most first-time wall art creators. Rushing the drying process causes smudges and mixed colors.
Acrylic paint dries quickly, but give each layer at least 20-30 minutes before adding more. Pour paintings need 24-48 hours before moving. Skipping the prep work leads to peeling paint and poor adhesion.
Prime your canvas if using cheap ones. Clean surfaces thoroughly before applying any medium. Choosing overly complicated projects sets you up for disappointment.
Start simpler than you think necessary. Success builds confidence faster than struggling through advanced techniques. Comparing your work to professionals kills creativity.
Your first pieces won’t look like Pinterest-perfect examples—and that’s completely okay. Progress matters more than perfection.
Taking Your DIY Wall Art Skills Further

Once you’ve completed a few projects, you’ll naturally want to expand your skills. The techniques you’ve learned form foundations for more advanced work. Consider exploring handmade gift craft ideas that incorporate your new abilities.
Custom artwork makes meaningful presents for birthdays, housewarmings, and holidays. Join online communities where crafters share inspiration and troubleshooting tips. Seeing others’ creative interpretations sparks ideas you’d never discover alone.
Local craft stores often host beginner workshops too. Document your progress with photos. Looking back at early projects shows how far you’ve come and keeps motivation high during creative slumps.
Conclusion
Creating beautiful wall art isn’t reserved for trained artists or people with natural talent. DIY wall art for beginners: the only guide you need to start has shown you that anyone can produce impressive pieces with basic materials and simple techniques. The projects outlined here require no special skills—just willingness to try something new.
Abstract pours, geometric tape art, pressed botanicals, fabric canvases, and quote art all deliver professional-looking results without professional training. Remember that every artist started somewhere. Your first piece might not be perfect, but it will be yours.
That authenticity brings warmth to your space that mass-produced decor never can. Start with one project this weekend. Pick the technique that excites you most, gather your supplies, and create something.
Your walls are waiting, and now you have everything you need to transform them. Which project will you try first? Share your plans in the comments below, or tag your finished pieces so we can celebrate your creative journey together!
FAQ
Q: What is the easiest DIY wall art for beginners to start with? A: Abstract acrylic pour painting is arguably the easiest because it requires no drawing or painting skills. You simply mix, pour, and tilt the canvas.
The paint does the artistic work for you, creating unique patterns every time. Q: How much does DIY wall art for beginners cost to make? A: Most beginner projects cost between $10-30 for materials.
Basic supplies like canvas, paints, and brushes are reusable across multiple projects, making each subsequent piece even cheaper. Dollar store supplies reduce costs further. Q: Do I need artistic talent to create good-looking wall art?
A: Absolutely not. Many stunning wall art techniques rely on tools, templates, and methods that eliminate the need for drawing ability. Tape creates straight lines, stencils handle lettering, and pour painting produces beautiful results through physics rather than skill.
Q: How long does a typical beginner wall art project take? A: Active creation time ranges from 20 minutes to two hours for most beginner projects. However, drying time adds to the total.
Simple tape art might finish in an afternoon, while pour paintings need 24-48 hours to dry completely before hanging. Q: What size canvas should beginners start with for DIY wall art? A: Start with medium sizes like 8×10, 11×14, or 12×12 inches.
These are manageable for learning techniques without overwhelming you with too much surface area. They’re also affordable if experiments don’t turn out as planned.