How to Make a Fabric Basket for Storage and Home Decor: A Complete Step-by-Step Guide
Have you ever looked at a cluttered shelf or a messy corner of your room and thought, “There has to be a prettier way to organize this”? The good news is, there is — and it costs almost nothing if you have some fabric lying around. Learning how to make a fabric basket for storage and home decor is one of those skills that looks impressive but is surprisingly beginner-friendly.
Whether you want a stylish catch-all for your living room or a practical organizer for your bathroom, a handmade fabric basket fits the bill perfectly. In this guide, you’ll get a complete walkthrough — from the materials you need, to the sewing steps, to creative ways to style your finished basket. No advanced sewing skills required.
Let’s get started.
Why Fabric Baskets Are a Must-Have for Storage and Home Decor

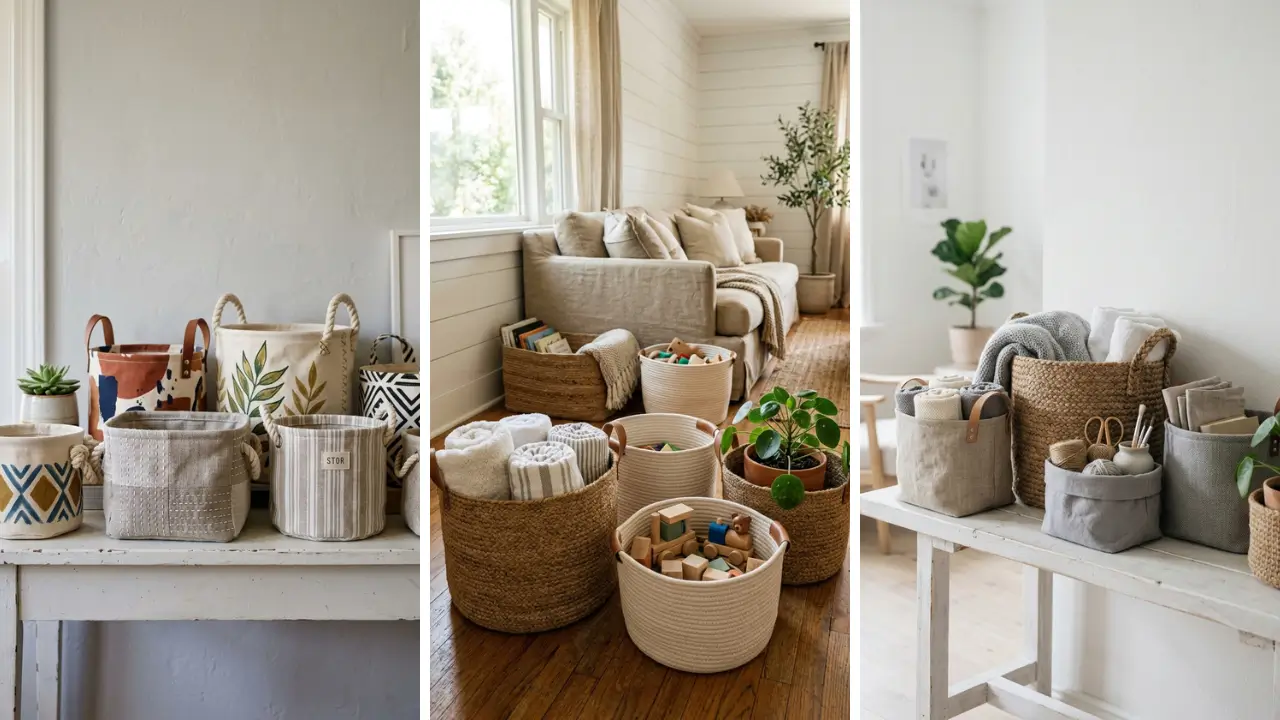
Fabric baskets have exploded in popularity for a good reason. They’re soft, lightweight, customizable, and far more affordable than store-bought storage solutions. Unlike rigid plastic bins, fabric baskets add warmth and texture to a space — making them a functional piece of decor, not just a box to hide clutter.
They work in virtually every room. Use them on open shelving in the living room, on bathroom counters, in nurseries, or at the entryway for keys and mail. The fabric options are endless, meaning you can match any interior style from boho to minimalist.
If you love fun crafts to make at home, fabric baskets are one of the most rewarding projects you can tackle on a lazy weekend. You get a real, usable product at the end — not just a decoration that collects dust.
Materials You Need to Make a Fabric Basket

One of the best things about this project is how simple the supply list is. Most of these items you may already have at home, and the rest are easy to find at any craft or fabric store.
- Outer fabric – cotton canvas, denim, burlap, or quilting cotton work great
- Lining fabric – a complementary print or solid color
- Fusible interfacing – medium to heavy weight, to give the basket structure
- Sewing machine – a basic model works perfectly fine
- Thread – matching or contrasting for a decorative effect
- Scissors or rotary cutter
- Ruler and fabric marker
- Iron and ironing board
- Pins or clips
If you’re working on a tight budget, this is a fantastic project to try with dollar store crafts ideas — you’d be surprised how far a few affordable fabric pieces can go when you make something this polished.
How to Make a Fabric Basket for Storage and Home Decor: Step-by-Step Instructions

Follow these steps carefully and you’ll have a beautiful, sturdy fabric basket ready in about 1–2 hours. The instructions below are for a medium-sized basket, roughly 8 inches wide and 6 inches tall — but you can scale up or down easily.
Step 1: Cut Your Fabric Pieces
Cut two rectangles from your outer fabric and two from your lining fabric. Each piece should measure 14 inches wide by 12 inches tall. Also cut two pieces of fusible interfacing the same size.
Press the interfacing onto the wrong side of both outer fabric pieces using a hot iron.
Step 2: Sew the Outer Basket

Place both outer fabric pieces right sides together. Sew along the two long sides and the bottom, using a 1/2 inch seam allowance. Leave the top open.
To create the basket’s flat base, pinch each bottom corner so the side seam aligns with the bottom seam, forming a triangle. Measure 2 inches from the tip and draw a line. Sew along that line, then trim the excess fabric.
This technique is called boxing the corners and it’s what gives your basket its three-dimensional shape.
Step 3: Sew the Lining
Repeat the exact same process with your lining fabric — sew the sides and bottom, box the corners — but this time, leave a 3-inch gap in the bottom seam. This gap is your turning hole, which you’ll need in the next step.
Step 4: Join the Outer Basket and Lining

Turn the outer basket right side out. Keep the lining wrong side out. Place the outer basket inside the lining so the right sides are facing each other.
Align the top edges and pin them together. Sew all the way around the top opening with a 1/2 inch seam allowance. Now reach through the gap in the lining and pull the entire basket through.
It will pop right-side out. Push the lining into the outer basket, press the top edge flat with an iron, and topstitch around the rim to give it a clean, professional finish. Sew the gap in the lining closed by hand or machine.
Step 5: Add Handles (Optional)
For a more polished look, cut two strips of fabric 3 inches wide and 12 inches long. Fold each strip lengthwise, press, and topstitch along both edges. Fold them into loops and sew them securely to the inside of the basket at the top rim, about 3 inches from each side seam.
Reinforce with a box stitch for durability.
Creative Variations to Personalize Your Fabric Basket

Once you master the basic shape, the creative possibilities are almost unlimited. Here are some ideas to make your basket truly unique:
- Cuffed top – Use a contrasting lining and fold the top down 2–3 inches to show it off. This looks especially great on shelving displays.
- Patchwork outer fabric – Sew together scrap pieces of coordinating fabrics before cutting your main pieces. Great for using up leftover fabric.
- Rope or leather handles – Instead of fabric handles, thread thick rope or leather cord through small grommets for a rustic, industrial look.
- Embroidery or iron-on patches – Add a monogram, floral motif, or fun phrase to the outer fabric before sewing everything together.
- Seasonal themes – Use holiday prints for Christmas or Halloween baskets that double as festive decor.
These baskets also make incredible DIY handmade gifts. Fill one with gourmet snacks, spa products, or baby essentials and you have a thoughtful, personalized gift that looks like it came from a boutique store.
Smart Ways to Use Fabric Baskets Around Your Home

Now that you know how to make a fabric basket for storage and home decor, let’s talk about where to actually use them. Placement matters a lot when it comes to making your baskets look intentional rather than random. Living room: Stack two or three different-sized baskets on a shelf or console table.
Use them for remote controls, coasters, or small throw blankets. Varying the textures — say, a cotton canvas next to a printed quilting cotton — adds visual interest. Bathroom: A small fabric basket on the counter is perfect for holding cotton balls, hair ties, or mini toiletries.
Make sure to use a lining fabric that can handle a little humidity — tightly woven cotton works well here. Kids’ rooms: Fabric baskets are safer than rigid plastic bins in children’s spaces. Use them for stuffed animals, art supplies, or small toy sets.
Bright prints and bold colors make cleanup feel less like a chore. Home office: Corral pens, sticky notes, charging cables, and paper clips in fabric baskets on your desk. It keeps things accessible while maintaining a tidy, curated look.
If you’re looking for more ideas along these lines, there are plenty of home craft projects quick enough to complete on a weekend that can transform how your space looks and functions.
Tips for Getting a Clean, Professional Result

A few small habits separate a basket that looks homemade (in a charming way) from one that looks sloppy. Keep these in mind as you work:
- Press every seam with an iron as you go. This single habit makes the biggest difference in how polished your final product looks.
- Use clips instead of pins on thick or layered fabric sections — they grip better and won’t leave holes.
- Sew slowly around corners and pivot with the needle down. Rushing corners leads to crooked seams that are hard to fix.
- Choose the right interfacing weight. Too light and your basket will flop; too stiff and it won’t have that soft, fabric look. Medium-weight sew-in or fusible interfacing is usually the sweet spot.
- Test your thread tension on a scrap piece before starting. Incorrect tension causes puckering, especially on the topstitch around the rim.
Want to explore even more creative projects like this? There’s a whole world of handmade gift craft ideas that are just as satisfying to make and equally impressive to give.
Conclusion: Start Crafting Your Own Fabric Basket Today
Knowing how to make a fabric basket for storage and home decor is one of those skills that keeps giving. Once you’ve made your first one, you’ll start seeing potential baskets everywhere — in every fabric scrap, every clearance cotton print, every thrifted piece of cloth. They’re quick to make, inexpensive, endlessly customizable, and genuinely useful in every room of the house.
The process is simple enough for a complete beginner, yet satisfying enough that experienced sewers enjoy it too. From choosing your fabrics to boxing those corners, every step builds toward something you’ll actually use and be proud to display. So grab your fabric stash, fire up your sewing machine, and make your first basket this weekend.
You might just find yourself making a dozen more before the month is out. Ready to get crafting? Share your finished fabric basket in the comments below — we’d love to see what fabrics and styles you chose!
And if you found this tutorial helpful, share it with a friend who loves to sew. Happy making!
Frequently Asked Questions
Q: Do I need a sewing machine to make a fabric basket for storage and home decor? A: A sewing machine makes the process much faster and gives you cleaner, more durable seams — but it’s not strictly necessary. You can hand-sew a fabric basket using a sturdy backstitch, though it will take significantly more time.
For beginners, even a basic entry-level sewing machine is a worthwhile investment if you plan to craft regularly. Q: What is the best fabric to use when learning how to make a fabric basket? A: Cotton canvas, denim, and heavy quilting cotton are ideal for beginners because they’re easy to cut, don’t fray badly, and hold their shape well — especially when paired with fusible interfacing.
Avoid stretchy fabrics like knits or jersey when you’re just starting out, as they’re much harder to control on a sewing machine. Q: How do I make my fabric basket stiffer and hold its shape better? A: The key is using the right interfacing.
Choose a medium to heavy-weight fusible interfacing and apply it to all outer fabric pieces before sewing. For an even firmer basket, you can add a layer of foam stabilizer or use a double layer of interfacing. Some crafters also insert a piece of thin cardboard or plastic canvas into the base of the finished basket for extra structure.
Q: Can fabric baskets be washed? A: Yes, most fabric baskets can be washed — but it depends on the materials used. If you used 100% cotton fabric and sew-in interfacing, the basket is generally machine-washable on a gentle cycle.
Fusible interfacing may soften slightly after washing. Always reshape the basket while it’s still damp and allow it to air dry to maintain its structure. Avoid putting it in a hot dryer.
Q: How long does it take to make a fabric basket from start to finish? A: For a beginner, expect about 1.5 to 2 hours for your first basket — including cutting, ironing, and sewing. Once you’ve made a couple and know the process by heart, you can easily finish one in under an hour.
They’re a great project to batch-make: cut all your pieces at once and sew multiple baskets in an afternoon assembly-line style.