5 Furniture Upcycling Mistakes That Ruin the Finish (And How to Fix)

You spent hours sanding, priming, and painting that thrift store dresser, only to watch the finish bubble, peel, or look streaky. Sound familiar? The truth is, even experienced crafters fall victim to 5 furniture upcycling mistakes that ruin the finish—and these errors can turn a promising project into a frustrating disaster.
But here’s the good news: every single one of these mistakes is fixable, and more importantly, preventable. Whether you’re transforming grandma’s vintage nightstand or breathing new life into a curbside find, understanding what goes wrong during the finishing process is half the battle. In this guide, you’ll discover the most common pitfalls that sabotage your hard work, plus step-by-step solutions to achieve that smooth, professional-looking result you’re after.
Let’s dive into what’s really happening when your furniture finish fails—and how to make it right.
Why Your Furniture Finish Keeps Failing: Understanding the Basics

Before we tackle the specific mistakes, it’s important to understand why finishes fail in the first place. Paint, stain, and sealers are all chemistry at work. When you skip steps or rush the process, you’re essentially disrupting that chemistry.
A successful furniture finish depends on three key factors: proper surface preparation, correct product application, and adequate curing time. Miss any of these, and you’re setting yourself up for disappointment. The good news?
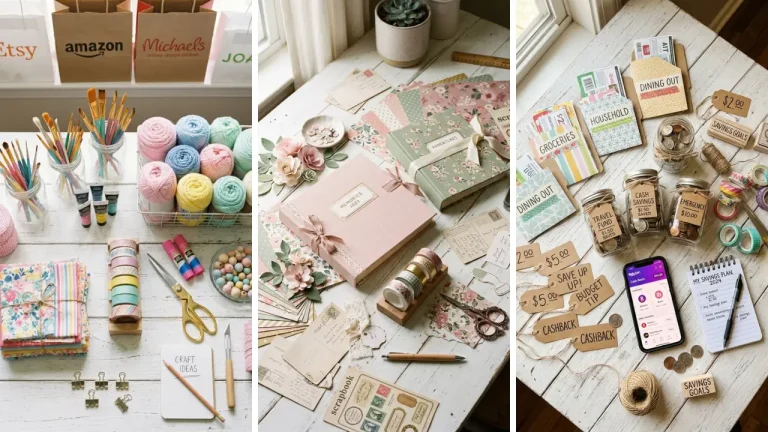
Once you know what to look for, avoiding these issues becomes second nature. Many people who enjoy fun crafts to make at home often start with furniture upcycling because it seems straightforward. And it can be—when you know the rules.
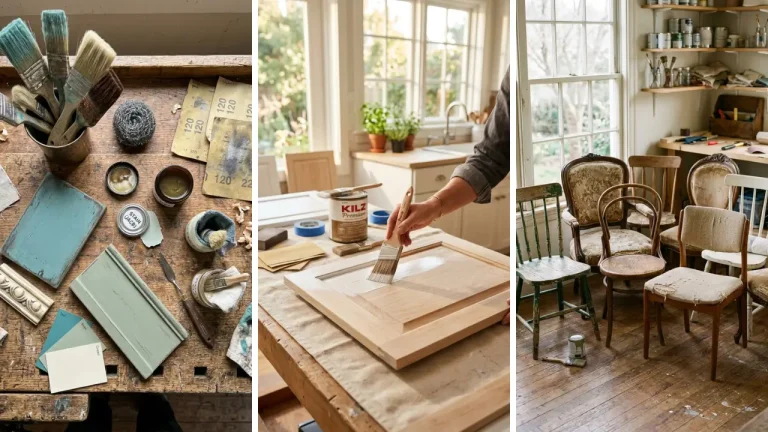
Mistake #1: Skipping Surface Preparation Completely

This is by far the most common of the 5 furniture upcycling mistakes that ruin the finish. You’re excited about your new piece, you’ve got your paint ready, and you just want to start transforming it. We get it.
But painting over dirt, grease, or glossy finishes is a recipe for disaster.
What Actually Happens When You Skip Prep
Paint needs something to grip onto. When you apply it over a slick, dirty, or waxy surface, it sits on top rather than bonding with the material. This results in paint that chips, peels, or scratches off with minimal contact.
Old furniture often has decades of furniture polish, cooking grease, and grime built up on the surface. Even pieces that look clean can have invisible residue that prevents proper adhesion.
The Fix: Proper Cleaning and Sanding Protocol

Start by cleaning your piece with TSP (trisodium phosphate) or a degreasing dish soap. Let it dry completely—at least 24 hours. Then sand the entire surface with 120-150 grit sandpaper.
You’re not trying to remove all the old finish; you’re creating texture for the new paint to grab. Pro tip: After sanding, wipe down with a tack cloth to remove all dust particles. Even tiny specks of dust will show through your final finish.
Mistake #2: Using the Wrong Primer (Or No Primer at All)
")
“But the paint says it’s paint and primer in one!” We hear this all the time. While these products work fine on walls, furniture is a different story. The constant handling, opening and closing of drawers, and daily use demands a more robust approach.
Why Primer Matters More Than You Think
Primer serves multiple purposes that paint alone cannot achieve. It blocks tannin bleed-through from wood, prevents stains from showing, creates a uniform base for color accuracy, and improves paint adhesion dramatically. Without primer, you might see mysterious orange or brown spots bleeding through your beautiful white paint weeks later.
This is tannin from the wood, and once it starts, there’s no stopping it without starting over.
Choosing and Applying the Right Primer
For most furniture projects, use a shellac-based primer like Zinsser BIN for maximum stain blocking. For pieces without bleed-through concerns, a quality bonding primer works well. Apply in thin, even coats and let it cure fully—usually 24 hours.
If you’re working on home craft projects quick turnaround times, plan your primer application the night before you want to paint. This way, you’re not tempted to rush.
Mistake #3: Applying Paint Too Thick or Too Fast

Patience is genuinely a virtue in furniture finishing. Thick coats and rushed applications cause bubbling, drips, brush marks, and uneven coverage. This mistake often comes from wanting to finish in one weekend when the project really needs more time.
Signs Your Paint Application Is Wrong
Watch for these red flags during application:
- Paint is pooling in corners or edges
- You can see obvious brush strokes that aren’t leveling out
- The surface looks lumpy or textured
- Drips are forming on vertical surfaces
Each of these indicates you’re applying too much product at once. The paint can’t release its solvents properly when it’s too thick, leading to a finish that never fully cures.
The Thin Coat Method That Professionals Use
Apply paint in multiple thin coats rather than one or two thick ones. A thin coat should be almost translucent when wet. Yes, you’ll need 3-4 coats instead of 2, but the finish will be infinitely smoother and more durable.
Wait at least 2-4 hours between coats (check your paint’s label), and lightly sand with 220-grit sandpaper between coats. This removes any dust nibs and helps the next layer adhere better.
Mistake #4: Ignoring Temperature and Humidity Conditions

Your garage in August might feel fine to you, but it could be destroying your furniture finish. Environmental conditions play a massive role in how paint and finishes cure—and this is one of the 5 furniture upcycling mistakes that ruin the finish that catches even experienced DIYers off guard.
How Weather Affects Your Finish
High humidity (above 70%) slows drying time dramatically and can cause the finish to remain tacky indefinitely. It also promotes mildew growth under the paint film. Extreme heat (above 85°F) causes paint to dry too quickly on the surface while remaining wet underneath.
This creates a skin that wrinkles and cracks as the underlying paint tries to cure. Cold temperatures (below 50°F) prevent proper chemical bonding in most paints, resulting in a finish that chips and peels easily.
Creating Ideal Conditions for Perfect Results
The sweet spot for most furniture paints is 60-75°F with 40-50% humidity. If you can’t paint indoors in a climate-controlled space, check the weather forecast and plan your painting days accordingly. Even when creating DIY handmade gifts from upcycled furniture, rushing due to deadlines will only result in a subpar finish.
Build in extra time for proper curing.
Mistake #5: Skipping or Rushing the Final Topcoat

Your furniture looks amazing. The color is perfect. You’re ready to move it back into place and show it off.
Stop right there. Without a proper topcoat, all your hard work will deteriorate within months.
Why Every Painted Piece Needs Protection
Paint alone is not durable enough for furniture that gets daily use. The topcoat provides:
- Scratch and abrasion resistance
- Protection from water rings and stains
- UV protection to prevent fading
- A professional-looking sheen
Kitchen tables, dressers, and any high-touch surfaces absolutely require a protective topcoat. Even decorative pieces benefit from the added durability.
Selecting and Applying the Right Topcoat
For most projects, a water-based polycrylic or polyurethane provides excellent protection without yellowing. Apply 2-3 thin coats, sanding lightly between each with 320-grit sandpaper. Critical: Allow the topcoat to cure fully before using the piece.
This typically takes 21-30 days for full hardness, though it will be dry to the touch much sooner. During this cure time, avoid placing items on the surface or stacking anything on drawers. If you enjoy dollar store crafts ideas to embellish your finished pieces, wait until the topcoat is fully cured before adding any decorative elements.
Bonus Tips for Flawless Furniture Finishes Every Time

Beyond avoiding the main 5 furniture upcycling mistakes that ruin the finish, these additional strategies will elevate your results: Invest in quality tools. A good brush or foam roller makes application easier and leaves fewer marks. Cheap brushes shed bristles that embed in your finish.
Work in good lighting. Set up your workspace with bright, angled lighting so you can see drips, missed spots, and brush marks while the paint is still wet and fixable. Keep a wet edge.
When painting large surfaces, always work from wet paint into dry areas to prevent visible lap marks. Document your process. Keep notes on what products you used and how long you waited between coats.
This helps you replicate successes and troubleshoot problems. For those who love creating handmade gift craft ideas, upcycled furniture makes stunning, one-of-a-kind presents when finished properly.
Conclusion: Master Your Furniture Upcycling Projects
Understanding and avoiding the 5 furniture upcycling mistakes that ruin the finish transforms frustrating projects into rewarding successes. Let’s recap the essentials: always prepare your surface thoroughly, use the right primer for your project, apply thin coats with patience, work in appropriate environmental conditions, and protect your finish with a proper topcoat. The difference between amateur and professional-looking results often comes down to these fundamental steps.
Every gorgeous furniture makeover you’ve admired online followed these same principles—there are no shortcuts to a beautiful, durable finish. Remember, furniture upcycling is both an art and a science. The art is in choosing colors and envisioning the transformation.
The science is in respecting the chemistry of your products and giving them what they need to perform properly. When you honor both aspects, you’ll create pieces that look stunning and last for years. Ready to start your next furniture project?
Share your biggest finishing challenge in the comments below—we’d love to help troubleshoot! And if you found these tips helpful, pass them along to a fellow DIY enthusiast who might be struggling with their furniture makeovers.
FAQ
Q: What are the 5 furniture upcycling mistakes that ruin the finish most often? A: The five most common mistakes are skipping surface preparation, using the wrong primer or no primer, applying paint too thick or fast, ignoring temperature and humidity conditions, and skipping or rushing the topcoat. Avoiding these ensures a professional-looking, durable result.
Q: How long should I wait between coats when painting furniture? A: Wait at least 2-4 hours between paint coats, depending on your product’s recommendations. For topcoats, wait 24 hours between applications.
The full cure time before heavy use is typically 21-30 days. Q: Can I paint furniture without sanding first? A: While some products claim to require no sanding, light sanding always improves adhesion.
At minimum, clean the piece thoroughly with a degreaser. For glossy surfaces, sanding or using a liquid deglosser is essential to prevent peeling. Q: Why is my furniture paint still sticky after drying?
A: Sticky paint usually indicates high humidity during application, coats that were too thick, or insufficient cure time. Try moving the piece to a climate-controlled environment and waiting longer. If it remains tacky after a week, the finish may need to be removed and redone.
Q: What’s the best way to fix furniture upcycling mistakes after the paint has dried? A: For minor issues like drips or brush marks, sand the area smooth with fine-grit sandpaper and apply a fresh thin coat. For major problems like peeling or bubbling, you’ll need to strip the affected area completely and start the preparation process again from scratch.