How to Make an Origami Lotus Flower for Home Decor or Gift Wrapping
Have you ever walked into a room and noticed a single paper lotus sitting on a shelf — and wondered how something so delicate could be made from a flat piece of paper? Learning how to make an origami lotus flower for home decor or gift wrapping is one of those skills that feels impressive but is surprisingly approachable, even if you’ve never folded a crane in your life. With just a few square sheets of paper, you can create a stunning floral accent that looks store-bought but costs almost nothing.
In this guide, you’ll get a full step-by-step breakdown, material tips, decoration ideas, and pro tricks to make your lotus look polished every single time.
Why the Origami Lotus Flower Is Perfect for Home Decor and Gift Wrapping

The origami lotus has a timeless, elegant silhouette that works in almost any aesthetic — minimalist, bohemian, or even modern luxury. Its layered petals mimic a real lotus beautifully, making it a standout piece without requiring any floral arrangements or maintenance. Unlike fresh flowers, a paper lotus lasts indefinitely and can be refreshed with a simple coat of clear spray.
For gift wrapping, the lotus adds a personal, artisanal touch that no store-bought bow can replicate. Place one on top of a wrapped box, tuck it inside a gift bag, or use it as a place card holder at a dinner table. The possibilities are genuinely endless.
If you enjoy exploring DIY handmade gifts, this origami lotus is one of the most versatile additions to your creative toolkit. Beyond gifts, a cluster of lotus flowers in varying sizes makes a gorgeous centerpiece for a dining table, a zen-inspired desk display, or a seasonal mantel arrangement. You can match the paper colors to your room palette for a cohesive interior look.
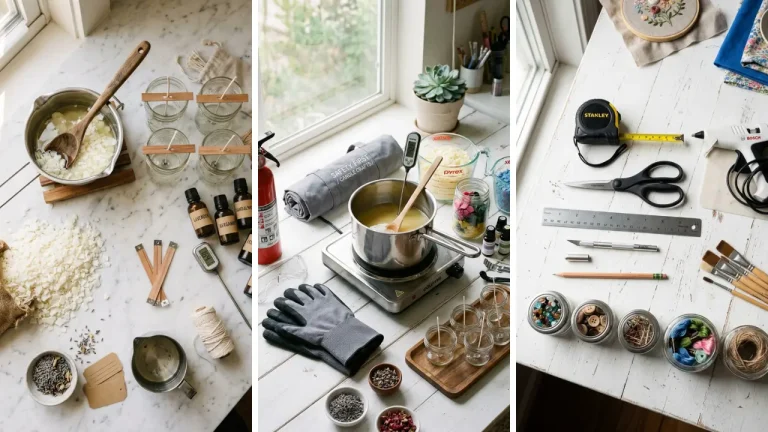
Materials You Need Before You Start Folding

One of the best things about origami is that the barrier to entry is incredibly low. You don’t need a craft store haul or special equipment. Here’s what to gather before you begin:
- Square origami paper (15×15 cm is ideal for beginners; larger sheets give more room for precision)
- Bone folder or stylus (optional but helpful for crisp, clean creases)
- Scissors (only if you’re starting with non-square paper)
- Ruler (for cutting perfect squares if needed)
If you want to elevate the look, try metallic origami paper, patterned washi paper, or tissue foil. These materials hold creases well and catch light beautifully, making the finished lotus look especially luxurious. You can find affordable options at dollar stores — and speaking of which, there are plenty of dollar store crafts ideas that pair perfectly with this project if you want to build a full decorative display on a budget.
For a classic look, solid colors like white, blush pink, deep red, or ivory work best. For a festive or seasonal vibe, try gold, silver, or patterned paper with subtle prints.
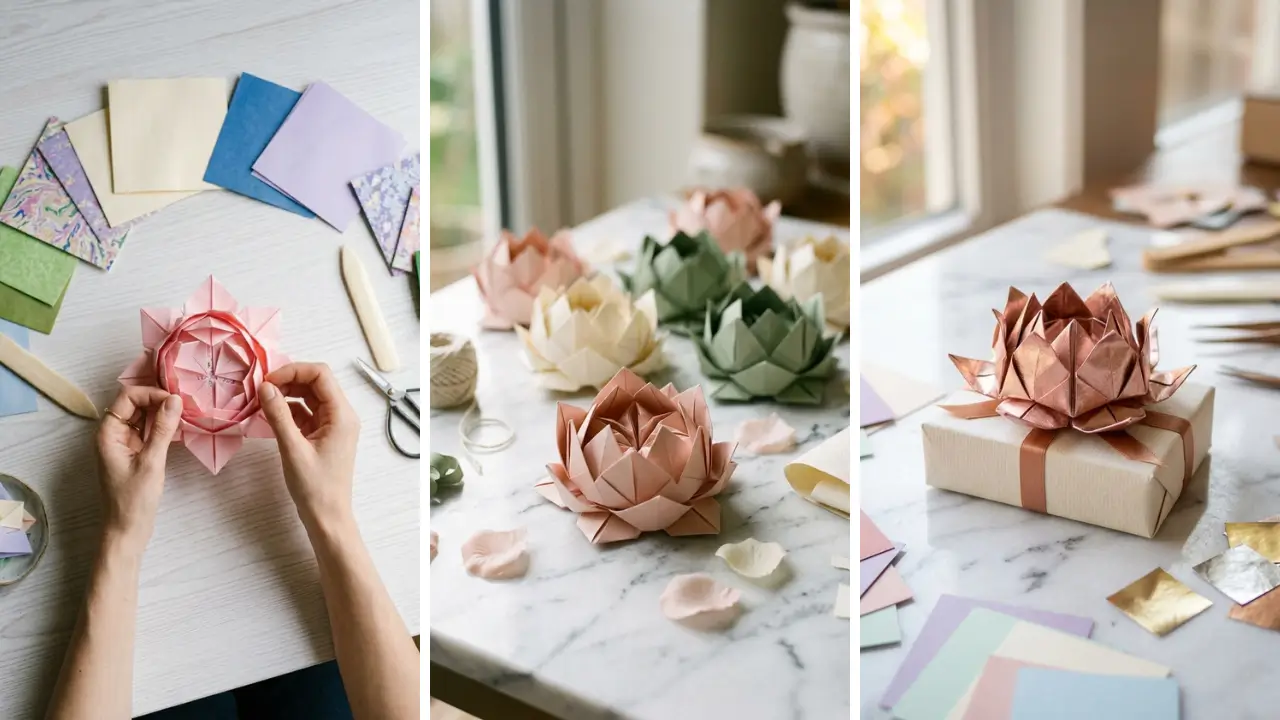
How to Make an Origami Lotus Flower Step by Step

This tutorial uses the traditional 16-petal origami lotus method, which produces a full, round bloom. Take your time with each fold — precision here pays off in the final result.
Step 1: Prepare Your Square Sheet
Place your square sheet of paper color-side down on a flat surface. Fold the paper in half horizontally, then unfold. Fold in half vertically, then unfold.
You should have a cross-shaped crease through the center of the paper.
Step 2: Fold All Four Corners to the Center

Take each corner and fold it precisely to the center point where your creases intersect. Press down firmly. You should now have a smaller square shape.
This is called the “blintz base” in traditional origami terminology.
Step 3: Repeat the Corner Fold
Without flipping the paper over, fold each of the four new corners into the center again. Press all folds flat and firm. Your square will now be considerably smaller.
Step 4: Flip and Fold Again

Flip the paper over carefully. Fold all four corners to the center one more time. At this point, your paper should be quite small and compact — this is normal.
All the layers you’re building up create the dimensional petals in the final step.
Step 5: Hold the Center and Pull the Petals
This is the most satisfying part. Place one finger in the very center of the folded square to hold it in place. From underneath, reach between two of the flaps and gently pull the inner layer of paper up and outward.
Do this for all four corners first — these become the outer petals. Then, find the smaller triangular flaps between each outer petal and pull those up carefully as well. These form the inner petals.
Adjust each petal slightly to create a round, open bloom shape. Curve the petal tips gently over a pen or your fingertip for a more realistic look.
Step 6: Shape and Finish
Gently press the base of the lotus downward to flatten and stabilize it. Curve each petal to your preference — some people love a tight, compact lotus while others prefer fully open petals. Neither is wrong.
For gift wrapping use, a tighter shape is easier to attach; for home decor, an open bloom looks more dramatic.
Creative Ways to Use Your Origami Lotus for Home Decor

Once you’ve mastered the basic fold, a whole world of decorative possibilities opens up. Here are some ideas that go beyond simply placing a single flower on a shelf:
- Floating centerpiece: Place several paper lotus flowers in a shallow bowl of water (use waterproof paper or coat with Mod Podge first) for a stunning table display.
- Wall art: Mount lotus flowers in different sizes and colors on a canvas or frame for a textured floral wall installation.
- Seasonal wreaths: Attach lotus blooms to a grapevine wreath base for an elegant seasonal accent.
- Candle holders: Set tea light candles inside large lotus blooms for a warm, ambient glow at dinner parties.
- Mobile or hanging display: String multiple lotus flowers at different heights using clear fishing line for a dreamy hanging installation.
These ideas are part of a broader category of home craft projects quick enough to complete in an afternoon but impressive enough to keep on display for months. Origami specifically rewards repetition — the more you make, the faster and more precise your folds become.
Using the Origami Lotus for Gift Wrapping: Tips and Techniques

An origami lotus on a gift instantly communicates thoughtfulness. It tells the recipient that you invested real time and creativity, not just money. Here’s how to use it effectively in your gift presentations: Match the paper to the gift: Use the same wrapping paper cut into a square for the lotus as you used to wrap the box.
This creates a cohesive, intentional look that feels professionally styled. It’s one of those handmade gift craft ideas that actually looks more expensive than it is. Attach it securely: Use a small piece of double-sided tape or a dab of hot glue to fix the lotus to the top of your gift.
For gift bags, fold the tissue paper into a lotus shape directly — no separate attachment needed. Add a tag: Slip a handwritten gift tag beneath the lotus petals. The flower acts as a natural holder, and it keeps the tag visible without needing a ribbon or string.
Layer with foliage: Tuck a few sprigs of eucalyptus, dried lavender, or faux greenery beneath the lotus for a botanical, gift-shop aesthetic that requires zero floral arranging skills.
Beginner Tips for a Better Origami Lotus Every Time

Even experienced folders sometimes end up with a lotus that looks a little lopsided or won’t hold its shape. These practical tips will help you get consistent, beautiful results from the start:
- Crease sharply: Every fold should be pressed firmly with your fingernail or a bone folder. Soft folds lead to a floppy, imprecise flower.
- Work on a hard surface: A table or cutting mat gives you the resistance needed for clean folds. Soft surfaces like beds or cushions make precision nearly impossible.
- Don’t rush the petal pulling: The final petal-opening step requires patience. Pull slowly and evenly to avoid tearing, especially with thinner paper.
- Practice with plain paper first: Before using your beautiful metallic or patterned sheets, run through the steps with regular printer paper cut into a square. This builds muscle memory without wasting special materials.
If you enjoy hands-on projects like this, you’ll love exploring other fun crafts to make at home that require no prior experience. Origami is a fantastic entry point, but it rarely stays as your only craft hobby for long.
Conclusion: Your Paper Lotus Journey Starts Here
Knowing how to make an origami lotus flower for home decor or gift wrapping is a genuinely useful skill that pays dividends every time a birthday, holiday, or housewarming rolls around. With just a square piece of paper and about 15 minutes, you can create something that genuinely delights people — and looks far more complex than it actually is. The origami lotus is one of those rare crafts that scales beautifully: make one as a thoughtful gift topper, or make fifty to fill a vase for a wedding centerpiece.
The key takeaway is simple — start with the right paper, fold with intention, and don’t skip the sharp creases. Once you’ve made your first successful lotus, you’ll want to make a dozen more. Every fold gets faster, cleaner, and more satisfying.
This is the kind of craft that sticks with you. Ready to start folding? Grab a square of paper right now and work through the steps in this guide.
Share your finished lotus in the comments below — we’d love to see your color choices and how you used it! Tag a friend who would love this project, or save this page for your next creative afternoon.
Frequently Asked Questions
Q: What size paper is best for making an origami lotus flower for home decor? A: A 15×15 cm (6×6 inch) square is ideal for beginners making a standard-sized lotus. For larger display pieces, try 20×20 cm or bigger.
Smaller sheets (10×10 cm) work well for gift toppers or miniature arrangements but require more precise folding. Q: Can I use regular printer paper to make an origami lotus? A: Yes, you can — but you’ll need to cut it into a perfect square first.
Printer paper is slightly thicker than origami paper, which can make the layers bulkier and harder to pull apart during the petal-opening step. It’s perfectly fine for practice rounds before using specialty paper. Q: How do I make the origami lotus flower waterproof for a floating centerpiece?
A: Apply two to three light coats of clear acrylic spray or Mod Podge to the finished lotus, letting each coat dry completely before applying the next. This seals the paper fibers and adds water resistance, though extended submersion will still eventually cause damage. For best results, float the lotus in water only for the duration of your event.
Q: How long does it take to learn how to make an origami lotus flower for home decor or gift wrapping? A: Most beginners can complete their first lotus in 20 to 30 minutes by following a step-by-step guide. By the third or fourth attempt, the average time drops to around 10 to 15 minutes.
The folding pattern is repetitive by design, which means it becomes intuitive very quickly — even for people with no prior origami experience. Q: What types of paper give the most beautiful results for an origami lotus? A: Metallic foil paper and two-toned origami paper consistently produce the most striking lotus flowers.
The contrast between the inner and outer petal layers becomes a design feature when you use paper with different colors on each side. Patterned washi paper also works beautifully and adds a Japanese-inspired aesthetic that pairs well with both modern and traditional home decor styles.