Lamp Cord Safety 101: What Every DIY Lighter Should Know
Have you ever grabbed a pair of wire strippers, a vintage bottle, and a lamp cord kit — and felt that rush of creative excitement? Making your own lamp is one of the most rewarding DIY handmade gifts you can create. But before you plug anything in, there’s something you absolutely cannot skip: understanding Lamp Cord Safety 101: What Every DIY Lighter Should Know.
Every year, thousands of home fires are traced back to faulty wiring — and many could have been prevented with basic knowledge. This guide walks you through everything from choosing the right cord to avoiding the most common mistakes DIY lamp makers make. Whether you’re a first-timer or you’ve built a dozen lamps already, this is the safety foundation you need.
Why Lamp Cord Safety Matters More Than You Think

It’s easy to underestimate electrical risk when you’re working with something as simple as a lamp cord. After all, it’s just a cord and a socket, right? Wrong.
Improper wiring is one of the leading causes of residential electrical fires in the U.S., with the National Fire Protection Association (NFPA) reporting that home electrical failures cause roughly 46,700 fires annually. DIY lamp projects often involve repurposing materials — bottles, driftwood, pipes, ceramics — and routing cords through unconventional paths. This increases risk if the cord is the wrong type, too thin, or improperly secured.
Safety isn’t just a technicality. It’s what separates a beautiful lamp from a fire hazard. The good news?
Once you understand the basics of lamp cord safety, building your own lamp becomes both safe and deeply satisfying. Let’s break it all down.
Choosing the Right Lamp Cord: The Foundation of Lamp Cord Safety 101

Not all lamp cords are created equal. The first step in Lamp Cord Safety 101 is selecting a cord that matches your lamp’s wattage and design requirements. Using the wrong gauge wire is one of the most common — and dangerous — mistakes beginners make.
Understanding Wire Gauge (AWG)
Wire gauge determines how much electrical current a cord can safely carry. In the U.S., lamp cords are typically rated in American Wire Gauge (AWG). The lower the AWG number, the thicker the wire and the more current it can handle.
- 18 AWG — Standard for most table lamps (up to 10 amps / 1,250 watts)
- 16 AWG — Better for floor lamps or high-wattage bulbs
- 14 AWG — Heavy-duty use, rarely needed for home lamps
For most DIY pendant or table lamps using LED or standard incandescent bulbs, 18 AWG SPT-1 or SPT-2 lamp cord is more than sufficient. SPT-2 has a thicker insulation layer and is preferred for lamps placed in high-traffic areas.
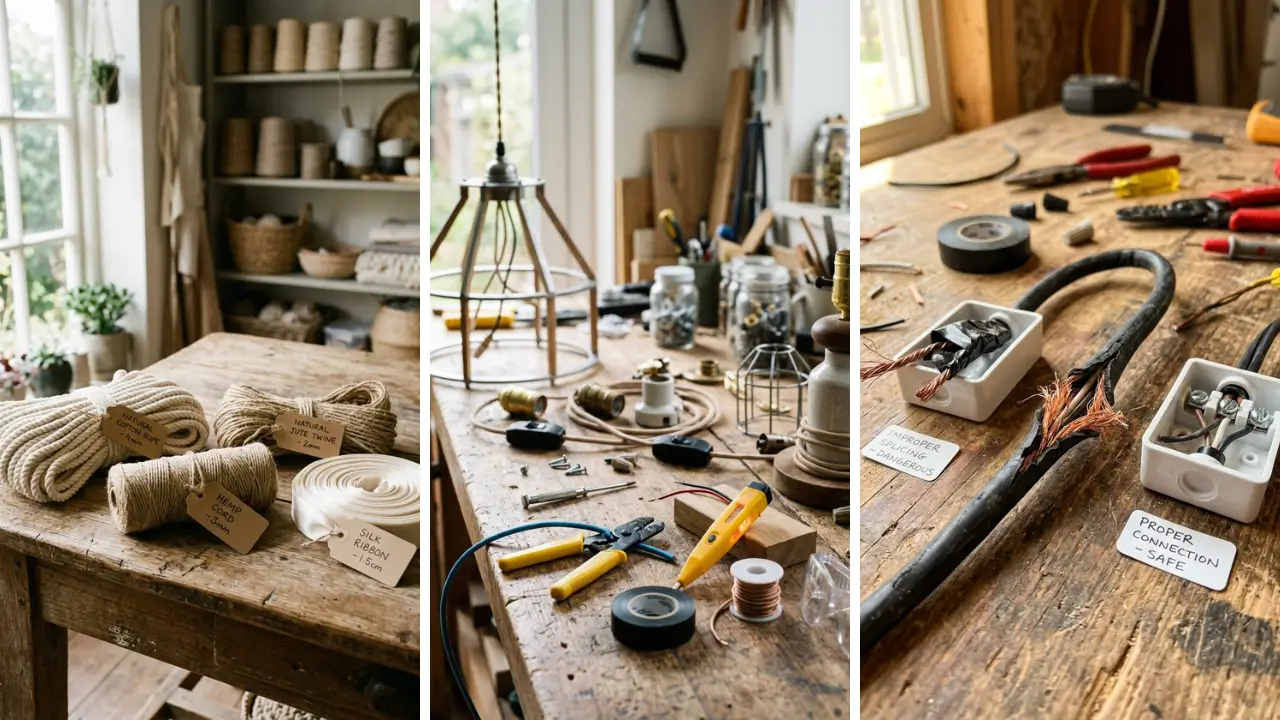
Cord Types to Know

SPT-1 cords are lighter and more flexible — great for decorative or pendant lamps. SPT-2 cords are thicker and more durable, ideal for floor lamps or table lamps that see daily use. Always check the cord’s UL (Underwriters Laboratories) listing before purchasing — this certification confirms it meets U.S.
electrical safety standards.
The Right Tools and Materials for Safe DIY Lamp Wiring

Good tools make safe wiring significantly easier. Here’s what every DIY lamp maker should have on hand before starting a project:
- Wire strippers — For cleanly removing insulation without nicking the copper
- Needle-nose pliers — For bending wire ends into hooks around terminal screws
- Voltage tester — Non-negotiable for confirming circuits are dead before working
- UL-listed lamp socket — Never use uncertified components
- In-line switch (optional) — Adds convenience and reduces plug wear
You don’t need expensive professional-grade tools. Many of these can be found at hardware stores or even sourced from dollar store crafts ideas roundups that highlight affordable supplies for home projects. The key is making sure every component is rated for electrical use.
Step-by-Step Wiring: What Every DIY Lighter Should Know

Wiring a lamp socket isn’t complicated — but it must be done in the correct order with full attention to polarity. Here’s a simplified but complete breakdown.
Step 1: Identify the Neutral and Hot Wires
In a standard lamp cord, one wire is the neutral (silver/ridged) and one is the hot (smooth). The neutral wire connects to the silver screw on the socket. The hot wire connects to the brass (gold) screw.
Getting this reversed can create a shock hazard even when the lamp appears to work fine.
Step 2: Strip the Wire Ends Correctly

Strip approximately 3/4 inch of insulation from each wire end. Avoid cutting too deep — nicked copper strands weaken the connection and create heat buildup. Twist the strands clockwise so they hold together tightly.
Step 3: Connect to the Socket
Bend each wire end into a clockwise hook using needle-nose pliers. Loop the hook around the matching terminal screw and tighten firmly. A loose connection is a fire risk — snug is the standard.
No bare copper should be exposed outside the terminal.
Step 4: Reassemble and Test Safely
Before inserting a bulb, do a visual check: no exposed wire, all connections tight, cord not pinched. Then insert a low-wattage bulb and plug in. If the bulb flickers or you smell anything unusual, unplug immediately and recheck your connections.
Common Lamp Cord Safety Mistakes and How to Avoid Them

Even experienced crafters make these errors. Knowing them in advance keeps your project safe from start to finish.
- Using extension cords as permanent wiring — Extension cords are rated for temporary use only. Never hardwire a lamp with one.
- Overloading the socket with a high-wattage bulb — Always match bulb wattage to the socket’s rating (usually marked inside the socket cap).
- Running cords under rugs — Heat cannot escape, leading to insulation breakdown and fire risk.
- Skipping the strain relief — A cord grip or strain relief bushing at the lamp base prevents tension on the electrical connections inside.
- Using non-UL-listed components — Cheap imported sockets or switches may lack proper insulation. Always buy UL-listed parts.
These aren’t hypothetical warnings — they’re lessons from real incidents. Taking a few extra minutes to do things correctly is always worth it, especially when the finished lamp becomes one of your proudest home craft projects quick and easy wins.
Safety Tips for Specific DIY Lamp Styles

Different lamp styles come with different safety considerations. Here’s what to watch for based on your project type.
Bottle Lamps
When drilling through glass or ceramic, always use the correct drill bit and work slowly with water cooling. Route the cord through the bottle using a lamp cord kit with a proper bottle adapter. Ensure the cord doesn’t rub against sharp glass edges inside — use a rubber grommet if needed.
Pendant Lamps
Pendant lamps hang from the ceiling, which means the cord bears the fixture’s weight. Never rely on the electrical cord alone to support a pendant lamp. Use a separate support wire or strain relief hook rated for the lamp’s weight.
The cord should carry electricity only — not mechanical load.
Pipe and Industrial-Style Lamps
Metal pipe lamps require special attention because metal conducts electricity. Ensure all wiring inside the pipe is properly insulated and that no bare wire contacts the pipe itself. Use heat-resistant wire sleeves inside metal conduits for added protection.
Where Lamp Making Meets Creativity and Gifting
Once you’ve got the safety side handled, the creative possibilities are genuinely endless. A handmade lamp is one of the most impressive and personal gifts you can give. People treasure handcrafted items precisely because of the care and skill they represent.
If you’re exploring more creative directions, check out these handmade gift craft ideas that pair beautifully with lamp-making techniques. You can also combine lamp projects with other weekend activities. Exploring fun crafts to make at home can give you inspiration for complementary decor pieces — think matching lampshades, woven baskets, or painted side tables — that complete the look of your handmade lamp.
Quick Safety Checklist Before You Plug In
Before every lamp you build, run through this final checklist:
- ✅ UL-listed cord, socket, and plug confirmed
- ✅ Wire gauge matches intended wattage
- ✅ Neutral wire to silver screw, hot wire to brass screw
- ✅ All terminal screws tightened firmly
- ✅ No exposed copper wire visible
- ✅ Strain relief installed at cord entry point
- ✅ Bulb wattage does not exceed socket rating
- ✅ Cord is not kinked, pinched, or routed under rugs
Print this out and tape it to your craft table. It takes 60 seconds to run through and could prevent a serious hazard.
Conclusion: Build Beautiful Lamps the Right Way
Making your own lamp is one of the most satisfying creative projects you can take on. The warmth of handmade light — literally and figuratively — transforms a space in a way that store-bought fixtures simply can’t replicate. But that beauty is only meaningful when it’s built safely.
Lamp Cord Safety 101: What Every DIY Lighter Should Know comes down to a few core principles: use the right materials, wire with correct polarity, secure everything properly, and always buy UL-listed components. These aren’t complicated steps — they’re habits that become second nature after your first safe, successful build. Whether you’re making your first bottle lamp or your tenth industrial pendant, these fundamentals apply every single time.
Safety and creativity aren’t opposites — they go hand in hand. Now that you’re equipped with the knowledge, go build something brilliant. Ready to start your next lamp project?
Share your lamp-making photos in the comments below, or drop your questions — we’d love to see what you’re creating. And if you’re looking for your next creative challenge, explore more project ideas to keep the inspiration going!
Frequently Asked Questions
Q: What is the most important thing to know in Lamp Cord Safety 101 for beginners? A: The single most critical concept in Lamp Cord Safety 101 is correct polarity — connecting the neutral wire to the silver screw and the hot wire to the brass screw. Getting this wrong can create a shock hazard even when the lamp appears to function normally.
Always double-check your connections before plugging in. Q: Can I use any lamp cord I find at a hardware store? A: Not all lamp cords are equal.
Always choose a cord that is UL-listed and has the appropriate AWG rating for your lamp’s wattage. For most standard table lamps, 18 AWG SPT-1 or SPT-2 cord is sufficient. Avoid cheap, uncertified cords, especially for gifts or lamps used daily.
Q: How do I know if my DIY lamp wiring is safe before I plug it in? A: Run through a visual inspection: check that no bare copper is exposed, all screw terminals are tight, the cord has a proper strain relief at the base, and the bulb wattage matches the socket rating. A non-contact voltage tester can also help verify the circuit is behaving correctly once powered on.
Q: What every DIY lighter should know about using LED bulbs in homemade lamps? A: LED bulbs are highly recommended for DIY lamp projects because they run cooler and draw far less wattage than incandescent bulbs. This reduces heat buildup in enclosed or unconventional lamp bases like bottles or wood.
Just make sure the LED bulb’s wattage equivalent doesn’t exceed the socket’s maximum rating printed inside the cap. Q: Is it safe to make lamps as DIY handmade gifts for others? A: Absolutely — as long as you follow proper safety protocols.
A handmade lamp using UL-listed components, correctly wired with the right gauge cord, is as safe as a commercially made lamp. Always include a note with the gift specifying the maximum bulb wattage to help the recipient use it safely for years to come.