How to Create a DIY Gallery Wall: Step-by-Step Layout Guide for Stunning Results
Staring at a blank wall in your living room, wondering how to fill that empty space without spending a fortune? You’re not alone. A gallery wall is one of the most impactful ways to personalize your home, showcase meaningful memories, and create a stunning focal point that sparks conversation.
Learning how to create a DIY gallery wall isn’t as complicated as it might seem—with the right step-by-step layout guide, you can transform any boring wall into a curated masterpiece. In this comprehensive guide, you’ll discover everything from choosing the perfect wall location to arranging frames in visually pleasing patterns. Whether you’re working with family photos, artwork, or a mix of decorative elements, these proven techniques will help you achieve professional-looking results.
Let’s dive into the creative process and turn your vision into reality.
Why a DIY Gallery Wall Transforms Your Space

A gallery wall does more than just fill empty space—it tells your story. Unlike single artwork pieces, a well-designed gallery wall creates visual interest through varied sizes, textures, and frames. It becomes a conversation starter and reflects your personality in ways that store-bought décor simply cannot match.
The beauty of creating your own gallery wall lies in complete customization. You control the theme, color palette, and arrangement. Plus, it’s budget-friendly since you can incorporate items you already own or find at thrift stores.
If you enjoy fun crafts to make at home, gallery walls offer the perfect weekend project. The satisfaction of stepping back and seeing your completed creation rivals any expensive interior design service.
Essential Materials You’ll Need to Create a DIY Gallery Wall

Before starting your project, gather these essential supplies to ensure smooth execution:
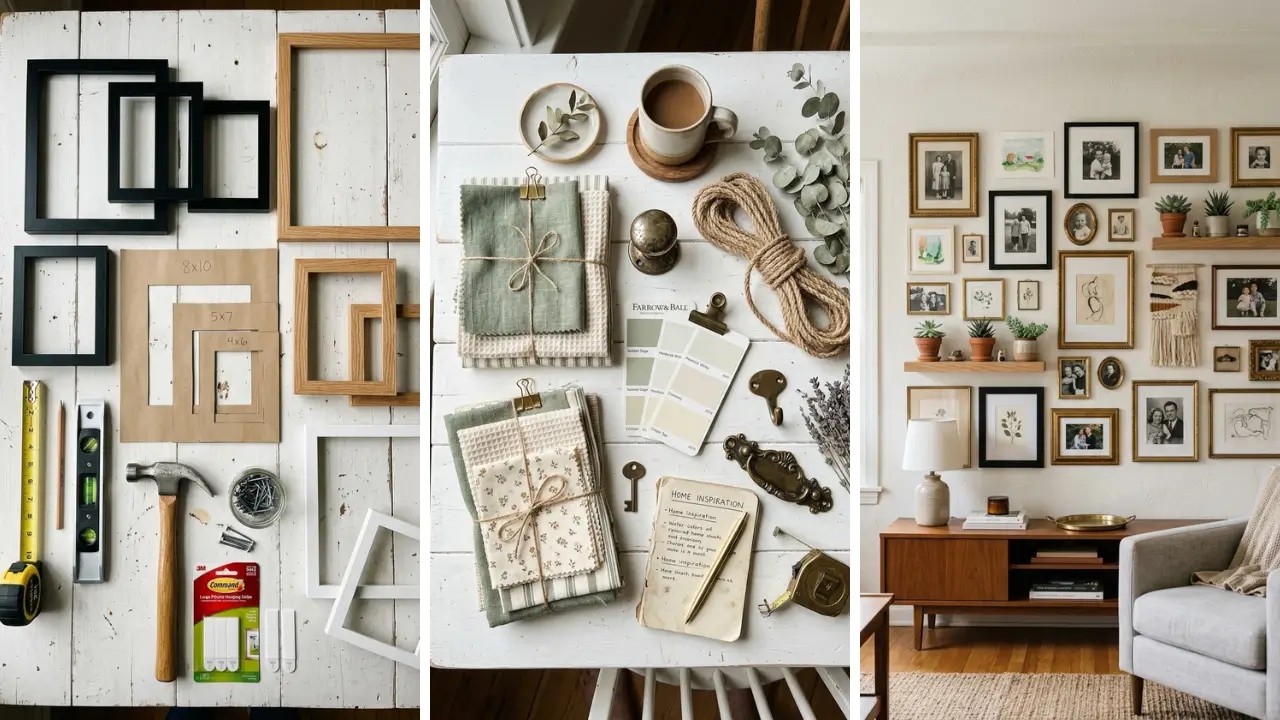
- Frames in various sizes – Mix different dimensions for visual interest
- Painter’s tape or kraft paper – For creating templates
- Level tool – Essential for straight hanging
- Measuring tape – Accurate spacing matters
- Pencil – For marking wall positions
- Picture hanging hardware – Nails, hooks, or adhesive strips depending on wall type
- Hammer or drill – Based on your hanging method
Don’t overlook the importance of quality frames. You can find amazing options through dollar store crafts ideas that look far more expensive than their price tag suggests. Spray painting mismatched frames in a unified color creates cohesion without breaking the bank.
Step 1: Choose the Perfect Wall Location

Not every wall works equally well for gallery displays. The ideal location should be visible from common areas, have adequate lighting, and offer enough uninterrupted space for your planned arrangement. Popular gallery wall locations include:
- Above the sofa in living rooms
- Staircase walls following the incline
- Entryway or hallway spaces
- Dining room accent walls
- Bedroom areas above headboards
Consider foot traffic patterns and natural light sources. Walls receiving harsh direct sunlight may fade photographs over time, while areas near high-traffic zones risk accidental bumps.
Step 2: Select a Cohesive Theme and Style

The most successful gallery walls share a unifying element. This doesn’t mean everything must match perfectly—controlled variety creates interest while cohesion prevents chaos.
Theme Options to Consider
Color-coordinated: Choose artwork and photos sharing similar color palettes. Black and white photography creates timeless elegance, while warm earth tones feel inviting. Subject-based: Family photos, travel memories, botanical prints, or vintage maps all work beautifully when grouped intentionally.
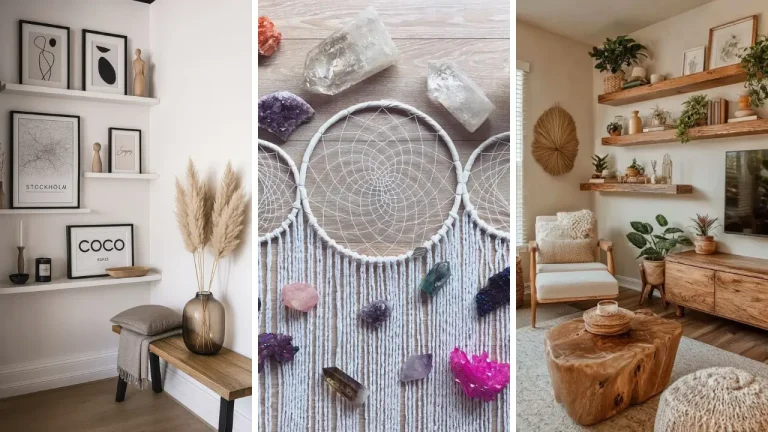
Mixed media: Combine framed artwork with mirrors, decorative plates, woven baskets, or dimensional objects for textural variety. Frame style matters too. Matching frames create clean, uniform aesthetics.
Eclectic mixed frames feel bohemian and collected over time. Both approaches work—just commit to one direction.
Step 3: Plan Your Layout Before Hanging

This step separates amateur attempts from professional-looking results. Never start hammering without planning first—trust this advice.
The Paper Template Method
Trace each frame onto kraft paper or newspaper, then cut out the shapes. Use painter’s tape to arrange these templates on your wall. This allows unlimited adjustments without creating unnecessary nail holes.
Step back frequently and view from different angles. Live with your paper arrangement for a day before committing. What looks perfect up close might feel unbalanced from across the room.
Floor Layout Technique
Alternatively, arrange your actual frames on the floor first. Create your desired pattern, then photograph it from above for reference during installation. This technique works especially well for complex arrangements.
For those who enjoy home craft projects quick results, the floor method offers faster visualization while still ensuring proper planning.
Popular Gallery Wall Layout Patterns That Work

Struggling with arrangement ideas? These proven patterns consistently deliver stunning results:
Grid Layout
Equal-sized frames arranged in neat rows and columns. This modern, symmetrical approach works best in contemporary spaces. Maintain consistent spacing—typically 2-3 inches between frames.
Salon Style
Frames of varying sizes arranged organically, filling the wall from floor to ceiling. This eclectic European style suits collected, maximalist aesthetics. Start with your largest piece as the anchor.
Horizontal Row
Frames aligned along a single horizontal axis. Perfect for narrow spaces or above furniture. Keep the center line at eye level (approximately 57-60 inches from the floor).
Staircase Ascending
Frames following the angle of stair railings. This dynamic arrangement transforms often-neglected stairwell walls into captivating displays.
Step 4: Establish Your Starting Point

Every gallery wall needs an anchor—a starting piece around which everything else orbits. Your largest frame or most meaningful artwork typically serves this role best. Position your anchor piece first, then build outward.
For above-furniture arrangements, center your anchor over the piece below. Standard practice places the center of your gallery at 57 inches from the floor—average museum eye level. Mark your anchor’s position lightly with pencil.
Double-check measurements before making any permanent holes.
Step 5: Master Proper Spacing Techniques

Consistent spacing creates visual harmony. Here are spacing guidelines that work:
- Between frames: 2-3 inches typically works best
- Above furniture: 6-8 inches between furniture top and lowest frame
- Wall edges: Leave breathing room—don’t crowd corners
Tighter spacing creates intimacy and connection between pieces. Wider spacing feels airier and works in larger rooms. Choose based on your aesthetic preference and room scale.
Step 6: Install Your Gallery Wall Properly
With planning complete, installation becomes straightforward. Follow these techniques for secure, level hanging: Use appropriate hardware for your wall type. Drywall needs anchors for heavier pieces.
Plaster walls require special consideration. When in doubt, use picture hanging strips for damage-free installation. Hang the anchor first.
Check level carefully—everything else aligns from this piece. Take your time getting this right. Work outward systematically.
Install pieces immediately adjacent to your anchor next, then continue expanding. Reference your paper templates or floor photograph constantly. Check level frequently.
Even small deviations compound as you add more frames. Better to catch and correct early.
Creative Elements Beyond Traditional Frames
Gallery walls needn’t contain only photographs. Incorporating diverse elements adds depth and personality:
- Mirrors – Reflect light and add dimension
- Decorative plates – Vintage finds create charming focal points
- Textile art – Woven pieces or framed fabric add texture
- Shelves – Small floating shelves allow rotating displays
- Clocks – Functional art serving dual purposes
- Letters or monograms – Personalized touches
Creating personalized elements for your gallery makes wonderful DIY handmade gifts for loved ones too. Consider crafting custom pieces that hold special meaning.
Budget-Friendly Tips for Stunning Results
Professional-looking gallery walls don’t require professional budgets. These strategies maximize impact while minimizing costs: Thrift store hunting: Quality frames often cost just dollars at secondhand shops. The artwork inside doesn’t matter—you’ll replace it anyway.
Print your own art: Download digital prints, use personal photographs, or frame pages from old calendars or books. Spray paint uniformity: Mismatched thrifted frames become cohesive collections with a single can of spray paint. Create your own artwork: Simple abstract paintings, pressed flowers, or children’s artwork all deserve framing.
Exploring handmade gift craft ideas often yields gallery-worthy pieces.
Common Gallery Wall Mistakes to Avoid
Learn from others’ errors to achieve better results: Hanging too high: This common mistake makes walls feel disconnected. Remember the 57-inch center guideline. Insufficient planning: Skipping the template phase results in unnecessary holes and frustration.
Plan twice, hang once. Overcrowding: Leave breathing room. Not every inch needs filling.
White space provides visual rest. Ignoring furniture relationships: Gallery walls should complement, not compete with, furniture below. Keep total width within furniture boundaries.
Forgetting about lighting: Consider adding picture lights or adjusting existing fixtures to highlight your display properly.
Maintaining and Updating Your Gallery Wall
Gallery walls aren’t permanent installations—they should evolve with you. Build in flexibility from the start. Use picture hanging strips allowing easy repositioning.
Incorporate a floating shelf for items you’ll swap seasonally. Choose frames that open easily for photograph updates. Dust frames monthly with microfiber cloths.
Check hanging hardware annually, especially in older homes where walls shift. Replace faded prints before they detract from overall presentation.
Conclusion: Your Gallery Wall Journey Starts Now
Creating a stunning gallery wall transforms empty spaces into personalized statements. By following this step-by-step layout guide, you’ve learned how to create a DIY gallery wall that looks professionally designed without professional costs. Remember the key principles: choose the right wall, plan before hanging, maintain consistent spacing, and don’t be afraid to mix elements creatively.
Your gallery wall should reflect your unique story and style. The beauty of DIY projects lies in making spaces truly yours. Start gathering your frames and photographs today—your blank wall is waiting for its transformation.
Ready to begin your gallery wall project? Share your progress in the comments below, or tag us in your completed creations on social media. We’d love to see how you’ve personalized these techniques for your space!
Frequently Asked Questions
Q: How many frames should I use for a DIY gallery wall? A: There’s no strict rule, but most successful gallery walls contain 5-15 pieces. Start smaller—you can always add more.
The wall size and frame dimensions matter more than quantity. A large wall might need 12+ pieces, while a small entryway looks complete with just 5-7. Q: What’s the best way to create a DIY gallery wall layout without making holes?
A: Use the paper template method first—trace frames onto kraft paper, cut out shapes, and tape them to your wall. Alternatively, use damage-free picture hanging strips like Command Strips. These support significant weight while allowing easy removal and repositioning.
Q: How high should I hang my gallery wall? A: Center your gallery wall arrangement at approximately 57 inches from the floor—standard museum eye level. When hanging above furniture, maintain 6-8 inches between the furniture top and your lowest frame for proper visual connection.
Q: Can I mix different frame styles in one gallery wall? A: Absolutely! Mixing frame styles creates eclectic, collected-over-time aesthetics.
For cohesion, maintain one unifying element—similar colors, matching mat boards, or consistent spacing. Alternatively, spray paint mismatched frames in a single color for instant coordination. Q: How do I create a DIY gallery wall on a tight budget?
A: Shop thrift stores for frames, print photographs at home or through budget services, and create simple artwork yourself. Spray painting mismatched frames creates expensive-looking uniformity. Frame meaningful items like postcards, fabric swatches, or children’s artwork instead of purchasing prints.