12 Coffee Table Makeover Ideas That Look Like Designer Pieces
Is your coffee table looking tired and outdated? You don’t need to spend hundreds on a new designer piece when you can transform what you already have. A simple makeover can turn any boring table into a stunning centerpiece.
These 12 coffee table makeover ideas that look like designer pieces will inspire your next project. From elegant marble effects to rustic farmhouse charm, there’s something for every style. Let’s dive in…
1. Elegant Faux Marble Top

- Contact paper with marble pattern
- Squeegee or credit card
- Scissors or craft knife
- Rubbing alcohol for cleaning
Transform any flat surface into a luxurious marble masterpiece without the hefty price tag. This technique works beautifully on wood, laminate, or glass tops. The result looks incredibly realistic and costs under twenty dollars.
Start by thoroughly cleaning your table surface with rubbing alcohol to remove all oils and dust. Measure and cut your contact paper with an extra inch on each side for wrapping. Apply slowly from one end, using a squeegee to eliminate air bubbles.
If you enjoy fun crafts to make at home, this project is perfect for beginners. The transformation takes less than an hour to complete.
2. Rustic Distressed Farmhouse
- Chalk paint in white or cream
- Sandpaper (120 and 220 grit)
- Clear wax or polyurethane
- Paint brushes
The distressed farmhouse look remains incredibly popular in modern home decor. This technique adds character and warmth to any plain coffee table. You’ll create that coveted vintage appearance that designers charge premium prices for.
Apply two coats of chalk paint, allowing proper drying time between each application. Once completely dry, use sandpaper to strategically distress edges and corners. Focus on areas that would naturally show wear over time.
Seal your masterpiece with clear wax for authentic farmhouse appeal or polyurethane for extra durability. This technique also works great for other home craft projects quick transformations around your house.
3. Sleek Two-Tone Modern

- Two contrasting paint colors
- Painter’s tape
- Foam roller
- Primer
Create a high-end contemporary look by painting your table in two contrasting colors. This designer technique instantly elevates even the most basic furniture piece. Think black and gold, navy and white, or gray and blush pink.
After priming, apply your base color to the entire table and let it cure completely. Use painter’s tape to create clean geometric lines where your second color will go. Most designers paint legs in a different shade than the tabletop.
Remove the tape while the second color is still slightly tacky for the crispest lines possible. This prevents peeling and gives you that professional showroom finish every time.
4. Glamorous Gold Leaf Accent

- Gold leaf sheets
- Gold leaf adhesive
- Soft brush
- Clear sealant spray
Add luxurious gold accents to your coffee table for an upscale designer look. This technique works beautifully on edges, corners, or as decorative patterns. The shimmer catches light and creates stunning visual interest.
Apply adhesive only where you want the gold leaf to stick and wait until it becomes tacky. Gently press the delicate sheets onto the adhesive using a soft brush. Don’t worry about imperfections—they add authentic character.
Seal everything with a clear protective coat to prevent tarnishing and flaking over time. This glamorous makeover turns ordinary tables into conversation pieces instantly.
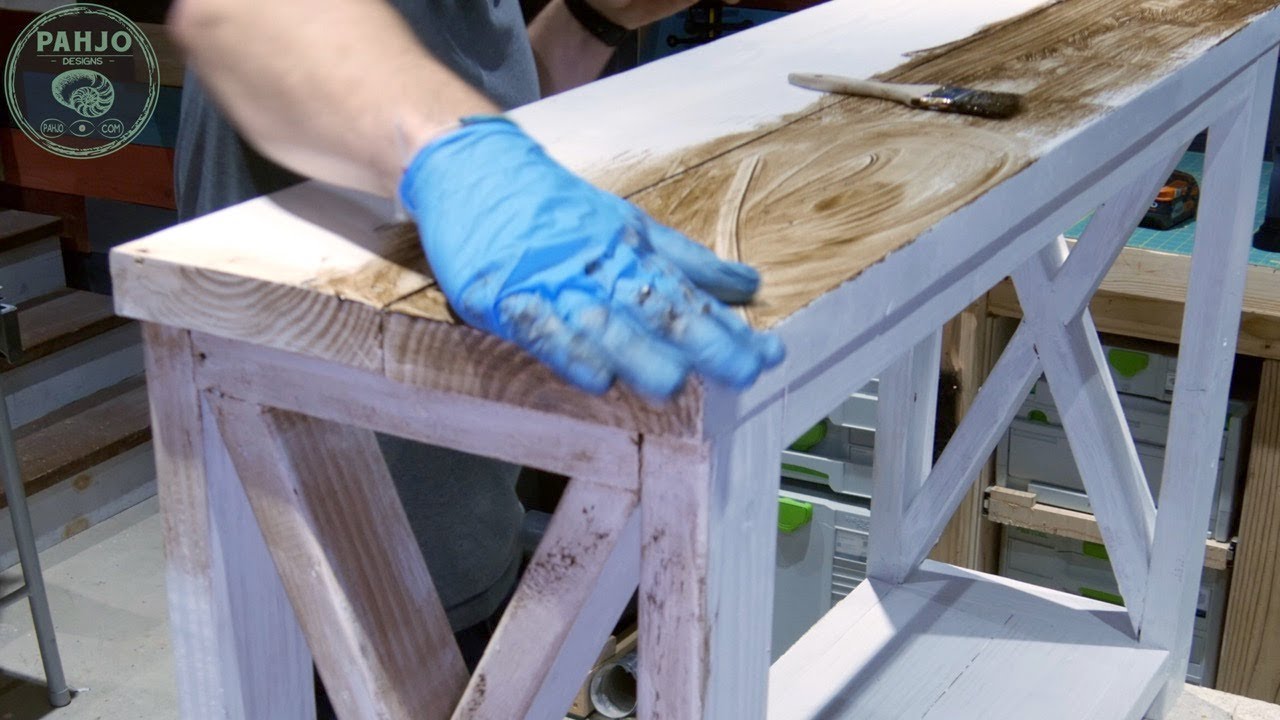
5. Coastal Whitewashed Beauty

- White latex paint
- Water
- Clean rags
- Sandpaper
Achieve that breezy coastal aesthetic with a simple whitewashing technique on wooden tables. This look brings relaxed beach vibes into any living space. The natural wood grain shows through for beautiful organic texture.
Mix white paint with water in a one-to-one ratio for the perfect whitewash consistency. Apply the mixture with a brush, working in the direction of the wood grain. Immediately wipe away excess with clean rags.
Build up additional thin layers until you reach your desired level of coverage. Some areas can be left more transparent than others for added visual depth and interest.
6. Stunning Decoupage Masterpiece

- Decorative paper or fabric
- Mod Podge
- Foam brush
- Clear polyurethane
Transform your tabletop into a unique artistic statement using decoupage techniques. Choose botanical prints, vintage maps, or bold geometric patterns. This method allows unlimited creative possibilities for personalization.
Apply a layer of Mod Podge to your clean table surface and carefully lay your chosen material. Smooth out all bubbles and wrinkles working from the center outward. Add another coat of adhesive over the top.
After drying completely, apply multiple coats of clear polyurethane for a durable protective finish. This creates a professional-looking surface that withstands daily use beautifully.
7. Industrial Concrete Effect

- Concrete effect paint kit
- Trowel or putty knife
- Fine sandpaper
- Concrete sealer
Create that trendy industrial concrete aesthetic without the weight or expense of real concrete. This modern look pairs perfectly with minimalist and contemporary decor styles. The textured finish adds sophisticated visual interest.
Apply the concrete paint in thin layers using a trowel or putty knife for authentic texture. Work in random patterns to mimic natural concrete variations. Allow each layer to dry before adding more.
Once cured, lightly sand any overly rough spots with fine sandpaper for comfort. Seal with a concrete-specific sealer to protect against moisture and stains effectively. This project also makes excellent DIY handmade gifts for housewarming occasions.
8. Elegant Stenciled Patterns
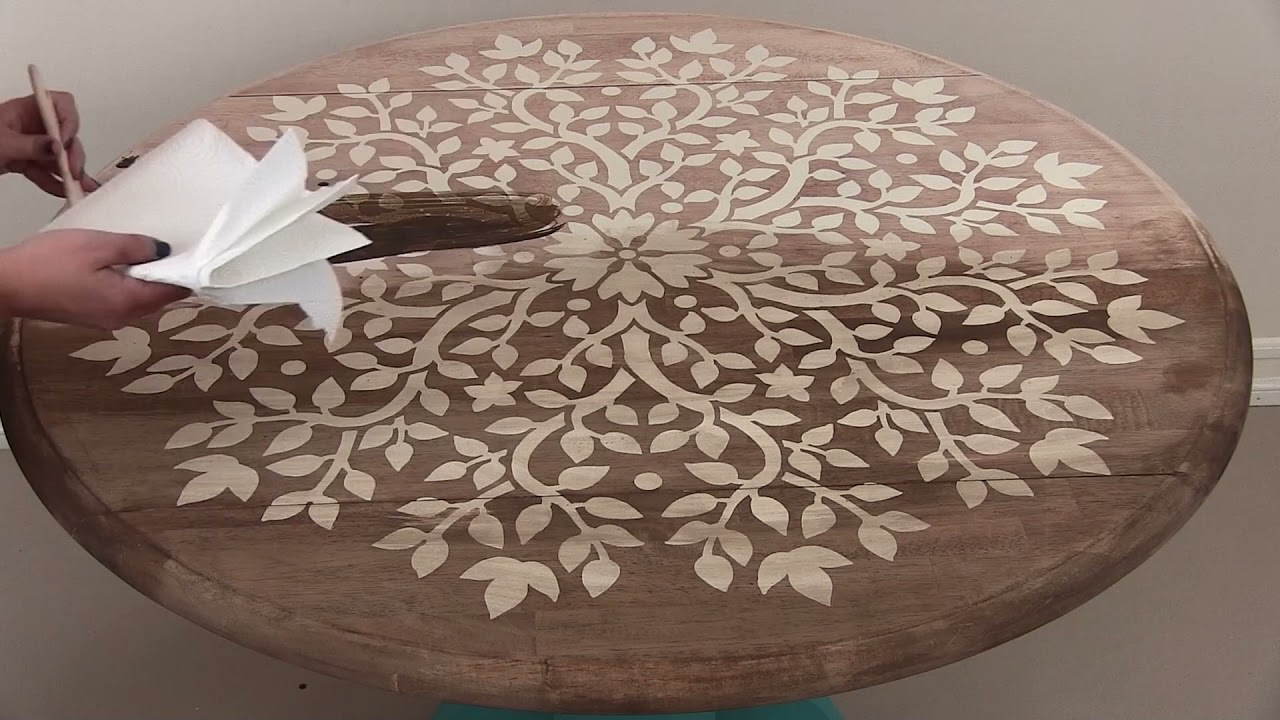
- Large stencils
- Stencil brush or sponge
- Acrylic paint
- Spray adhesive
Add designer-worthy patterns to your coffee table using stenciling techniques. Moroccan tiles, damask, or geometric designs create instant visual impact. This method gives you custom furniture without custom prices.
Secure your stencil with spray adhesive to prevent movement and paint bleeding. Use a nearly dry brush with minimal paint to dab color through the openings. Less paint prevents seepage under stencil edges.
Carefully reposition your stencil to continue the pattern across the entire surface. Touch up any imperfections after removing the stencil completely from your tabletop.
9. Reclaimed Wood Plank Top

- Thin wood planks or pallet wood
- Wood stain
- Wood glue
- Finishing nails
Cover an old tabletop with reclaimed wood planks for instant rustic charm. This technique hides damaged surfaces while adding tremendous character. The natural wood variations create unique one-of-a-kind pieces.
Cut planks to fit your tabletop, varying widths for more visual interest if desired. Stain each piece in slightly different shades for that authentic reclaimed appearance. Allow complete drying before assembly.
Attach planks using wood glue and small finishing nails for a secure bond. Sand edges smooth and seal with polyurethane for lasting protection and durability.
10. Luxurious Velvet Wrapped

- Velvet fabric
- Spray adhesive
- Staple gun
- Glass or acrylic top
Wrap your tabletop in sumptuous velvet for an unexpectedly glamorous transformation. This technique works best on tables with removable tops or flat surfaces. The soft texture adds incredible luxury to any room.
Cut velvet larger than your tabletop with several inches of extra fabric on all sides. Apply spray adhesive to the surface and carefully smooth the velvet into place. Pull taut to eliminate any wrinkles or bunching.
Staple excess fabric underneath or around edges for a clean finished look. Top with glass or acrylic to protect the delicate fabric from spills and wear. You can find affordable supplies at stores offering dollar store crafts ideas for budget-friendly options.
11. Chic Hairpin Leg Swap

- Hairpin legs (set of four)
- Screwdriver or drill
- Wood screws
- Measuring tape
Instantly modernize any coffee table by replacing old legs with trendy hairpin legs. This simple swap creates a mid-century modern aesthetic immediately. Available in various heights, colors, and finishes to match any style.
Remove existing legs and flip your table to mark new attachment points evenly spaced from each corner. Pre-drill holes if working with hardwood to prevent splitting. Attach hairpin legs securely with included hardware.
This transformation takes minutes but delivers dramatic visual impact in your living space. Combine with a fresh coat of paint for an even more impressive makeover result.
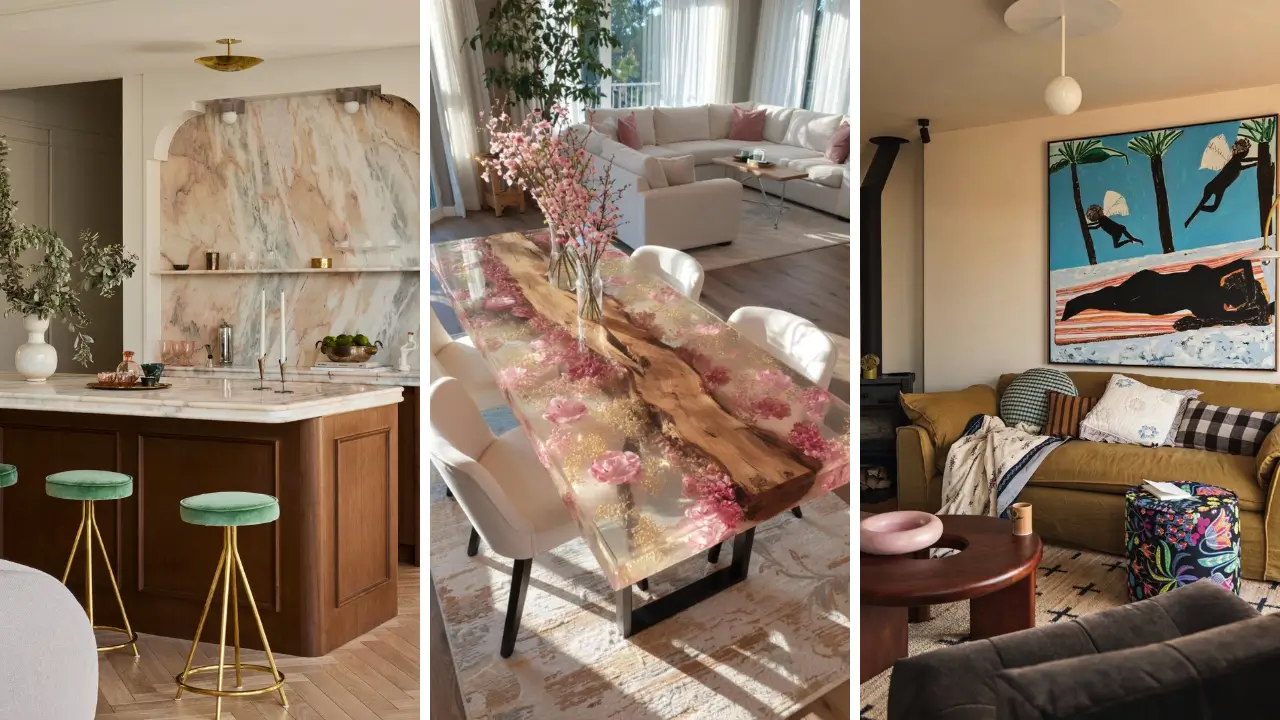
12. Artistic Resin River Top

- Epoxy resin kit
- Resin pigments
- Mixing cups and sticks
- Heat gun or torch
Create a stunning resin river effect for the ultimate designer statement piece. This advanced technique yields absolutely breathtaking results worth the effort. The glossy finish and color depth are truly mesmerizing.
Mix resin according to package instructions and add your chosen pigment colors for desired effects. Pour onto your prepared tabletop, guiding the resin to create river-like patterns. Work quickly before the resin begins setting.
Use a heat gun to pop air bubbles and create interesting cell effects in the resin. Allow full curing time before use—typically 24 to 72 hours depending on product specifications. This technique also creates beautiful handmade gift craft ideas for special occasions.
These 12 coffee table makeover ideas that look like designer pieces prove you don’t need a big budget for stunning furniture. Each technique transforms ordinary tables into extraordinary conversation starters. Grab your supplies and start creating your own designer-worthy centerpiece today!
Share your favorite ideas in the comments below! We’d love to see your makeover results. Rate this post and save it for your next weekend project.