10 Cricut Paper Craft Projects That Look Professionally Made
Have you ever wondered how some crafters create paper projects that look like they came straight from a high-end boutique? The secret lies in your Cricut machine and a few clever techniques. These 10 Cricut paper craft projects that look professionally made will transform ordinary cardstock into extraordinary creations.
Whether you want to impress guests at your next party or create stunning home decor, these projects deliver polished results every time. Let’s dive in…
1. Elegant 3D Paper Flowers

Materials Needed:
- Cardstock in various colors
- Floral wire stems
- Hot glue gun
- Cricut scoring stylus
- Green floral tape
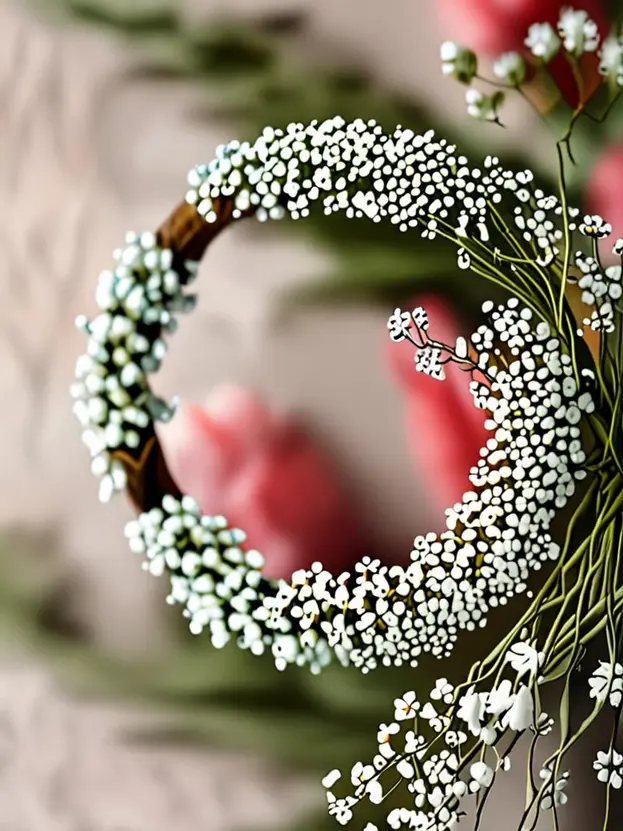
Creating 3D paper flowers with your Cricut produces stunning results that rival real botanicals. The precision cuts ensure every petal has perfect edges and smooth curves. These flowers make gorgeous centerpieces, wall art, or gift toppers.
Use the scoring stylus to create natural-looking creases in each petal before shaping. Layer multiple petal sizes from large to small for realistic depth. The key to professional results is using heavy cardstock that holds its shape without wilting.
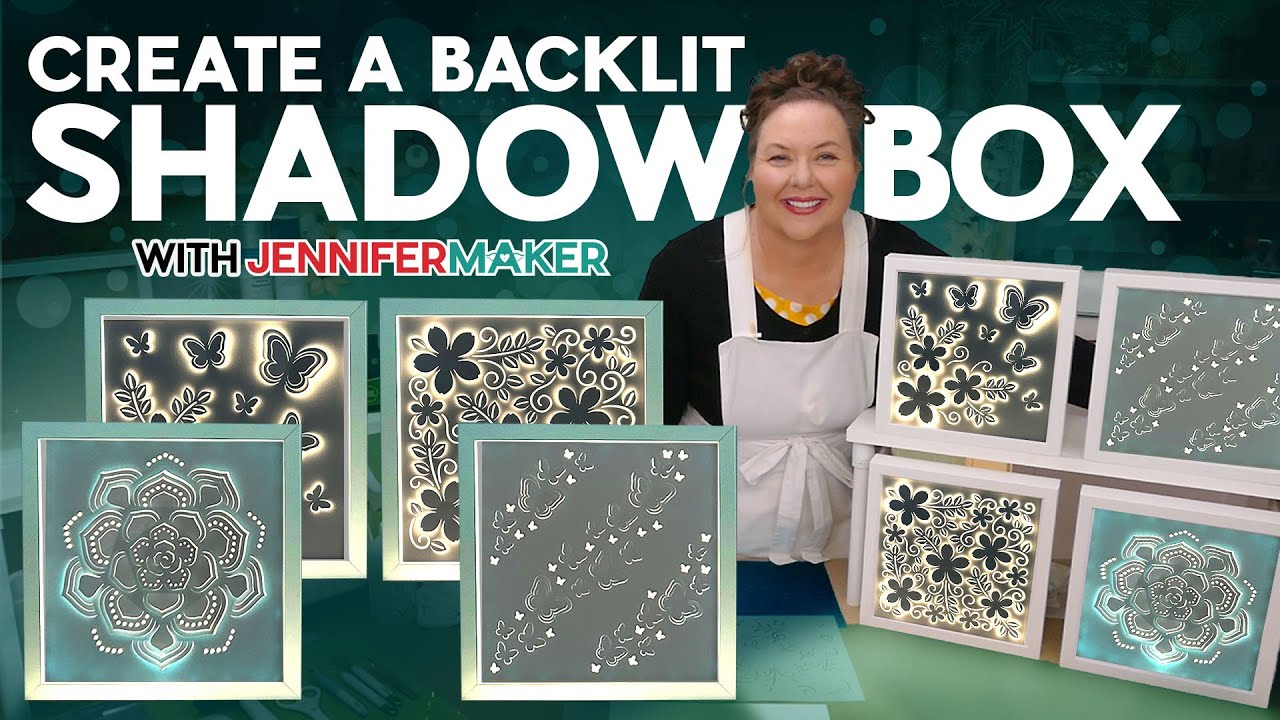
2. Intricate Shadow Boxes
Materials Needed:
- Multiple cardstock sheets
- Shadow box frame
- LED strip lights
- Foam adhesive squares
Shadow boxes showcase the Cricut’s ability to cut intricate layered designs with precision. Each layer creates depth that transforms flat paper into dimensional artwork. These pieces make impressive DIY handmade gifts for weddings, anniversaries, or housewarmings.
Start with your background layer and work forward, spacing each piece with foam adhesive squares. Adding LED lights behind the design creates a magical glowing effect. Choose contrasting colors to make each layer pop distinctly.
3. Custom Wedding Invitations

Materials Needed:
- Luxury cardstock
- Vellum paper
- Wax seal stamps
- Ribbon or twine
- Envelope liners
Professional wedding invitations cost a fortune, but your Cricut creates boutique-quality designs at a fraction of the price. The machine cuts intricate lace patterns, monograms, and delicate borders with flawless precision. Every invitation looks handcrafted yet perfectly consistent.
Layer vellum overlays on top of your main invitation for an elegant frosted effect. Add matching envelope liners cut from coordinating paper. Finish with a wax seal for that luxurious touch that guests will treasure.
4. Geometric Wall Art

Materials Needed:
- Metallic cardstock
- Canvas or foam board
- Craft glue
- Ruler and pencil
Transform your walls with geometric paper art that rivals expensive store-bought pieces. The Cricut cuts perfect hexagons, triangles, and diamonds that human hands simply cannot replicate. Arrange them in ombre gradients or bold color-blocked patterns.
Mount your cut shapes on canvas using dimensional adhesive for shadow effects. If you love creating DIY wall art ideas for living room spaces, this project delivers maximum impact. Metallic cardstock adds shimmer that catches light beautifully throughout the day.
5. Delicate Paper Lanterns

Materials Needed:
- Translucent vellum
- LED tea lights
- Scoring board
- Double-sided tape
Paper lanterns with intricate cut-out patterns create magical ambiance for any occasion. The Cricut slices through vellum effortlessly, producing designs impossible to achieve by hand. These lanterns work beautifully for weddings, garden parties, or everyday decor.
Use battery-powered LED tea lights instead of real candles for safety. The warm glow illuminates your cut patterns and casts gorgeous shadows on surrounding surfaces. Create themed designs like florals, stars, or geometric patterns.
6. Layered Cake Toppers

Materials Needed:
- Glitter cardstock
- Wooden skewers
- Hot glue gun
- Clear acrylic sealer
Custom cake toppers add personalized elegance to any celebration without the hefty price tag. Your Cricut cuts names, ages, phrases, and decorative elements with crisp, clean edges. These toppers photograph beautifully and become treasured keepsakes.
Layer two or three pieces of glitter cardstock for extra dimension and stability. Attach wooden skewers securely with hot glue, ensuring they can support the topper’s weight. Seal with acrylic spray to protect from humidity near the cake.
7. Stunning Gift Boxes

Materials Needed:
- Heavy cardstock
- Scoring stylus
- Decorative paper
- Ribbon and embellishments
Forget generic store-bought boxes when your Cricut creates custom gift packaging in any size or style. The scoring function produces perfect fold lines for professional-looking boxes every time. These make wonderful handmade gift craft ideas that impress recipients before they even open them.
Choose coordinating papers for box bottoms and lids to create elegant contrast. Add die-cut embellishments like flowers, tags, or monograms for extra polish. The presentation becomes part of the gift itself.
8. Botanical Greeting Cards

Materials Needed:
- White cardstock base
- Green and colored cardstock
- Fine-tip glue pen
- Envelope templates
Handmade cards feel special, but Cricut-cut botanical designs elevate them to gallery-worthy art. Delicate fern fronds, eucalyptus branches, and flower sprigs cut perfectly every single time. Recipients often frame these cards rather than throwing them away.
Layer multiple green shades for realistic botanical depth in your designs. Use fine-tip glue pens for precise adhesive placement on tiny leaves and stems. Match custom-cut envelopes to complete the professional presentation.
9. Monogram Door Hangers

Materials Needed:
- Chipboard or thick cardstock
- Patterned scrapbook paper
- Mod Podge sealer
- Ribbon for hanging
Personalized monogram door hangers welcome guests with style and sophistication. The Cricut cuts through chipboard to create sturdy bases that last for years. Cover with beautiful patterned papers for designs matching any season or decor style.
Apply multiple coats of Mod Podge to seal and protect your finished piece from moisture. These make excellent housewarming gifts or fun crafts to make at home during weekends. Add coordinating ribbon loops that complement your paper choices.
10. Exploding Photo Boxes

Materials Needed:
- Coordinating cardstock sets
- Photo prints
- Decorative embellishments
- Small gift items
- Scoring tools
Exploding boxes create unforgettable gift-giving experiences that recipients remember forever. When the lid lifts, walls fall open to reveal photos, messages, and small treasures. The Cricut ensures every panel, fold, and embellishment aligns with mathematical precision.
Plan your photo placement and decorative elements before assembling any layers. Include multiple “explosion” tiers for maximum wow factor. These projects work wonderfully as home craft projects quick enough to complete in an afternoon yet impressive enough for major milestones.
These 10 Cricut paper craft projects that look professionally made prove you don’t need expensive equipment or years of experience to create stunning handmade pieces. Your Cricut machine handles the precision while you bring the creativity. Grab your cardstock and start creating today!
Share your favorite project ideas in the comments below! Rate this post and let us know which design you’ll tackle first.