10 Chalk Paint Christmas Furniture Makeover Ideas
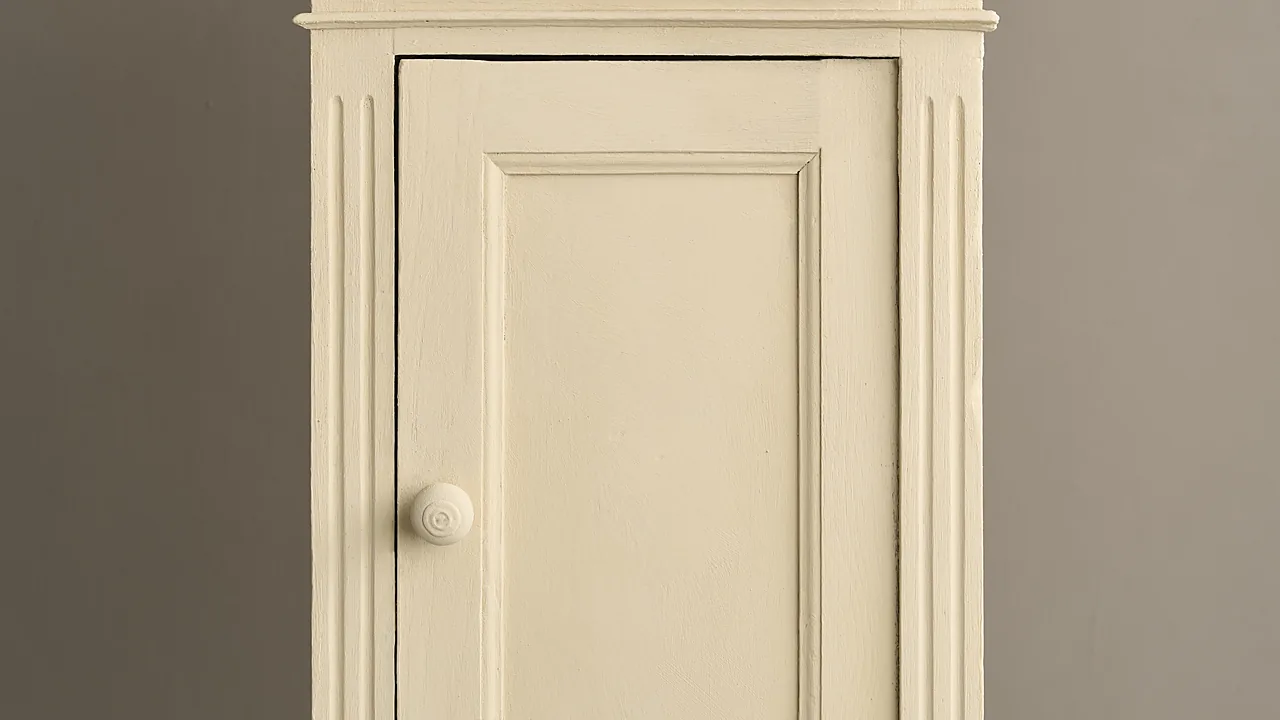
Have you ever decorated a room for Christmas and realised the furniture underneath is still fighting the whole scheme? A tired orange pine dresser or a scratched side table pulls a room down faster than any amount of garland lifts it. Chalk paint is the shortcut, because it grips without stripping and it dries fast enough to finish a piece over a weekend. These ten chalk paint Christmas furniture projects each list what they need, how long they take, and the step most people skip.
Why Chalk Paint Suits a December Deadline
Three properties matter when the deadline is fixed.
- Almost no prep. It bonds to varnished and laminated surfaces after a clean and a light scuff, which removes the slowest part of refinishing.
- Fast recoat. Most brands are touch dry in an hour and ready for a second coat in two, so two coats and a wax fit into one day.
- Forgiving finish. Brush marks read as texture rather than mistakes, which is exactly the look that suits a rustic December room.
What it does not do is survive heavy use unsealed. Anything that gets touched daily needs wax or a water based topcoat, and that is where most failures come from. If you have not picked a brand yet, the chalk paint brand comparison covers coverage and cost per piece, and chalk paint versus latex covers when a different paint is the better call.
1. Cream Dresser With Aged Edges
Materials: cream chalk paint, clear wax, dark wax, 180 grit paper.
Time: one day plus overnight cure.
Two coats of cream, then sand lightly along the edges and around the handles where real wear would happen. Seal with clear wax first, then work a little dark wax into the corners and wipe most of it back.
Quick tip: clear wax before dark wax, always. Dark wax applied to bare chalk paint sinks in and goes blotchy, and it cannot be lifted once it has.
2. Deep Green Sideboard
Materials: forest green chalk paint, water based matt topcoat.
Time: one day.
Deep green is the one colour that carries December without reading as a Christmas decoration in February. Use a matt topcoat rather than wax on a sideboard, because it handles plates and glasses better.
Quick tip: dark colours show brush marks more than pale ones. Lay off each section in one direction with a barely loaded brush as the final pass.
3. Side Table in Warm White
Materials: warm white chalk paint, clear wax.
Time: half a day.
A small table is the right first project. It takes one tin, shows results in an afternoon, and teaches you how the paint behaves before you commit to a dresser.
Quick tip: choose warm white over bright white for December. Bright white goes grey under warm bulbs and fairy lights.
4. Two Tone Bookcase
Materials: two chalk paint colours, painters tape, topcoat.
Time: one and a half days.
Paint the frame in the darker colour and the inside backs of the shelves in the lighter one. The contrast makes whatever sits on the shelves stand forward, which is useful when the shelves are holding decorations.
Quick tip: paint the interior first and the frame second. Masking a finished frame is far easier than masking a finished interior.
5. Dining Chairs in a Matched Set
Materials: chalk paint, small brush, hard wearing topcoat.
Time: a weekend for four chairs.
Chairs take the most handling of anything in the room, so skip wax here and use a hardwearing water based topcoat instead. Two thin coats of paint beat one thick one on spindles and legs.
Quick tip: turn the chairs upside down and paint the undersides and lower legs first, then flip them. Drips run downward onto parts you have not painted yet, which is where you want them.
6. Painted Tray Table for Drinks
Materials: small tray or tray table, chalk paint, stencil, topcoat.
Time: half a day.
Paint the tray, stencil a simple motif in the centre, then seal it properly because this surface will meet wet glasses all month.
Quick tip: three thin topcoats on a tray, not one thick one. A single heavy coat stays soft underneath and rings will press into it.
7. Distressed Blanket Chest
Materials: chalk paint, candle wax or petroleum jelly, sandpaper.
Time: one day.
Rub a candle along the edges before painting. The paint will not key where the wax is, so it lifts off cleanly with light sanding and leaves wear exactly where you planned it.
Quick tip: the resist method gives a far more convincing result than sanding alone, because real wear follows edges and corners rather than flat faces.
8. Thrifted Nightstand in Berry Red
Materials: thrifted nightstand, berry chalk paint, new hardware, topcoat.
Time: one day.
Small thrifted pieces are the cheapest way to add a strong colour without committing a large piece to it. Change the handles at the same time, since that single swap does more than the paint on a small item.
Quick tip: check the drawer runs before buying. Paint fixes the surface, not a drawer that drops when you pull it. What to look for is covered in how to tell if thrift store furniture is worth flipping.
9. Console With a Stencilled Border
Materials: chalk paint in two tones, stencil, stencil brush.
Time: one and a half days.
Paint the base colour, let it cure fully, then stencil a narrow border along the top edge and the drawer fronts. Keep the stencil brush almost dry and dab rather than stroke.
Quick tip: a loaded brush pushes paint under the stencil edge every time. Offload most of it onto kitchen paper before the brush touches the piece.
10. Entry Bench in Charcoal
Materials: chalk paint, 120 and 180 grit paper, durable topcoat.
Time: one day.
An entry bench takes boots, bags, and wet coats all winter, so this is the piece that most needs a proper topcoat. Sand the seat smooth between coats with 180 grit for a surface that is pleasant to sit on.
Quick tip: grit choice matters more than people expect, and the sequence is set out in the sandpaper grit guide.
The Sequence That Gets a Piece Finished in a Day
Order matters more than speed. This is the sequence that works.
- Clean first. Sugar soap or a degreaser, then rinse. Chalk paint grips almost anything except grease and silicone polish.
- Scuff, do not strip. A quick pass with 180 grit is enough on a glossy surface. Stripping defeats the point of using chalk paint.
- Two thin coats. One thick coat dries with a skin over wet paint and stays soft for days.
- Cure before sealing. Wait at least two hours, longer in a cold room. Sealing damp paint traps moisture and the finish stays tacky.
- Seal to match the use. Wax for display pieces, water based topcoat for anything touched daily.
Work in a room above 10C. Chalk paint applied in a cold garage in December takes far longer to cure and the topcoat will show it.
How Much Paint and Wax a Piece Actually Needs
Running out halfway through a second coat is the most common way a weekend project becomes a fortnight one, because the replacement tin rarely matches exactly. Work from surface area rather than guessing from the look of the furniture.
- A one litre tin covers roughly 13 square metres in one coat, which in practice is a chest of drawers and a small side table with a little left over.
- A small side table or nightstand takes about 250ml for two coats.
- A standard dresser or sideboard takes 500ml to 750ml for two coats, more if the original colour is dark and you are painting pale over it.
- Four dining chairs take about 500ml, because spindles and legs have far more surface area than they appear to.
- Wax goes much further than people expect. A 500ml tin seals several large pieces, since it is worked in thin and buffed back rather than laid on.
Buy one tin more than the calculation suggests when painting a matched set, and open both tins and stir them together before starting. Batch variation between tins is small but visible across chairs standing side by side.
Mistakes That Show Up in January
- Dark wax straight onto paint. It blotches permanently. Clear wax first.
- Wax on a dining surface. It marks with every warm plate. Use a topcoat there.
- Painting over silicone polish. The paint will bead and lift. Degrease properly or it fails within weeks.
- Distressing flat faces. Real wear lives on edges, corners and around handles. Anywhere else looks staged.
- Using the piece before it cures. Chalk paint is touch dry in an hour but takes up to three weeks to fully harden. Treat it gently through December.

Conclusion
Start with the side table or a thrifted nightstand if this is a first attempt, because both finish in an afternoon and neither punishes a mistake. Save the dining chairs for when you are confident, since four matched pieces are where inconsistency shows.
Paint in late November or the first week of December so everything has cured before the room is in constant use. The full method, including brush choice and coverage, sits in how to paint furniture with chalk paint, and the rest of the room is covered in handmade Christmas decor.
Frequently Asked Questions
Q: Does chalk paint need sanding first?
A: Not in the usual sense. A light scuff with 180 grit on glossy or varnished surfaces helps, but no stripping back to bare wood is needed. What does matter is cleaning off grease and silicone polish, because chalk paint will not bond over either.
Q: How long does chalk paint take to dry before Christmas?
A: Touch dry in about an hour and recoatable in two, so a two coat piece can be finished and sealed in a day. Full hardening takes up to three weeks, so paint in late November if the piece will be in heavy use through December.
Q: Should chalk painted furniture be waxed or sealed?
A: Wax suits display pieces such as a dresser or blanket chest. Anything that meets plates, glasses, or wet coats needs a water based topcoat instead, because wax marks under heat and moisture.
Q: What colour chalk paint works for Christmas without looking seasonal all year?
A: Deep forest green, warm white, and charcoal all carry a December scheme and still look right in June. Berry red works best on small thrifted pieces, where a strong colour is easy to repaint later if it tires.