How to Paint a Watercolor Effect on Canvas for Beginners

Have you ever admired those dreamy, flowing watercolor paintings and wished you could create something similar? Here’s the good news: you absolutely can, even if you’ve never held a paintbrush before. Learning how to paint a watercolor effect on canvas for beginners opens up a world of artistic expression that’s both forgiving and incredibly rewarding.
Unlike traditional watercolor on paper, working on canvas gives you a sturdier surface and more room for experimentation. The techniques are surprisingly simple once you understand the basics. By the end of this guide, you’ll know exactly what supplies to grab, which methods work best, and how to avoid common mistakes that trip up most newcomers.
Whether you’re looking to decorate your home with original artwork, give personalized gifts, or simply explore a new creative hobby, this tutorial has everything you need. Let’s dive into the colorful world of watercolor effects on canvas!
Understanding Watercolor Effects on Canvas: What Makes It Different

Before you start painting, it’s important to understand why watercolor on canvas differs from traditional watercolor on paper. Canvas has a texture and absorbency level that changes how paint behaves. This isn’t a bad thing—it actually gives you more control and creative options.
Traditional watercolor paper absorbs water quickly, creating that signature bleeding effect. Canvas, however, resists water absorption unless properly prepared. This means you need to either prime your canvas differently or use specific techniques to achieve that soft, flowing look.
The advantage? You get more time to blend colors before they dry. Plus, canvas is more durable than paper, making it perfect for displaying your finished artwork without worrying about warping or damage.
Essential Supplies for Painting Watercolor Effects on Canvas

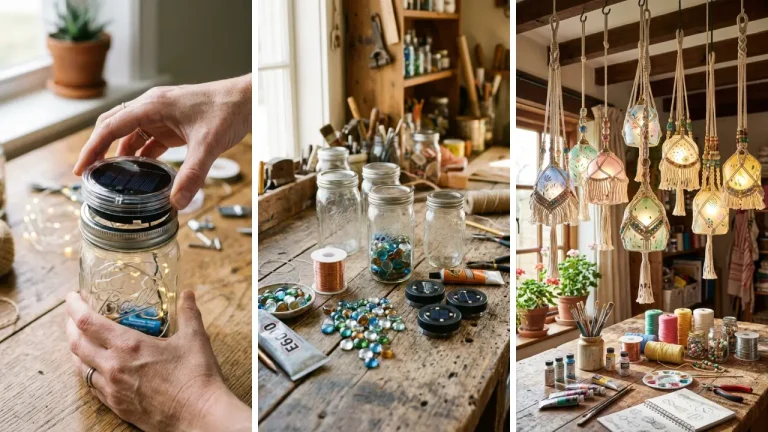
Getting the right materials sets you up for success. You don’t need to spend a fortune—many beginners find great results with budget-friendly options. If you enjoy exploring dollar store crafts ideas, you’ll be happy to know that some basic supplies can be found affordably.
Canvas Options
Choose a pre-stretched canvas or canvas boards. For beginners, 8×10 or 11×14 inches work well—not too small to feel cramped, not too large to feel overwhelming. Look for canvases with a smooth texture rather than heavy grain.
Paints to Use

You have two main options:
- Acrylic paints thinned with water or medium: More versatile and widely available
- Watercolor ground + traditional watercolors: Creates the most authentic watercolor effect
For beginners, acrylics are recommended because they’re forgiving and easier to layer. Grab a basic set with primary colors plus white—you can mix any shade from these.
Brushes and Tools
Invest in a few soft, synthetic brushes in various sizes. Round brushes work best for watercolor techniques. You’ll also need:
- A large flat brush for washes
- A spray bottle filled with water
- Paper towels or clean rags
- A palette or plastic plate for mixing
- Two cups of water (one for rinsing, one for clean water)
How to Prepare Your Canvas for Watercolor Painting

This step is crucial for achieving that authentic watercolor look. Standard canvas comes pre-primed with gesso, which repels water. You need to modify the surface to accept watercolor techniques properly.
Method 1: Using Watercolor Ground
Watercolor ground is a special primer that makes any surface accept watercolor paint. Apply 2-3 thin coats with a wide brush, letting each coat dry completely before adding the next. This creates a slightly absorbent surface that mimics watercolor paper.
Method 2: Working with Acrylic Washes
If you’re using acrylics, you can work directly on primed canvas. Simply thin your paints significantly—aim for a milk-like consistency. Adding a flow medium helps paints move more smoothly without losing color intensity.
Once your canvas is ready, understanding how to paint a watercolor effect on canvas for beginners becomes much easier because your surface will respond predictably to your brush strokes.
Step-by-Step Technique: Creating Beautiful Watercolor Effects

Now comes the exciting part! These techniques form the foundation of watercolor painting on canvas. Practice each one individually before combining them in a finished piece.
Wet-on-Wet Technique
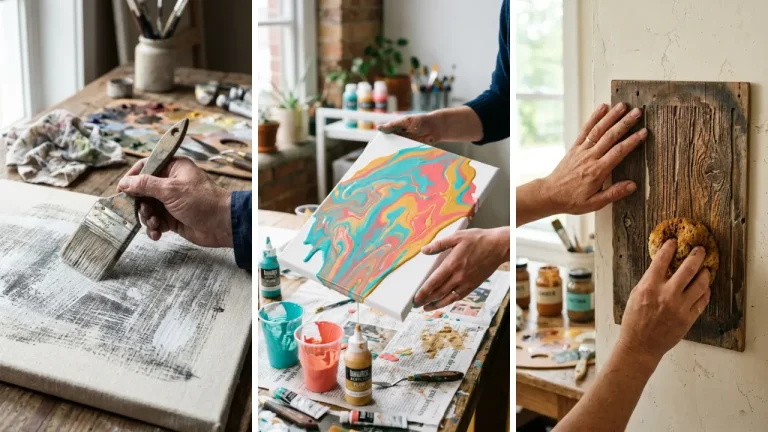
This creates the softest, most flowing effects. Start by wetting your canvas surface with clean water using a large brush or spray bottle. While the surface is still wet, apply diluted paint.
Watch as colors spread and blend naturally. This technique is perfect for backgrounds, skies, and abstract pieces. Work quickly—you have limited time before the water dries.
Pro tip: Tilt your canvas to encourage paint flow in specific directions. This creates beautiful, organic patterns you couldn’t achieve with brushwork alone.
Wet-on-Dry Technique
For more controlled effects, apply wet paint to a dry canvas surface. This gives you sharper edges and more defined shapes. Use this technique for details, foreground elements, or when you want colors to stay separate.
Layering and Glazing
Watercolor’s magic lies in its transparency. Build up color gradually through multiple thin layers rather than one thick application. Let each layer dry completely before adding the next.
Glazing—applying a thin, transparent layer over dried paint—creates depth and richness that’s impossible to achieve in a single layer. This technique transforms good paintings into stunning ones.
Creating Texture and Interest
Experiment with these methods to add visual interest:
- Salt technique: Sprinkle table salt on wet paint, let dry, then brush away for a crystalline texture
- Lifting: Use a damp brush or paper towel to remove paint, creating highlights
- Splattering: Flick paint from a loaded brush for natural, organic dots
- Plastic wrap texture: Press crinkled plastic wrap onto wet paint for unique patterns
Beginner-Friendly Project: Abstract Watercolor Landscape

Let’s put these techniques together with a simple project. This abstract landscape is perfect for practicing how to paint a watercolor effect on canvas for beginners without pressure to create something “perfect.” This type of project also makes for wonderful DIY handmade gifts that friends and family will treasure.
What You’ll Create
A soft, dreamy landscape with a gradient sky, simple mountains or hills, and organic foreground shapes. The beauty of abstract work? There are no mistakes—only happy accidents.
Step-by-Step Instructions
Step 1: Prepare your canvas and gather your paints. Choose 3-4 colors that complement each other. Blues and purples for the sky, greens and yellows for land work beautifully.
Step 2: Wet the top two-thirds of your canvas. Working quickly, apply your lightest sky color at the top, gradually transitioning to a slightly darker shade lower down. Let colors blend naturally.
Step 3: While the sky is still damp, add a thin line of your mountain color along the horizon. Watch it softly bleed upward—this creates atmospheric perspective. Step 4: Let everything dry completely.
Then, using wet-on-dry technique, add layers of color for hills or trees in the foreground. Keep shapes loose and organic. Step 5: Add final details with your smallest brush—birds, distant trees, or texture in the foreground.
Step back often to assess your composition.
Common Mistakes and How to Avoid Them

Every beginner faces similar challenges. Knowing these pitfalls ahead of time saves frustration and wasted materials.
Using Too Much Paint
Watercolor effects depend on transparency. Using too much pigment creates muddy, opaque results. Always dilute more than you think necessary—you can add more color, but you can’t take it away.
Overworking Wet Areas
Once you’ve applied paint to wet canvas, resist the urge to keep brushing. Every stroke disturbs the natural blending happening beneath your brush. Apply paint, then step away and let physics do the work.
Not Letting Layers Dry
Patience is crucial. Applying new layers before previous ones dry completely causes colors to mix into muddy browns. Use a hairdryer on low heat to speed up drying between layers.
Forgetting About Value
Value—the lightness or darkness of colors—matters more than color itself. A painting with good value contrast will always read better than one with only mid-tones. Include some very light areas and some very dark areas.
Taking Your Watercolor Canvas Art Further

Once you’ve mastered the basics, countless directions await. Consider exploring these options: Try painting flowers, portraits, or realistic landscapes using the same techniques. Many artists combine watercolor effects with pen and ink details for mixed-media pieces.
Your finished canvases make excellent gifts. Explore other handmade gift craft ideas to pair with your paintings—perhaps a hand-painted card or decorated frame. Looking for more creative inspiration?
Check out these fun crafts to make at home that complement your new painting skills. You might also enjoy browsing home craft projects quick enough to complete in an afternoon.
Conclusion: Your Watercolor Journey Starts Now
Learning how to paint a watercolor effect on canvas for beginners isn’t about achieving perfection on your first try. It’s about embracing the fluid, unpredictable nature of the medium and finding joy in the process. Every painting teaches you something new.
Remember these key points: prepare your canvas properly, work with diluted paints, embrace the wet-on-wet technique for softness, and most importantly—let go of perfectionism. The most beautiful watercolor effects often come from happy accidents. Start with simple abstract pieces where there’s no “right” or “wrong.” As your confidence grows, tackle more complex subjects.
Your unique style will develop naturally through practice. The supplies are affordable, the techniques are learnable, and the results are stunning. What’s stopping you from creating your first watercolor canvas today?
Ready to start painting? Grab your supplies and try the abstract landscape project this weekend. Share your creations in the comments below—we’d love to see your watercolor experiments!
Don’t forget to bookmark this guide for reference during your painting sessions.
Frequently Asked Questions
Q: Can I use regular watercolors directly on canvas without special preparation? A: Standard canvas repels traditional watercolors because of its gesso coating. You’ll need to apply watercolor ground first, or use thinned acrylics instead.
Without proper preparation, your paint will bead up and won’t create the flowing effects you want. Q: How to paint a watercolor effect on canvas for beginners without expensive supplies? A: Start with student-grade acrylics, which are affordable and work beautifully when properly diluted.
Dollar store canvases work fine for practice. As your skills develop, you can invest in higher-quality materials. The technique matters more than expensive supplies.
Q: Why does my watercolor painting on canvas look muddy? A: Muddy results usually come from overworking wet paint, mixing too many colors together, or not letting layers dry between applications. Stick to 2-3 colors maximum per area, apply paint then leave it alone, and always wait for complete drying before adding new layers.
Q: How long does it take to learn how to paint a watercolor effect on canvas for beginners? A: Most beginners create satisfying pieces within their first few sessions. Basic techniques can be learned in an afternoon, though mastery takes months of practice.
Focus on enjoying the process rather than achieving specific results, and improvement comes naturally. Q: Do I need to seal my finished watercolor canvas painting? A: If you used acrylics, sealing is optional but recommended for protection.
Apply a clear acrylic varnish once your painting is completely dry. For pieces made with watercolor ground and traditional watercolors, sealing with a spray fixative or varnish is essential to protect the water-soluble paint.