12 DIY Christmas Ornaments to Make at Home
Quick summary
- Budget matters less than drying time, since the cheapest materials are also the ones that crack when rushed.
- Fix the hanging loop before any paint or glue goes on, or you will drill through a finished piece.
- Fruit slices, dough shapes and cones all mould in storage unless they dry right through and get sealed.
Quick answer: The easiest homemade ornaments start from salt dough, air-dry clay, felt or folded paper, none of which need special tools and most of which take about an hour of active work. Bake or dry them all the way through, seal anything that began as food, and sort out the hanger first.
Have you ever unpacked the decorations box in December and realised that nothing inside it means anything to you? Everything matches, everything is intact, and none of it is worth looking at twice. You are not alone. The boxes that people actually look forward to opening are the ones with a few lumpy, obviously handmade things in them.
These twelve DIY Christmas ornaments are sorted by how much mess and drying time each one demands, starting with the ones you can finish in an evening. Each entry lists what it takes, roughly how long it needs, and the single detail that decides whether it survives to next year.
Why Handmade Ornaments Are Worth the Evening
A shop-bought bauble is finished the moment you buy it. A handmade one keeps accumulating meaning, which sounds like a strange claim about a painted disc of clay until you have hung the same one for six years.
There are practical reasons too. Handmade ornaments cost very little, they use up offcuts that are too small for anything else, and they can be made to fit a specific tree, colour scheme or person. If the holiday budget is tight, the same logic runs through easy Christmas crafts on a budget.
The trade-off is time, and almost all of it is drying time rather than working time. Plan around that and nothing else here is difficult.
What to Have on Hand Before You Start
Nothing on this list is specialist, and most kitchens already hold half of it.
- Baker twine or thin ribbon for hangers. Buy more than seems reasonable, because every single ornament needs some.
- A fine skewer or thick needle for making holes before anything sets hard.
- Acrylic paint and a small brush. Acrylic sticks to clay, wood, dough and cones alike.
- Clear matt sealant, either spray or brush-on. This is the difference between an ornament that lasts and one that does not.
- Baking parchment, so nothing dries stuck to a plate.
A fuller shopping list for the whole season sits in the guide to Christmas craft supplies worth stocking up on.
12 DIY Christmas Ornaments to Make at Home
1. Salt Dough Shapes
Needs: flour, salt, water, cookie cutters. Time: 20 minutes, plus three hours in a low oven.
Mix two parts flour to one part salt and add water until it holds together. Roll it thicker than feels right, cut shapes, make the hole, then dry it at the lowest oven setting rather than baking it fast.
Watch out for: rolling too thin. Anything under about 6mm warps as it dries and snaps at the hanging hole within a season.
2. Air-Dry Clay Imprints
Needs: air-dry clay, something textured, a straw. Time: 15 minutes, plus two days drying.
Press lace, a leaf, a sprig of rosemary or a child hand into rolled clay, cut around it, and punch the hole with a drinking straw. The texture does all the decorative work, so no painting is required.
Watch out for: curling edges. Dry the pieces between two sheets of parchment with a light book on top for the first day.
3. Folded Paper Stars
Needs: paper strips or squares, nothing else. Time: 10 minutes each once you have the knack.
Folded stars cost essentially nothing and look far more considered than they are, particularly in heavy paper or old sheet music. They are also the one ornament on this list that packs completely flat.
Watch out for: thin paper. Printer weight collapses; card or scrapbook paper holds its points. More festive folding sits in DIY paper Christmas decorations.
4. Felt Stitched Shapes
Needs: felt scraps, embroidery thread, stuffing. Time: 40 minutes each.
Cut two matching shapes, blanket stitch around the edge, stuff lightly before closing. Felt does not fray, which makes it the most forgiving fabric for anyone who has never sewn.
Watch out for: overstuffing. A plump felt star pulls its own seams open; a flat one keeps its outline.
5. Dried Orange Slices
Needs: oranges, an oven, twine. Time: 10 minutes, plus three to four hours drying.
Slice thinly and evenly, blot hard, then dry at the lowest oven setting until no moisture remains. Backlit on a tree they glow, and they smell like the season for weeks.
Watch out for: under-drying. A slice that feels slightly tacky will go mouldy in the box, and it will take whatever it touches with it.
6. Cinnamon Stick Bundles
Needs: cinnamon sticks, twine, dried sprigs. Time: 5 minutes each.
Bind three sticks into a flat bundle, tuck a sprig of something evergreen behind the twine, and add a loop. This is the fastest entry here and costs almost nothing per piece.
Watch out for: loose binding. Wrap the twine at least four times and knot at the back, or the bundle splays open on the branch.
7. Painted Wooden Discs
Needs: pre-cut wooden slices, acrylic paint, sealant. Time: 30 minutes, plus overnight.
Wooden discs take paint beautifully and already have the rustic edge that people spend money trying to fake. Simple designs beat detailed ones at tree-viewing distance.
Watch out for: raw wood drinking the paint. One coat of white primer first, and the colours stay bright instead of sinking grey.
8. Fabric Scrap Baubles
Needs: fabric offcuts, a polystyrene ball, glue or pins. Time: 45 minutes each.
Cut small fabric squares and pin or glue them in overlapping rows around a foam ball. It uses the offcuts that are too small for any sewing project and needs no stitching at all.
Watch out for: mixed scales. Keep every print small; one large-scale pattern among them reads as a mistake. Similar scrap-saving logic runs through handmade Christmas fabric gifts.
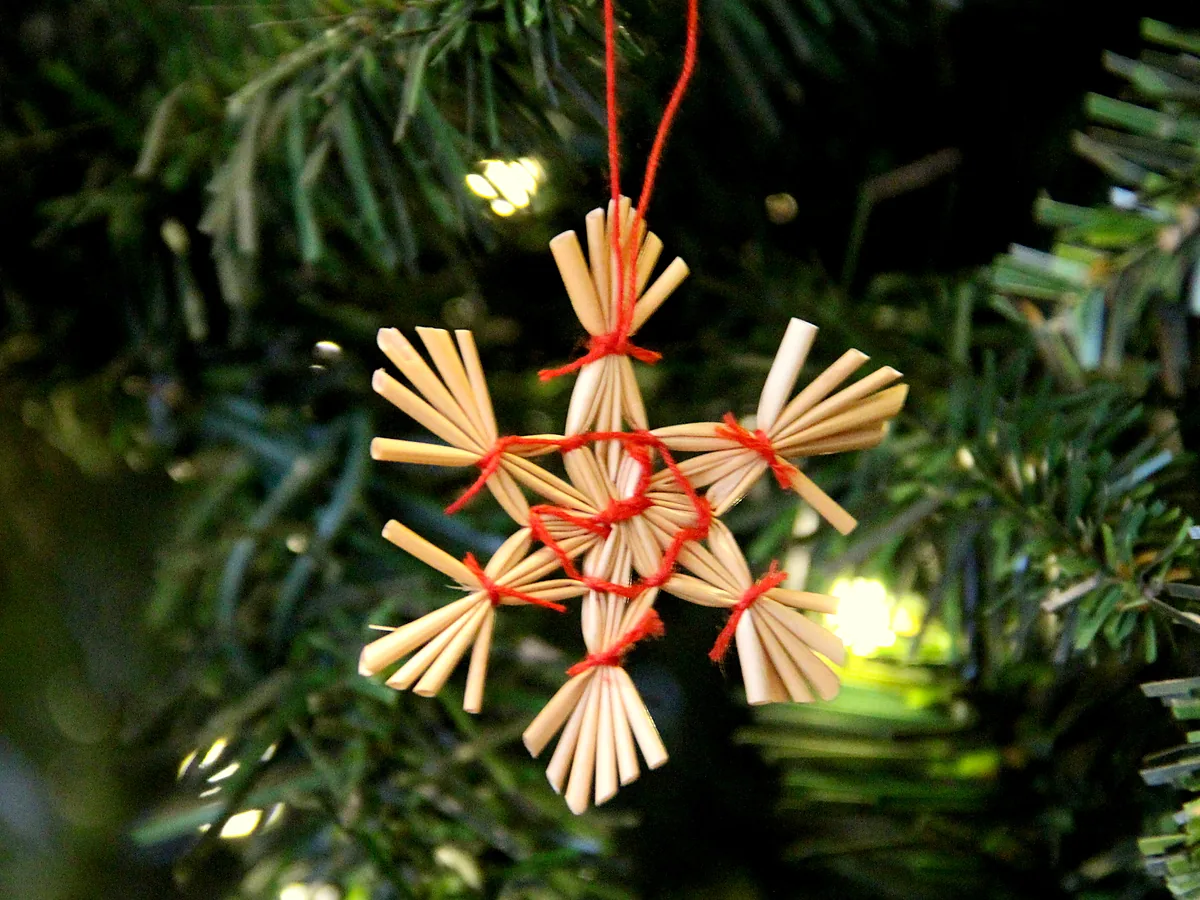
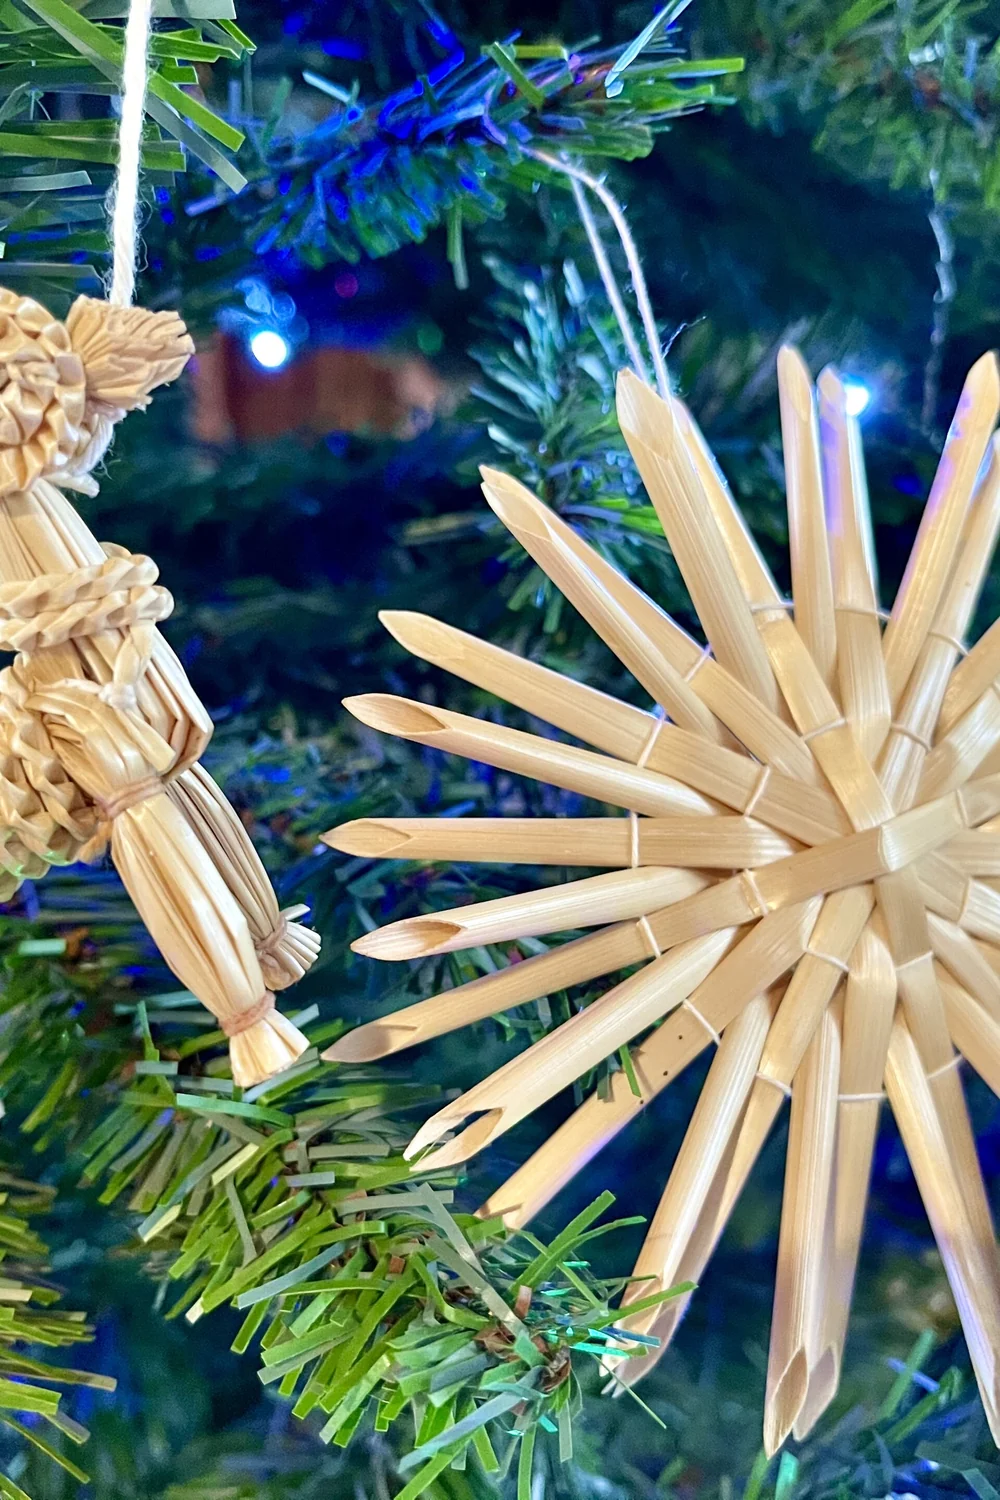
9. Straw and Fibre Stars
Needs: drinking straws or natural straw, thread. Time: 30 minutes each.
Bind lengths into a radiating star and tie every crossing point with contrasting thread. The red-on-pale-gold version is a Scandinavian fixture and reads as deliberate rather than homemade.
Watch out for: uneven arms. Cut every length against one template rather than by eye, because the eye is generous and the finished star is not.
10. Knotted Cord Ornaments
Needs: cotton cord, a small ring. Time: 30 minutes each.
A few repeated knots around a ring produce a hanging shape that suits a plain or minimal tree. The technique is identical to larger fibre work, just scaled down to something that fits in a palm.
Watch out for: cord that is too thick. Anything above about 3mm makes a knot bulky enough to drag a branch down. There is a full set of patterns in macrame Christmas ornament ideas.
11. Filled Clear Baubles
Needs: clear plastic baubles, dried botanicals or thread. Time: 10 minutes each.
Open the bauble, drop in dried flowers, tiny cones, or a loose nest of embroidery thread, and close it. Fast, breakage-proof, and the only ornament here that children can make unsupervised.
Watch out for: overfilling. A third full looks composed; packed solid looks like a jar. Choosing botanicals that keep their colour is covered in the guide to the best dried flowers.
12. Pinecone Hangers
Needs: pinecones, twine, optional paint. Time: 10 minutes each, plus baking.
Tie twine around the top scales and hang as they are, or brush the tips with white paint for a frosted edge. Free, if you are willing to go outside and pick them up.
Watch out for: passengers. Bake foraged cones at 95C for half an hour on parchment to drive out insects and sap before they go anywhere near the house.
How to Make Ornaments That Survive the Loft
Most handmade ornaments are lost to storage rather than to accidents, and every one of these failures is preventable.
- Seal anything porous. Dough, clay, wood and cones all absorb moisture from the air. Two thin coats of matt sealant stop that.
- Dry things longer than the recipe says. Ambient humidity varies enormously, and an extra day costs nothing.
- Attach hangers before decorating. Making a hole in a finished ornament is how finished ornaments break.
- Store flat, not loose. Egg boxes and shallow lidded trays beat one deep box every time.
- Keep natural materials separate. If one orange slice turns, it should not be sitting against the felt.
- Label the box by year. Knowing which year each set came from turns the box into a record.
Where all of it lives for the other eleven months is handled in how to store holiday decor.
Making Ornaments With Children
Four of these work with young children and the rest do not, which is worth knowing before an afternoon goes wrong. Salt dough, filled clear baubles, painted wooden discs and pinecone hangers all tolerate imprecision, and none involve anything sharp or hot beyond the adult-operated oven. Felt stitching, straw stars and knotted cord demand accuracy that frustrates small hands.
One adjustment makes the difference: let the ornament be genuinely theirs. A wonky painted disc hung for a decade beats a neat one made mostly by an adult, and everyone involved can tell which is which.
Turning Ornaments Into Gifts
A single handmade ornament, dated on the back and wrapped properly, is a better gift than its cost suggests. Sets of three in a small box work even better.
Personalising is what lifts it: a year, an initial, or a shape that means something to the recipient. An ornament marking a first home or a new baby gets kept permanently, which is not true of most things in that price range. The same small-scale making turns up in a different format in DIY advent calendar ideas.
Conclusion
Start with salt dough or cinnamon bundles. Both are finished within a day, neither punishes a mistake, and both teach the one habit that matters here, which is making the hanging hole before the piece hardens.
Add two or three handmade pieces a year rather than attempting a full tree in one December. That pace is sustainable, and in five years the box looks entirely different. Once they are made, how to decorate a Christmas tree covers where each one should actually hang, and DIY Christmas wreath ideas handle the door.
Frequently Asked Questions
What is the easiest Christmas ornament to make at home?
Cinnamon stick bundles, which take about five minutes and need only three sticks and a length of twine. Salt dough shapes are almost as simple but add three hours of oven drying, so they suit an afternoon rather than a spare moment.
How do you keep salt dough ornaments from cracking?
Roll them to at least 6mm, dry them at the lowest possible oven setting over several hours rather than baking them quickly, and seal both sides once cool. Cracking is almost always caused by thin dough or a fast, hot bake.
Will dried orange slices go mouldy on the tree?
Only if they were not dried right through. A finished slice should feel completely dry and slightly brittle, with no tackiness anywhere, including the pith at the edge. Sealing them afterwards adds a second layer of protection in a humid room.
What can children actually make without help?
Filled clear baubles need no supervision beyond handing over the botanicals. Salt dough, painted wooden discs and pinecone hangers all work with an adult running the oven. Anything involving needles, fine binding or precise cutting is better left until later.
How long do handmade Christmas ornaments last?
Sealed clay, wood and felt pieces last indefinitely with reasonable storage. Natural materials such as citrus, cones and cinnamon hold up for three to five seasons before they fade or lose their scent, at which point they are cheap enough to remake.
Featured image: Chris Olszewski / Wikimedia Commons, CC BY-SA 4.0, title text added by OKI HERE.