12 DIY Advent Calendar Ideas to Make This Year
Have you ever bought a cardboard advent calendar on 1 December, watched it collapse by the tenth, and thought there had to be something better? There is, and most of it can be made in an evening. The twelve DIY advent calendar ideas below range from a ten minute paper bag garland to a wooden crate wall that comes out again every year. Each one lists what it needs, roughly how long it takes, and what actually fits inside, because the filling is where most homemade calendars fall down.
What to Decide Before You Start
Three decisions shape every calendar, and making them first saves rebuilding later.
- Who it is for. A calendar for one child can hold bulky pockets. A calendar for a whole household needs twenty four compartments that each hold four small things, which changes the size completely.
- Where it hangs. Wall mounted calendars can be wide and flat. Anything on a mantel or shelf has to stand on its own, which rules out fabric pockets unless you add a rod.
- Reusable or not. If you want it out again next December, avoid writing years on it and avoid glue that cannot be undone. Numbered tags tied with twine can be moved; numbers painted straight on cannot.
Work out the filling budget before you build anything. Twenty four gifts at two dollars each is forty eight dollars, which is usually more than the calendar itself costs. If you are stocking up on materials anyway, the Christmas craft supplies guide covers what is worth buying in bulk.
1. Paper Bag Garland Calendar
Materials: 24 small kraft paper bags, twine, mini pegs, number stickers.
Time: 30 minutes.
Fold the top of each bag over twice, punch a hole through the fold, and peg the bags along a length of twine. Number them with stickers or a stamp.
Quick tip: hang the twine in two shorter rows rather than one long one. A single row of twenty four bags sags in the middle however tight you pull it.
2. Wooden Crate Wall
Materials: 24 small wooden boxes, wood glue, paint, picture hanging strips.
Time: an afternoon plus drying.
Glue the boxes into a grid of six by four, let it cure overnight under weight, then paint the whole face one colour and stencil the numbers. Mount it with heavy duty strips rather than a single nail, because the filled weight is deceptive.
Quick tip: this is the one that genuinely lasts a decade. Build it once and it becomes the piece people expect each year.
3. Fabric Pocket Wall Hanging
Materials: backing fabric, 24 fabric squares, dowel, sewing machine.
Time: 3 hours.
Hem the backing, then stitch the squares on in rows, sewing the sides and bottom of each and leaving the top open. Sew a channel along the top of the backing and slide a dowel through to hang it.
Quick tip: stitch the pockets from the bottom row up. Working downward means the finished rows bunch under the machine arm. The same construction turns up in beginner sewing projects for home decor.
4. Toilet Roll Cracker Calendar
Materials: 24 cardboard tubes, wrapping paper, ribbon.
Time: 45 minutes.
Fill each tube, roll it in paper cut about four inches wider than the tube, and tie both ends like a cracker. Stack them in a basket or a shallow crate with the numbered ends facing out.
Quick tip: this is the cheapest option on the list and the best one for using up offcuts of paper that are too small to wrap anything else.
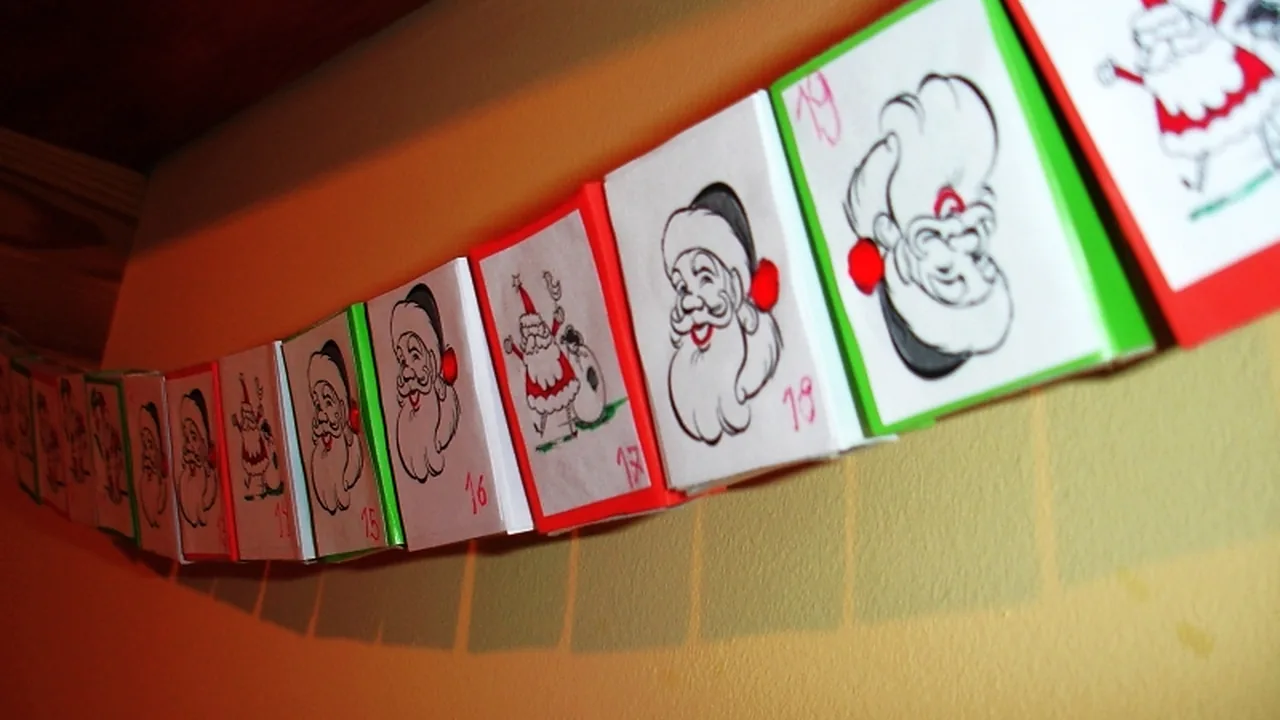
5. Matchbox Drawer Tower
Materials: 24 large matchboxes, glue, paper, tiny knobs or beads.
Time: 2 hours.
Cover the sleeves in paper, glue them into a block four wide and six tall, and fix a bead to each drawer front as a pull. The drawers hold small things only, which keeps the gift budget honest.
Quick tip: glue the sleeves together with the drawers inside so nothing warps as the glue dries, then slide them out once it has set.
6. Envelope Board
Materials: 24 small envelopes, a framed corkboard, pins, stamps.
Time: 40 minutes.
Pin the envelopes to the board in a grid, numbered with a stamp or written by hand. Each one holds a note rather than an object, which suits an advent of activities instead of gifts.
Quick tip: an activity calendar sidesteps the whole gift budget. Write things like bake something, call a relative, or walk somewhere with lights on.
7. Mason Jar Shelf Row
Materials: 24 small jars, chalk paint, twine, a long shelf.
Time: an hour plus drying.
Paint a band on each jar, write the number on the dried paint with chalk, and line the jars along a shelf. Glass means the contents show, so fill them with something that looks good, such as wrapped sweets or folded notes.
Quick tip: chalk paint takes numbers cleanly and wipes off with a damp cloth, so the same jars can be renumbered or reused for something else entirely. Brand differences are covered in the chalk paint brand comparison.
8. Clothespin Tree on the Wall
Materials: washi tape or twine, 24 pegs, small envelopes.
Time: 30 minutes.
Mark out a triangle on the wall with tape to make the tree shape, then peg the envelopes along the lines in rows that shorten towards the top. It takes no floor space, which matters in a small room.
Quick tip: use washi tape rather than masking tape. It lifts off painted walls without taking the paint with it.
9. Knitted or Crocheted Mini Stockings
Materials: yarn scraps, hook or needles, twine.
Time: about 20 minutes per stocking.
Work twenty four small stockings and hang them from a length of twine. This is the slowest build here, so start it in October if you want it finished.
Quick tip: make them all in the same yarn weight even if the colours differ, or they hang at visibly different lengths. More in this direction sits in crochet home decor ideas.
10. Terracotta Pot Grid
Materials: 24 small terracotta pots, a wooden tray or crate, paint.
Time: 90 minutes.
Number the pots on the rim, fill them, and cover each with a circle of tissue paper held by an elastic band. Stand them in a tray so the whole thing moves as one piece.
Quick tip: seal the inside of the pots with a coat of varnish if you are putting food in them. Unsealed terracotta is porous and holds moisture.
11. Book Page Cone Calendar
Materials: old book or sheet music pages, glue, twine, pegs.
Time: an hour.
Roll each page into a cone, glue the seam, and hang the cones from twine with the open end up. The print gives the whole thing a vintage look without buying patterned paper.
Quick tip: cones hold more than they look like they will, but anything heavy pulls them out of shape, so keep each one under about fifty grams. Similar paper work appears in DIY paper Christmas decorations.
12. Drawer Unit Advent
Materials: a small chest of drawers or craft organiser, paint, number labels.
Time: 2 hours plus drying.
Paint a cheap plastic or wooden organiser, label the drawers one to twenty four, and fill them. Once December ends it goes back to storing craft supplies, which makes it the most practical piece here.
Quick tip: look at second hand organisers before buying new. A scuffed unit disappears entirely under two coats of paint.
How to Fill 24 Pockets Without Overspending
The build is the easy part. Twenty four fillings is where it gets expensive, so mix the categories instead of buying twenty four gifts.
- Eight edible: a single wrapped chocolate, a candy cane, a tea bag, a sachet of hot chocolate.
- Eight activity notes: a film to watch, a walk to take, a recipe to bake together. These cost nothing and are usually remembered longer than the objects.
- Six tiny objects: a hair clip, a marble, a sticker sheet, a seed packet.
- Two larger ones: save these for the first and the twenty fourth so the calendar opens and closes on something.
Fill the calendar in one sitting rather than day by day. Partially filled calendars are how the twentieth of December arrives with eight empty pockets.
Mistakes That Make an Advent Calendar Fall Apart
- Pockets sized for the gift you have, not the gifts you will find. Build to fit a small chocolate bar and everything else will fit too.
- One long sagging line. Twine stretches under weight. Two rows or a rigid frame solve it.
- Numbers glued on permanently. That turns a reusable piece into a single season one.
- Hanging it with a single nail. A filled calendar can weigh several kilograms. Use two fixings and spread the load.
- Starting on 1 December. The sewn and knitted versions take days, not hours.
Conclusion
If you have one evening, make the paper bag garland or the toilet roll crackers. If you want something that comes back every year, build the wooden crate wall or paint a drawer unit, because both survive storage and both stop looking like a craft project after the first season.
Start the build in early November and fill it in one go in late November, and 1 December arrives with nothing left to do. When January comes, the guide to storing holiday decor covers packing the reusable ones flat, and the rest of the season is covered in easy Christmas crafts on a budget.
Frequently Asked Questions
Q: When should a DIY advent calendar be made?
A: Build it in early November and fill it in the last week of November. The sewn pocket hanging and the knitted stockings take several days of work, so those need starting in late October if they are to be ready.
Q: What size should advent calendar pockets be?
A: Size them to hold a standard small chocolate bar, roughly 10cm by 5cm by 1cm. Anything that fits that will also hold notes, sweets, and most small objects, so you are not restricted later by what you can find.
Q: What can go in an advent calendar apart from sweets?
A: Activity notes work well and cost nothing, for example a film to watch or a recipe to bake. Small practical items such as hair clips, stickers, seed packets, and tea bags also fit, and mixing categories keeps the total cost down.
Q: How do you make an advent calendar reusable?
A: Avoid permanent numbering and avoid glue where a tie would do. Numbered tags on twine, chalk paint labels, and removable stickers all let the same calendar be renumbered or repurposed, and wooden or fabric builds survive storage far better than cardboard.