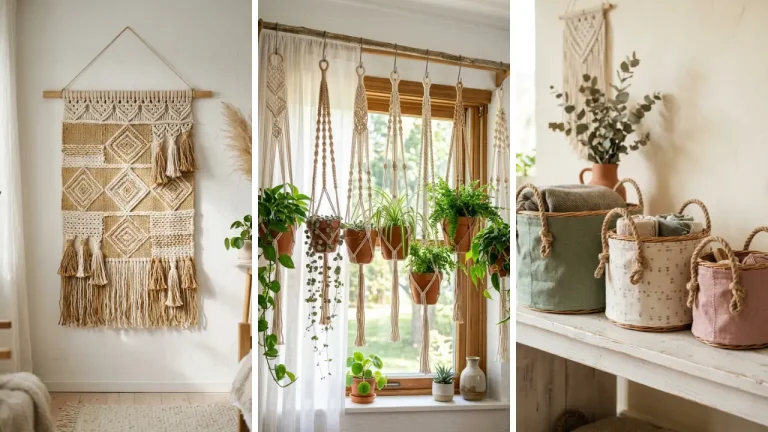
How to Tie the 5 Basic Macrame Knots for Beginners Must Know
Have you ever looked at a gorgeous macrame wall hanging or a beautifully knotted plant hanger and thought, “I could never make that”? Here’s the truth: you absolutely can. Learning how to tie the 5 basic macrame knots every beginner must know is simpler than it looks — and once you nail these foundational knots, an entire world of fiber art opens up to you.
This guide walks you through each essential knot step by step, with clear instructions designed for complete beginners. No prior experience needed. By the end of this article, you’ll have the core skills to start creating your own macrame pieces with confidence.
Why Learning Basic Macrame Knots Is the Best Place to Start

Macrame has seen a massive revival in recent years, and it’s easy to see why. It’s affordable, meditative, and produces stunning handmade results. But like any craft, the secret to success lies in mastering the basics first.
All macrame projects — from beginner wall hangings to complex plant holders — are built using a small set of repeating knots. If you can tie these five foundational knots, you can tackle virtually any pattern out there. Think of them as the alphabet of macrame: learn the letters, and you can write anything.
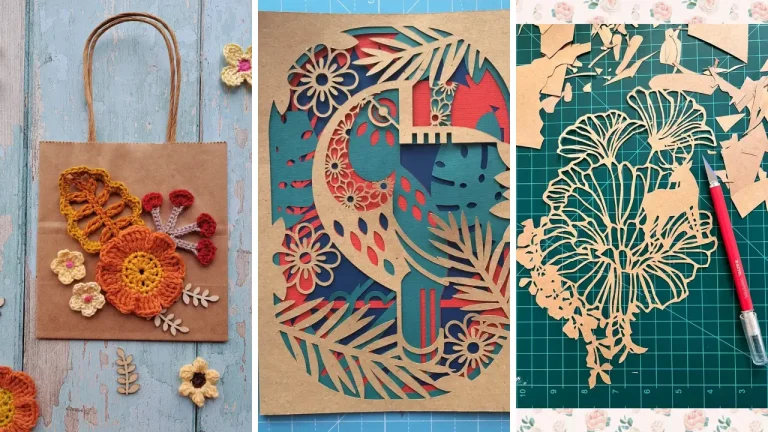
Beyond the craft itself, macrame is a fantastic gateway into the world of DIY handmade gifts. A knotted keychain or mini wall hanging makes a thoughtful, personal present that costs very little to create but feels genuinely luxurious.
What You Need Before You Start Tying Knots

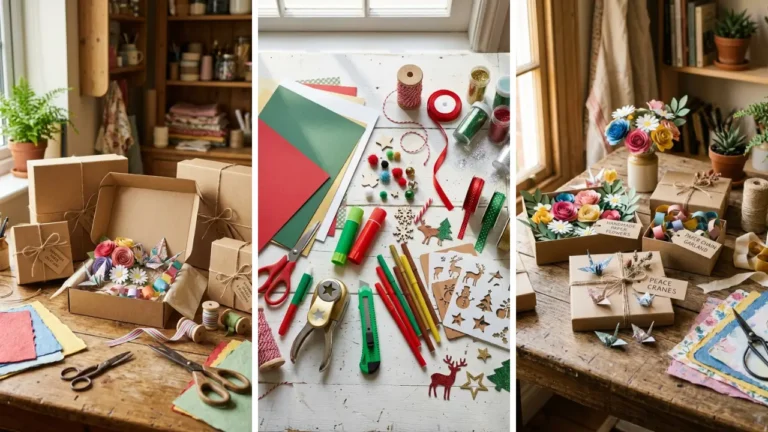
Before diving into the knots themselves, let’s quickly cover your starter supplies. You don’t need much — that’s part of what makes macrame so beginner-friendly.
- Macrame cord: 3mm–5mm single-strand or 3-ply cotton cord works best for beginners.
- Mounting surface: A wooden dowel, ring, or even a sturdy clothes hanger works fine.
- Scissors: Sharp scissors for clean cuts.
- Tape measure: To cut consistent cord lengths.
That’s it. Macrame is one of those fun crafts to make at home that requires almost no upfront investment, especially when you’re just learning the basic knots on short practice lengths of cord.
How to Tie the 5 Basic Macrame Knots Every Beginner Must Know

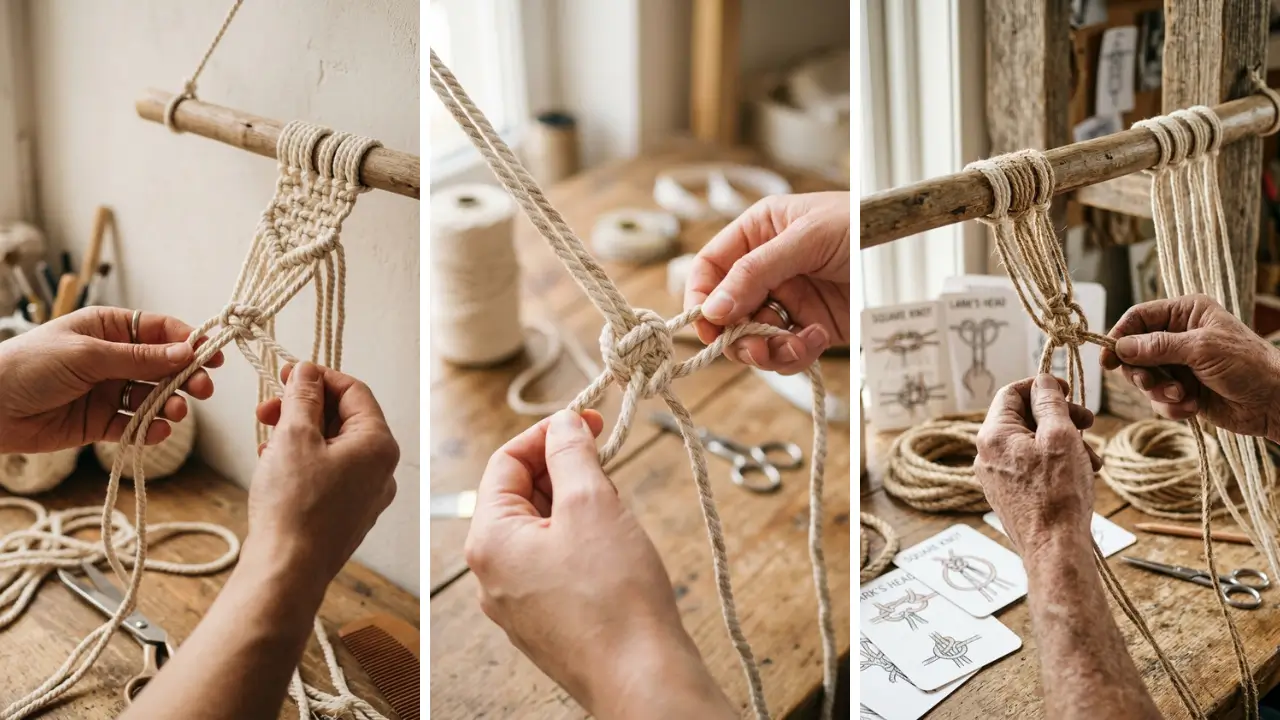
1. The Square Knot

The square knot is the single most important knot in macrame. It’s the foundation of countless patterns, including wall hangings, bags, and plant hangers. You’ll use it constantly.
To tie a square knot, you need four cords. The two middle cords are your anchor cords — they stay still. The outer two cords do all the work.
- Take the left cord and cross it over the two anchor cords, then under the right cord.
- Pull the right cord under the anchor cords and up through the loop created on the left.
- Pull both working cords to tighten. That’s the first half.
- Repeat the same steps in reverse (start with the right cord this time).
- Pull snug — that’s a complete square knot.
Pro tip: Keep your tension consistent. Uneven tension is the most common beginner mistake and makes your work look messy.
2. The Half Square Knot (Spiral Knot)
If you only tie the first half of the square knot over and over without reversing, you get a half square knot. Repeated continuously, this creates a beautiful spiral twist — often called a spiral or DNA knot. The steps are the same as the first half of the square knot.
Just repeat that one motion consistently, always starting from the same side. After about 4–5 repetitions, you’ll notice the cords naturally begin to twist into a helix shape. This knot is popular for bracelets, plant hangers, and decorative accents.
It’s simple but visually impressive — exactly the kind of result that makes macrame feel so rewarding early on.
3. The Lark’s Head Knot

Before you can start knotting, you need to attach your cords to a dowel or ring. That’s where the lark’s head knot comes in. It’s technically a mounting knot, but it’s essential.
- Fold your cord in half to create a loop.
- Place the loop over the top of your dowel, with the loop facing toward you.
- Pull both loose ends of the cord down through the loop from front to back.
- Pull tight to secure.
For a neater look, try the reverse lark’s head knot by inserting the loop from back to front instead. This gives a slightly different texture and is preferred in many modern macrame patterns.
4. The Half Hitch Knot
The half hitch knot is used to create diagonal lines, curves, and detailed texture in macrame designs. It’s slightly more technical than the square knot but opens up enormous creative possibilities. To tie a half hitch, hold one cord taut as your holding cord.
Take a second working cord and loop it over the holding cord, then back under and through the loop. Pull to tighten. That’s one half hitch.
Two half hitches tied together form a double half hitch, which is what most patterns actually use. Repeat this along a diagonal holding cord to create clean, angled lines across your work. Practicing double half hitches is one of the fastest ways to level up your macrame skills.
Once you get the tension right, you can create chevrons, diamonds, and intricate geometric patterns.
5. The Gathering Knot (Wrapping Knot)
")
The gathering knot — also called a wrapping knot — is used to bundle multiple cords together neatly. It’s commonly used at the top of plant hangers or to finish off sections of a piece.
- Lay one long cord alongside the bundle of cords you want to wrap, with the end pointing downward.
- Begin wrapping the long cord tightly around the bundle from top to bottom.
- When you’ve wrapped to your desired length, thread the end of the wrapping cord through the bottom loop.
- Pull the top tail upward to lock the knot in place. Trim any excess cord.
A clean gathering knot gives your macrame a polished, professional finish. It’s one of those small details that makes a huge visual difference in the final piece.
Practicing These Knots: Tips for Faster Progress

Learning the knots is one thing — building muscle memory is another. Here are a few practical tips to speed up your progress:
- Practice on short practice cords first. Cut 50cm pieces and practice each knot until it feels natural before committing to a full project.
- Work at a comfortable height. Hang your dowel at chest or eye level so you’re not hunching over while you knot.
- Watch your tension. Consistent tension is the difference between a polished and messy result.
- Use contrasting colors when learning. It’s much easier to see what each cord is doing when the working cords and anchor cords are different colors.
If you’re looking for more structured guidance on getting started with fiber crafts and other creative hobbies, exploring home craft projects quick can give you plenty of inspiration to keep the momentum going.
Simple Beginner Projects to Practice Your Knots

Once you’ve practiced the five basic knots individually, the next step is combining them in a simple project. Here are three beginner-friendly ideas:
- Macrame keychain: Uses lark’s head, square knots, and a gathering knot. Finished in under 30 minutes.
- Mini wall hanging: Combines lark’s head, square knots, and double half hitches for a complete decorative piece.
- Simple plant hanger: Uses gathering knots and square knots to create a functional and beautiful hanger.
These projects make wonderful handmade gift craft ideas for friends and family. There’s something genuinely special about giving someone a gift you made entirely by hand — and macrame pieces always impress, even when they’re simple. If budget is a concern, you’ll be happy to know macrame cord is very affordable, and you can find supporting supplies for almost nothing.
It pairs perfectly with other budget-friendly creative hobbies — similar to exploring dollar store crafts ideas that look way more expensive than they actually are.
Conclusion: Your Macrame Journey Starts With These Five Knots
Macrame doesn’t have to be intimidating. Understanding how to tie the 5 basic macrame knots every beginner must know — the square knot, half square knot, lark’s head knot, half hitch knot, and gathering knot — gives you everything you need to start creating beautiful fiber art from scratch. These five knots are the building blocks of virtually every macrame pattern in existence.
Master them, and no project will feel out of reach. The key is consistent practice: spend time on short practice cords, focus on even tension, and work through small projects before attempting larger ones. Macrame is more than just a craft — it’s a creative outlet, a stress-reliever, and a way to make meaningful, beautiful things with your own hands.
Whether you’re making pieces for your own home or creating thoughtful gifts, these knots open doors you didn’t even know were there. Now grab your cord, find a comfortable spot, and start tying. Ready to get knotting?
Try practicing one knot today — even just 10 minutes on the square knot can make a huge difference. Share your first macrame attempt in the comments below, or tag your projects online. We’d love to see what you create!
Frequently Asked Questions
Q: What is the easiest macrame knot for absolute beginners? A: The lark’s head knot is technically the simplest, but the square knot is the most important to learn first. It only takes a few minutes to understand the motion, and with a little practice, it becomes second nature.
Most beginner projects are built almost entirely on square knots. Q: How long does it take to learn how to tie the 5 basic macrame knots every beginner must know? A: Most beginners can learn all five basic knots in a single afternoon of focused practice — roughly 2 to 3 hours.
The lark’s head and gathering knots come quickly, while the double half hitch may take a bit more time to master. Consistent practice over a few sessions will make all five feel completely natural. Q: What type of cord is best for practicing macrame knots as a beginner?
A: Single-strand or 3-ply cotton macrame cord in 3mm to 5mm thickness is ideal for beginners. It’s soft, easy to work with, and holds knots well without slipping. Avoid nylon or synthetic cords when starting out — they’re slippery and harder to control.
Q: Can I use the 5 basic macrame knots to make gifts for people? A: Absolutely. Even with just these five fundamental knots, you can create beautiful keychains, wall hangings, plant hangers, and bracelets that make incredible handmade gifts.
Simple macrame pieces are often more impressive to recipients than complex ones because the texture and craftsmanship are so visible. Q: Do I need any special tools to practice basic macrame knots for beginners? A: No special tools are required.
A wooden dowel or curtain rod to mount your cords, a pair of sharp scissors, and cotton macrame cord are all you need to get started. Some crafters use a foam board or macrame rack for convenience, but these are completely optional — especially when you’re just learning the basic knots.