How to Decoupage a Dresser Drawer: Easy Step-by-Step Guide
Have you ever looked at an old dresser drawer and wondered what you could do to breathe new life into it? Learning how to decoupage a dresser drawer for a unique statement piece is one of the most rewarding furniture transformation projects you can tackle. This centuries-old craft technique allows you to turn ordinary, forgotten furniture into extraordinary conversation starters that reflect your personal style.
Decoupage is essentially the art of decorating surfaces with paper cutouts and sealing them with layers of finish. What makes it perfect for dresser drawers is its accessibility—you don’t need expensive tools or years of experience. Whether you’re working with a thrift store find or breathing new life into a family heirloom, this technique delivers stunning results every time.
In this comprehensive guide, you’ll discover everything from selecting the right materials to achieving a professional, long-lasting finish. By the end, you’ll have the confidence to transform any tired dresser drawer into a beautiful focal point for your home.
Understanding Decoupage: The Perfect Technique for Dresser Transformations

Decoupage comes from the French word “decouper,” meaning to cut out. This technique has been used since the 17th century by artisans who wanted to imitate expensive lacquered furniture. Today, it remains one of the most versatile and budget-friendly ways to customize furniture.
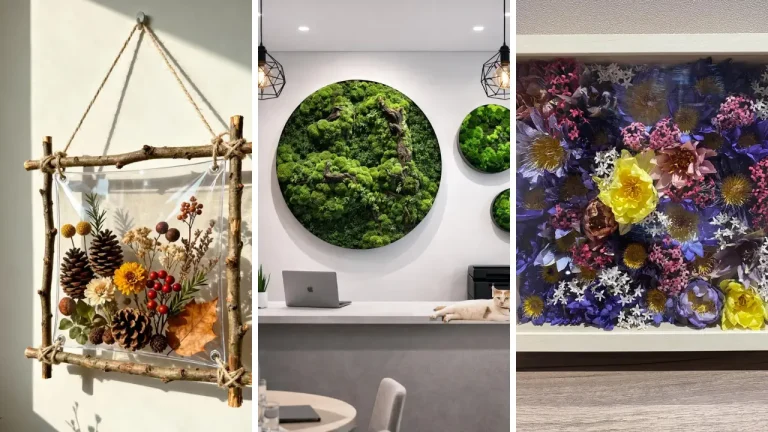
The beauty of decoupaging dresser drawers lies in the endless design possibilities. You can use vintage book pages, decorative napkins, fabric, wallpaper, maps, or even photographs. Each material creates a different effect, from elegant and sophisticated to whimsical and playful.
If you enjoy creative projects like this, you might also love exploring fun crafts to make at home that require minimal experience but deliver impressive results. Decoupage fits perfectly into this category because it’s forgiving for beginners while offering depth for advanced crafters.
Essential Materials You Need for Decoupaging a Dresser Drawer

Before starting your project, gathering the right supplies ensures a smooth process and professional outcome. Here’s your complete materials checklist: Base Materials:
- Dresser drawer (wooden surfaces work best)
- Sandpaper (120 and 220 grit)
- Primer (optional but recommended for dark surfaces)
- Acrylic paint for base coat
Decoupage Supplies:
- Decoupage medium (Mod Podge or similar)
- Decorative paper, napkins, or fabric
- Sharp scissors or craft knife
- Foam brushes or soft bristle brushes
- Brayer or credit card for smoothing
Finishing Supplies:
- Clear sealer (water-based polyurethane or wax)
- Fine sandpaper (320 grit) for between coats
- Soft cloth for buffing
Many of these supplies can be found at your local craft store without breaking the bank. Speaking of budget-friendly options, check out these dollar store crafts ideas that prove you don’t need expensive materials to create high-end looks.
How to Prepare Your Dresser Drawer for Decoupage Success

Proper preparation is the secret weapon that separates amateur results from professional-looking finishes. Skipping this step is the number one mistake beginners make when learning how to decoupage a dresser drawer for a unique statement piece.
Cleaning and Sanding
Start by removing any hardware from the drawer. Clean the entire surface with a mixture of warm water and mild dish soap to remove dust, grease, and grime. Let it dry completely—rushing this step leads to adhesion problems later.
Next, sand the drawer surface with 120-grit sandpaper. This creates a slightly rough texture that helps the paint and decoupage medium bond properly. Follow up with 220-grit for a smoother finish.
Wipe away all dust with a tack cloth or damp rag.
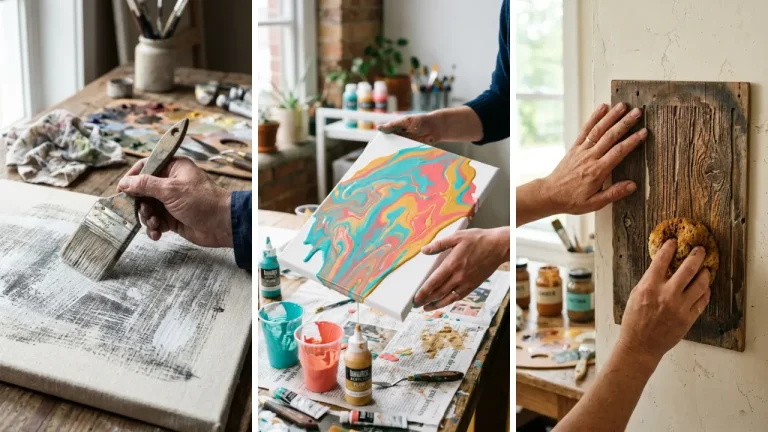
Priming and Base Coating

Apply a coat of primer if you’re working with a dark-stained or previously painted surface. Primer prevents bleed-through and creates a uniform base. Once the primer dries, apply your chosen base paint color.
Consider how your base color will interact with your decoupage paper. White or light colors work well with most designs, while darker bases create dramatic effects with translucent papers. Apply two thin coats rather than one thick coat for best results.
Step-by-Step Decoupage Application Process

Now comes the exciting part—actually applying your decorative elements. This is where your creative vision comes to life.
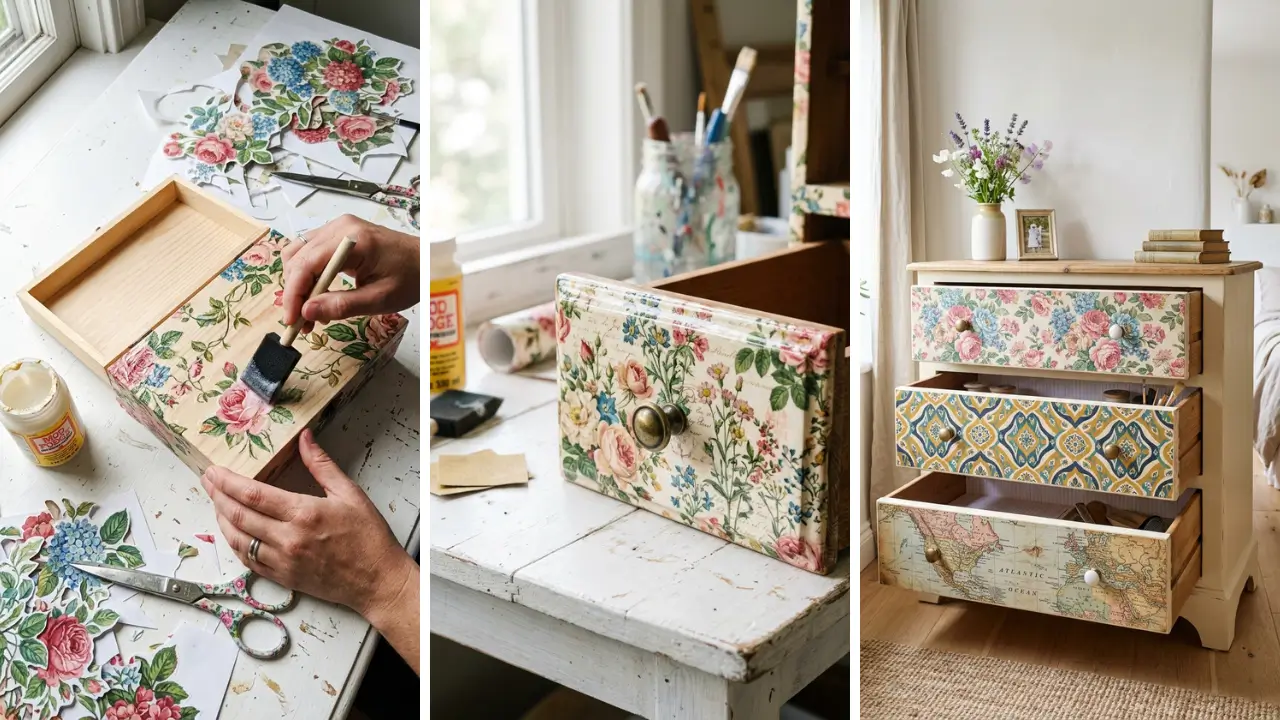
Cutting and Planning Your Design
Before applying any glue, lay out your paper pieces on the drawer to plan your design. Take photos of arrangements you like so you can reference them during application. Cut your paper pieces with sharp scissors for clean edges, or tear them for a more organic, vintage look.
When working with napkins, carefully separate the printed top layer from the backing layers. You only need the thin printed layer for decoupage. This creates a smoother, more seamless finish.
Applying the Decoupage Medium
Apply a thin, even layer of decoupage medium to the drawer surface where you’ll place your first paper piece. Work in small sections to prevent the medium from drying before you position your paper. Carefully place your paper onto the wet medium, starting from one edge and smoothing outward to prevent air bubbles.
Use a brayer or the edge of a credit card to gently press the paper flat. Work from the center outward to push any trapped air to the edges. Once the paper is positioned, apply another thin layer of decoupage medium over the top.
This layer seals the paper and prepares the surface for additional elements or finishing coats. Let each layer dry completely before adding more.
Layering Techniques for Depth and Interest
Creating visual depth transforms a simple decoupage project into true art. Overlap paper pieces slightly, vary the sizes and orientations of your cutouts, and consider mixing different paper types for texture variation. Some crafters add dimensional elements like small buttons, charms, or dried flowers between decoupage layers.
These DIY handmade gifts techniques can elevate your dresser drawer from a simple project to a gallery-worthy piece.
Achieving a Professional Finish on Your Decoupaged Drawer

The finishing process determines whether your project looks handmade in the best way or simply amateur. Multiple sealing coats create durability and that coveted smooth finish.
Building Up Protective Layers
Apply at least three to five coats of decoupage medium or clear sealer over your completed design. More coats equal better protection and a smoother final surface. Allow each coat to dry completely—typically 20-30 minutes for decoupage medium.
Between coats, lightly sand with 320-grit sandpaper. This removes any brush strokes or texture and helps the next coat adhere better. Wipe away dust before applying the next layer.
Final Sealing Options
For drawers that will see regular use, consider a final coat of water-based polyurethane. This provides superior protection against scratches, water rings, and daily wear. Choose matte, satin, or gloss finish based on your aesthetic preference.
Alternatively, furniture wax creates a beautiful soft sheen and adds protection. Apply with a soft cloth in circular motions, let it haze, then buff to your desired shine.
Creative Design Ideas for Decoupaging Dresser Drawers

The design possibilities are truly endless when you understand how to decoupage a dresser drawer for a unique statement piece. Here are some inspiring approaches: Vintage Botanical: Use pages from old botanical books or printed botanical illustrations. This classic look works beautifully in bedrooms and living spaces.
Map Theme: Cover drawers with maps of meaningful locations—places you’ve traveled, your hometown, or dream destinations. Perfect for offices or children’s rooms. Fabric Decoupage: Thin cotton fabrics create a soft, textured look that pairs beautifully with shabby chic or cottage-style decor.
Collage Style: Mix vintage photographs, ticket stubs, postcards, and ephemera for a highly personal, eclectic statement piece. These projects make excellent handmade gift craft ideas too. A decoupaged jewelry box or small drawer makes a meaningful present that shows real thought and effort.
Troubleshooting Common Decoupage Problems

Even experienced crafters encounter challenges. Here’s how to handle the most common issues: Air Bubbles: If bubbles appear, poke them gently with a pin and press flat. For larger bubbles, carefully lift the paper edge, apply more medium, and smooth again.
Wrinkles in Thin Paper: Work with smaller pieces when using delicate napkins or tissue paper. Applying medium to the surface only (not the paper) reduces wrinkling. Paper Tearing: Wet paper is fragile.
Use a light touch and work slowly. If tearing occurs, embrace it as part of the vintage aesthetic or carefully patch with additional pieces. Yellowing: Some decoupage mediums yellow over time.
Choose “non-yellowing” formulas and avoid direct sunlight exposure for your finished piece. These home craft projects quick tips will help you avoid frustration and achieve better results from the start.
Caring for Your Decoupaged Dresser Drawer
Proper care ensures your statement piece stays beautiful for years. Clean surfaces with a soft, slightly damp cloth—avoid harsh chemicals or abrasive cleaners that can damage the finish. Keep decoupaged furniture away from direct heat sources and intense sunlight, which can cause fading or finish deterioration.
If you notice the finish becoming dull over time, a fresh coat of wax restores the protective layer and shine. For heavily used drawers, consider applying a fresh sealing coat annually. This maintenance step takes minimal time but significantly extends the life of your decoupage work.
Conclusion: Transform Your Space with Decoupaged Furniture
Learning how to decoupage a dresser drawer for a unique statement piece opens up a world of creative possibilities for your home. This accessible technique transforms ordinary furniture into extraordinary art, all while being budget-friendly and beginner-appropriate. The key to success lies in proper preparation, patience during application, and building up protective finishing layers.
Don’t rush the process—each step contributes to that professional, polished final result you’re aiming for. Whether you choose vintage botanicals, meaningful maps, or eclectic collages, your decoupaged drawer will tell a story that mass-produced furniture simply cannot. It becomes a conversation piece, a reflection of your personality, and a source of genuine pride.
Ready to start your transformation? Grab that old drawer you’ve been meaning to update, gather your supplies, and begin creating. Share your finished project in the comments below—we’d love to see what unique statement pieces you create!
Frequently Asked Questions
Q: What type of paper works best for decoupaging a dresser drawer? A: Thinner papers like napkins, tissue paper, and rice paper create the smoothest finishes. However, scrapbook paper, wrapping paper, and even fabric work well too.
The key is applying enough sealing coats to smooth any texture differences. Q: How long does a decoupage dresser drawer project take to complete? A: The actual working time is just a few hours, but you’ll need 24-48 hours total for drying time between coats.
Plan your project over a weekend for best results without rushing. Q: Can I decoupage over previously painted or stained furniture? A: Yes!
Sand the surface lightly to create tooth for adhesion, clean thoroughly, and apply primer if the existing color is dark. This prevents color bleed-through and ensures your decoupage paper shows true to color. Q: How do I decoupage a dresser drawer for a unique statement piece without bubbles?
A: Work with smaller paper pieces, apply medium to the surface rather than the paper when using thin materials, and use a brayer or credit card to smooth from the center outward. Working slowly and carefully prevents most bubble issues. Q: Is decoupaged furniture durable enough for everyday use?
A: Absolutely! With proper sealing—at least 3-5 coats of decoupage medium plus a final protective sealer—your decoupaged drawer will handle daily use for years. Regular maintenance with furniture wax extends durability even further.