How to Set Up a Home Craft Room on Any Budget
Have you ever dreamed of having your own dedicated space where creativity flows freely, but your wallet says otherwise? Here’s the good news: learning how to set up a home craft room on any budget is absolutely achievable, whether you’re working with $50 or $500. The secret isn’t about spending more—it’s about spending smarter.
A well-organized craft room can transform your creative process entirely. No more hunting for scissors in kitchen drawers or finding paint tubes under the couch. In this comprehensive guide, you’ll discover practical strategies to create your dream crafting space without breaking the bank.
From repurposing everyday items to maximizing every square inch, we’ll cover everything you need to know.
Ready to turn that unused corner, spare closet, or chaotic desk into a functional creative haven? Let’s dive into the step-by-step process that works for every budget level.
Assess Your Space and Crafting Needs Before Spending a Dime

Before buying anything, take a realistic look at what you have. Walk through your home with fresh eyes. That awkward corner in the bedroom?
Perfect for a small crafting desk. The hall closet nobody uses? Could become a compact craft station.
Start by answering these questions:
- What types of crafts do you primarily do?
- How much table space do you actually need?
- What supplies do you already own that need organizing?
- How much natural light is available in potential spaces?
Different crafts require different setups. Sewing needs a stable surface and electrical outlet access. Painting demands good ventilation and easy-clean floors.
If you enjoy fun crafts to make at home, you might prioritize versatile workspace over specialized equipment.
Measure your available space precisely. Knowing exact dimensions prevents costly mistakes like buying furniture that doesn’t fit. A tape measure and quick sketch save both money and frustration later.
Budget-Friendly Furniture Solutions for Your Craft Room
Furniture typically eats the biggest chunk of any room budget. But here’s where creativity truly pays off. You don’t need expensive craft-specific furniture to build a functional workspace.
Thrift Store and Secondhand Finds

Thrift stores, estate sales, and Facebook Marketplace are goldmines for craft room furniture. Old kitchen tables make excellent work surfaces—they’re built sturdy and often have useful drawers. Vintage dressers provide deep storage perfect for fabric, yarn, or paper supplies.
Look for pieces with “good bones” that might need minor fixes or fresh paint. A wobbly table leg often needs just a few screws. Outdated finish?
A coat of paint transforms anything into something you’ll love.
Repurpose What You Already Own
That old desk gathering dust in the garage deserves a second chance. Bookshelves from college can organize supplies beautifully. Even a sturdy folding table works wonderfully when space is tight—it disappears when you need the room for other activities.
Consider multi-purpose furniture if your craft space shares a room with other functions. A storage ottoman holds supplies while providing seating. A rolling cart moves wherever you’re working that day.
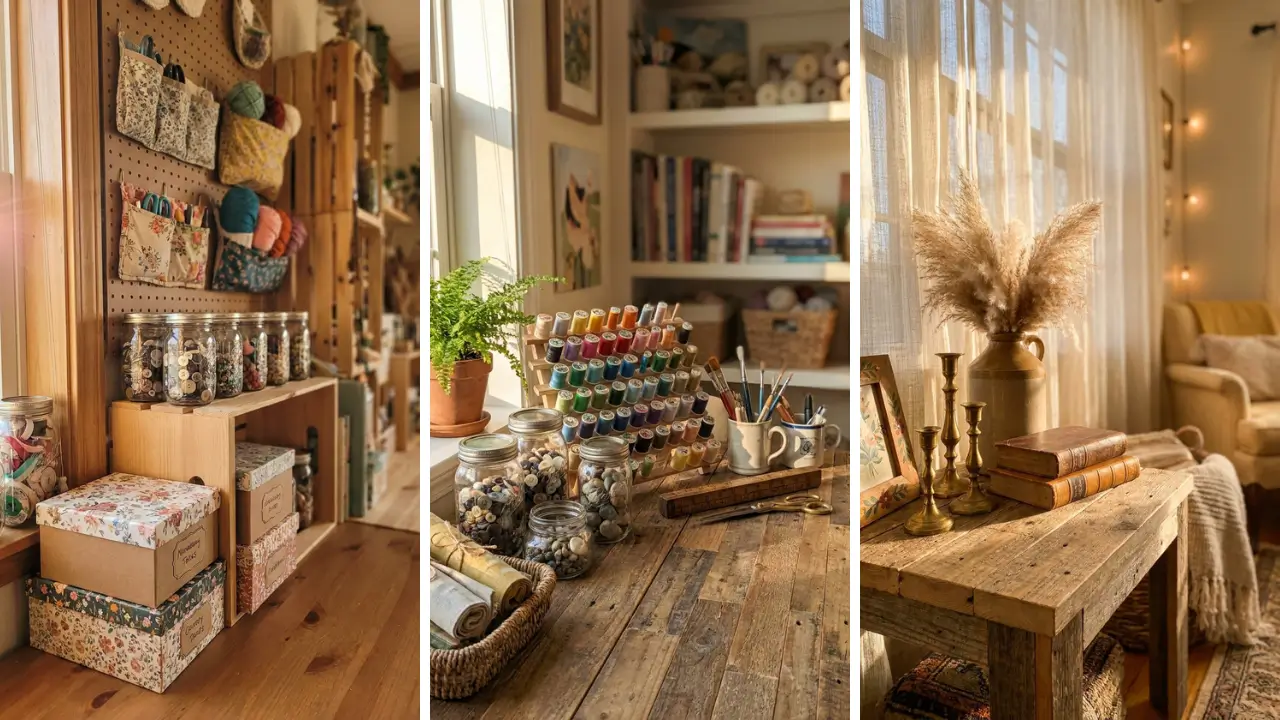
Smart Storage Solutions That Won’t Empty Your Wallet
Organization makes or breaks a craft room. The best news? Effective storage doesn’t require expensive specialty systems.
Some of the smartest solutions cost almost nothing.
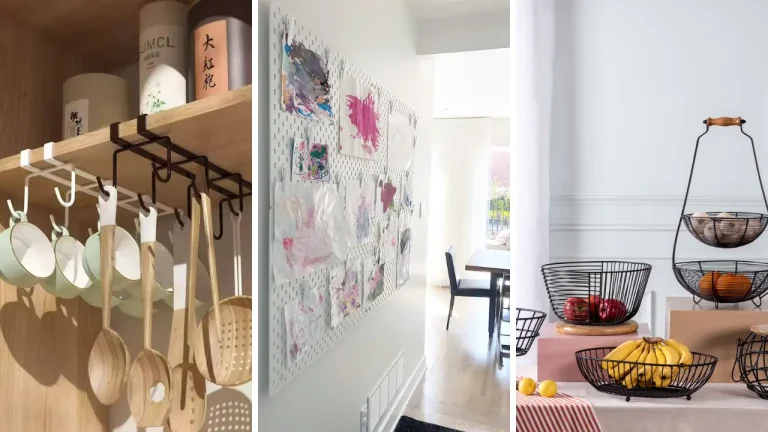
Dollar Store Organization Hacks

Dollar stores offer incredible craft storage potential. Clear shoe boxes organize small items like buttons, beads, or ribbon scraps. Plastic bins in various sizes stack neatly on shelves.
Check out these dollar store crafts ideas for even more budget-friendly inspiration.
Tension rods inside cabinet doors create ribbon dispensers. Magnetic strips hold metal scissors and tools. Ice cube trays organize tiny embellishments perfectly.
DIY Storage Projects
Building your own storage adds personal touches while saving money. Mason jars mounted under shelves store items visibly. Pegboard walls cost under $20 but organize an entire workspace worth of tools.
Toilet paper tubes, surprisingly, make excellent cord and ribbon organizers.
Cardboard boxes covered with decorative paper become attractive storage that looks intentional, not improvised. Soup cans wrapped in fabric hold pencils, brushes, and markers beautifully.
Essential Supplies to Start Your Craft Room Right

When setting up a home craft room on any budget, prioritize essential supplies over specialty items. Start with basics and add specialized tools as specific projects require them.
Core supplies every crafter needs:
- Quality scissors (invest here—they last years)
- Basic adhesives: glue stick, craft glue, tape
- Cutting mat and rotary cutter or craft knife
- Ruler and measuring tools
- Basic paper and cardstock variety pack
Buy quality for tools you’ll use daily. Cheap scissors dull quickly and frustrate rather than help. However, specialty punches or dies can wait until you’re sure you’ll use them frequently.
For those interested in home craft projects quick to complete, focus on versatile supplies that work across multiple project types. Mod Podge, for example, serves as glue, sealer, and finish in one bottle.
Lighting and Comfort: Often Overlooked Budget Priorities
Poor lighting causes eye strain and affects how colors appear in your projects. Good lighting doesn’t require expensive fixtures, though.
Natural light works best for most crafts, especially color-matching tasks. Position your main work surface near windows when possible. For evening crafting, look for daylight-balanced LED bulbs in existing lamps—they’re affordable and replicate natural light accurately.
A simple desk lamp with adjustable arm focuses light exactly where you need it. Clamp lights from hardware stores cost under $15 and mount anywhere. Under-cabinet LED strips brighten shadowy work areas for just a few dollars.
Don’t forget physical comfort. You’ll spend hours in this space, so a supportive chair matters. A chair pad improves any basic chair.
Anti-fatigue mats help if you craft standing. Small investments in comfort mean longer, more enjoyable crafting sessions.
Organizing Your Craft Supplies for Maximum Efficiency

A system that works with your habits beats any Pinterest-perfect setup that doesn’t. Think about how you actually work, then organize accordingly.
Group supplies by project type or frequency:
- Keep daily-use items within arm’s reach
- Store seasonal supplies higher or in less accessible spots
- Create project kits for ongoing works
- Label everything—future you will thank present you
Clear containers let you see contents instantly, reducing time spent searching. Consistent container sizes stack efficiently, maximizing shelf space. When exploring handmade gift craft ideas, having organized supplies means you can start projects immediately when inspiration strikes.
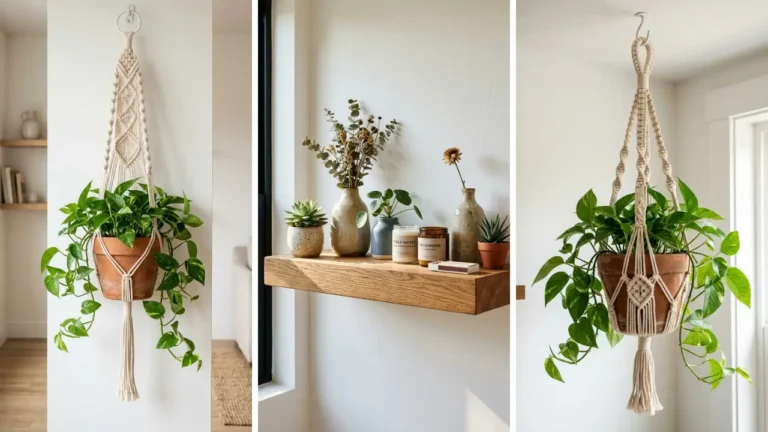
Vertical space often goes wasted. Wall-mounted shelves, pegboards, and hanging organizers utilize wall space that’s otherwise doing nothing. Every inch counts in small craft rooms.
Making the Most of Small or Shared Spaces
Not everyone has a spare room to dedicate entirely to crafting. Working within limitations requires extra creativity—something crafters excel at naturally.
Closet Craft Stations
A closet converted into a craft station offers surprising functionality. Remove doors or replace with curtains for easy access. Install a desktop at comfortable height.
Use vertical space aggressively with shelving above and storage below.
When closed, everything hides away. When open, you have a complete workspace. This solution works perfectly for renters who can’t make permanent modifications.
Mobile Crafting Solutions

Rolling carts bring your supplies wherever you want to work. Crafting at the kitchen table today? Roll the cart over.
Working in the living room while watching TV? The cart comes along. A good rolling cart with multiple tiers holds substantial supplies while remaining mobile.
Portable project boxes keep individual works-in-progress contained. You can craft anywhere without spreading materials throughout the house.
Budget Breakdown: Sample Setups at Different Price Points
Understanding what’s achievable at different budgets helps planning tremendously. Here’s what you might accomplish at various spending levels.
Under $50 setup: Repurposed desk or table, thrifted containers and jars, cardboard box storage covered in paper, DIY pegboard, basic essential supplies only.
$50-$150 setup: Secondhand furniture pieces, dollar store organization throughout, simple shelving units, improved lighting, broader supply selection.
$150-$300 setup: Mix of new and secondhand furniture, coordinated storage systems, quality task lighting, well-stocked supply inventory, possible cutting machine or specialized tool.
Remember, rooms evolve over time. Start with basics and upgrade gradually as budget allows. Many crafters build their dream spaces over months or years, not all at once.
Maintaining Your Craft Room Without Additional Costs

A craft room only works if it stays organized. Building maintenance habits prevents the chaos that makes spaces unusable.
The five-minute rule helps tremendously: spend five minutes tidying after each crafting session. Put tools back. Throw away scraps.
Return supplies to proper homes. This small habit prevents overwhelming messes.
Regular purges keep collections manageable. If you haven’t used something in a year, consider donating it. Craft supplies you’ll never use just create clutter.
Another crafter might love what’s gathering dust in your space.
Creating DIY handmade gifts becomes so much more enjoyable when your space stays functional. An organized room inspires creativity rather than overwhelming it.
Conclusion: Your Dream Craft Room Awaits
Learning how to set up a home craft room on any budget ultimately comes down to prioritizing what matters most for your creative process. You don’t need expensive furniture, matching storage containers, or specialty craft room products. You need functional space, accessible supplies, and a system that works for how you actually craft.
Start with what you have. Improve gradually as budget allows. Focus on organization over aesthetics initially—pretty rooms that don’t function well frustrate more than inspire.
The best craft room is one you’ll actually use and enjoy.
Whether you’re working with a dedicated spare room or carving out a corner of your bedroom, the principles remain the same: assess needs honestly, shop secondhand first, repurpose creatively, and organize intentionally. Your perfect crafting space is closer than you think.
Ready to start your craft room journey? Share your biggest challenge in setting up creative space in the comments below. Already have a budget-friendly craft room?
We’d love to hear your best tips! Don’t forget to save this guide for reference as you build your dream space.
FAQ
Q: What is the minimum space needed to set up a home craft room on any budget?
A: You can create a functional craft space in as little as a 3×3 foot area. A corner with a small desk and vertical storage works well. Even a closet can transform into a complete craft station with smart organization.
Q: How much does it realistically cost to set up a basic craft room?
A: A basic functional craft room can cost under $100 using secondhand furniture and dollar store organization. Most people spend between $100-$300 for a comfortable setup. Premium rooms with new furniture and specialized equipment might cost $500-$1000 or more.
Q: What are the most important items to invest in when setting up a home craft room on any budget?
A: Prioritize quality scissors, good lighting, and a sturdy work surface. These three elements affect every project you’ll make. Cheap scissors frustrate constantly, poor lighting strains eyes, and wobbly tables make precise work impossible.
Q: Can I create a craft room in a rental apartment without permanent modifications?
A: Absolutely! Use freestanding furniture, tension rod organizers, removable adhesive hooks, and portable storage systems. Closet conversions, rolling carts, and fold-away desks all work beautifully without any permanent changes that might affect your security deposit.
Q: How do I organize a craft room when I do multiple types of crafts?
A: Create zones or containers dedicated to each craft type. Use clear labeling so everything returns to its proper home. Consider a rolling cart for your current project while keeping other supplies stored separately.
Prioritize your most frequent craft in the most accessible space.