Paper Flower Wall Backdrop Ideas for Spring Parties and Events
Ever walked into a spring party and immediately felt transported into a blooming garden? That magical first impression almost always comes from one thing — a stunning floral backdrop. Paper flower wall backdrop ideas for spring parties and events have taken the crafting and event decor world by storm, and honestly, it’s easy to see why.
They’re affordable, customizable, and surprisingly easy to make yourself. Whether you’re planning a baby shower, bridal brunch, birthday bash, or outdoor garden party, a paper flower wall can completely transform your venue. In this guide, you’ll discover the most beautiful and practical ideas to create your own showstopping backdrop — no florist budget required.
Why Paper Flower Walls Are Perfect for Spring Events

Spring is all about renewal, color, and freshness — and paper flowers capture that energy beautifully. Unlike real flowers that wilt within hours, paper blooms stay picture-perfect throughout your entire event. They’re also incredibly versatile: you can match them to any color palette, theme, or venue size.
Another huge advantage? Cost. A real floral wall installation can run hundreds or even thousands of dollars.
With paper, you can achieve the same wow factor for a fraction of the price. Many crafters even find that dollar store crafts ideas can be the starting point for building a backdrop that looks like it cost a fortune. Paper flower walls also make excellent photo backdrops for social media moments — a must-have for any modern spring celebration.
Your guests will thank you for the Insta-worthy setup!
Top Paper Flower Wall Backdrop Ideas for Spring Parties and Events

Not all paper flower walls are created equal. The style you choose should reflect your event’s theme, your color scheme, and how much time you have to prepare. Here are the most popular and stunning ideas to inspire you.
1. Ombre Pastel Flower Wall
An ombre effect using soft pastels — blush pink, lavender, mint, and cream — is one of the most sought-after paper flower wall backdrop ideas for spring parties. Arrange flowers in diagonal or horizontal gradient bands across a foam board or wooden frame. The color transition creates a dreamy, almost watercolor-like appearance.
Use tissue paper, crepe paper, or cardstock for different textures. Mix petal sizes and flower types (roses, dahlias, ranunculus) to add depth and visual interest.
2. Giant Oversized Blooms

Go big or go home! Oversized paper flowers — think 18 to 24 inches in diameter — make an instant statement. Just five to eight large blooms arranged on a neutral backdrop (white fabric, kraft paper, or a plain wall) creates a bold, editorial look.
This style works beautifully for outdoor garden parties and photoshoot stations. It’s also one of the most beginner-friendly approaches since you’re making fewer pieces overall.
3. Wildflower Meadow Backdrop
Want something more organic and whimsical? A wildflower-inspired backdrop mimics the look of a natural spring meadow. Use a mix of daisies, poppies, sunflowers, and simple five-petal blooms in varied heights and sizes.
Add paper leaves and grass for extra dimension. This style pairs perfectly with rustic or boho-themed events. It’s also a great option if you enjoy fun crafts to make at home over a relaxed weekend with friends or family helping out.
4. Monochromatic White and Green Wall
For a sophisticated, elegant look, stick to white flowers with lush green paper foliage. This palette works for bridal showers, engagement parties, and elegant spring luncheons. The simplicity of the color scheme lets the textures and shapes of the paper do all the talking.
Layer different white flower styles — peonies, gardenias, and anemones — alongside tropical leaves and eucalyptus sprigs made from cardstock or crepe paper.
5. Rainbow Burst Flower Wall

For children’s birthday parties or vibrant spring events, a rainbow arrangement radiating outward from a central point creates pure joy. Use red, orange, yellow, green, blue, and purple flowers arranged in arc or starburst patterns. This style photographs incredibly well and keeps energy high throughout the event.
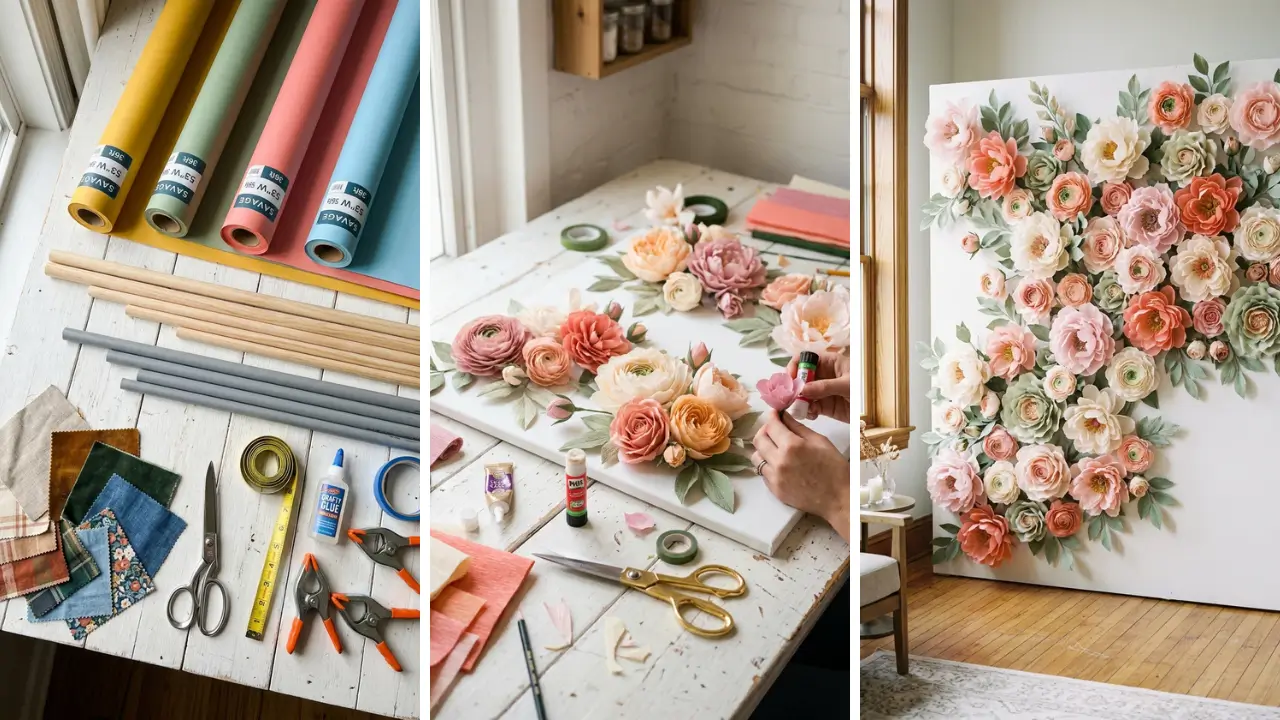
Materials You’ll Need to Build Your Backdrop

Before diving into construction, gathering the right supplies makes everything smoother. Here’s what most paper flower wall projects require:
- Paper: Tissue paper, crepe paper, cardstock, or mulberry paper — each gives a different texture and look.
- Base: A foam board, wooden dowel frame, wire mesh, or even a pegboard works perfectly as your structure.
- Adhesives: Hot glue gun is the go-to. Floral wire and floral tape also come in handy.
- Tools: Scissors, craft knife, bone folder, and ruler for precise cuts.
- Extras: Ribbon, fairy lights, greenery, and faux butterflies can elevate the final look.
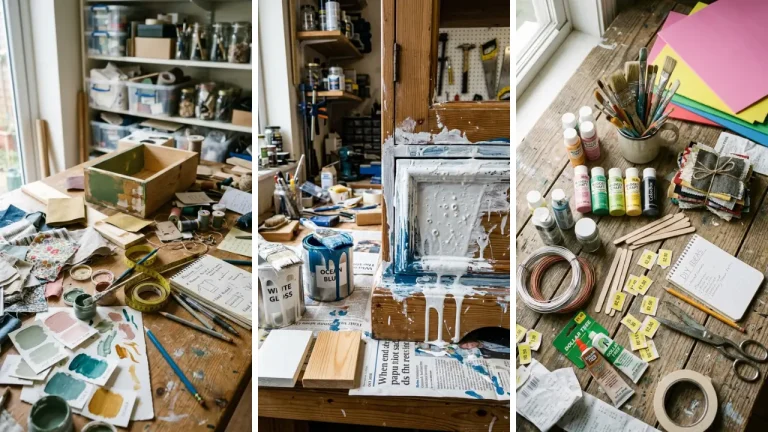
If you’re looking to expand your crafting toolkit, exploring home craft projects quick tutorials can give you solid foundational skills that apply directly to building flower walls.
Step-by-Step: How to Make a Simple Paper Flower Wall Panel

Creating your first paper flower wall doesn’t have to be overwhelming. Break it into manageable steps and you’ll have a gorgeous backdrop ready in a weekend. Step 1: Plan your layout.
Sketch your design on paper first. Decide on your color placement, flower sizes, and overall dimensions. A standard 6×4 foot panel works well for most backdrops.
Step 2: Make your flowers in batches. Tackle one flower style at a time. For tissue paper pom-poms, stack 8–10 sheets, fold accordion-style, bind the center with wire, then pull each layer apart gently.
For cardstock flowers, cut petal templates and curl edges with a pencil before assembling. Step 3: Arrange before gluing. Lay all your flowers on the base without gluing first.
Step back and assess the layout. Adjust sizes and colors until balanced. Step 4: Glue from the outside in.
Start with the outermost flowers and work inward. This prevents gaps and gives a fuller look. Fill any empty spaces with smaller blooms or paper leaves.
Step 5: Add finishing touches. Tuck in greenery, add fairy lights if desired, and check for any visible hot glue strings to clean up before the event.
Budget-Friendly Tips for Paper Flower Backdrops

You absolutely do not need to spend a lot to create something stunning. Smart shopping and creative reuse can stretch your budget significantly. Buy tissue paper in bulk — it’s inexpensive and one of the most versatile materials for large flower walls.
Check discount stores, craft sales, and clearance sections. Many of the most beautiful backdrops start with affordable supplies that transform into something truly impressive. You can also repurpose materials you already own.
Wrapping paper, old magazines, and even newspaper can be sculpted into interesting floral shapes. These projects double as amazing DIY handmade gifts when you preserve a few flowers to give as keepsakes after the party. If you’re gifting flowers or decorations to someone special, check out these handmade gift craft ideas that can complement your paper flower creations beautifully.
Styling Your Paper Flower Backdrop for Maximum Impact

The backdrop itself is just one element. How you style the full setup matters just as much for achieving that editorial, professional look. Frame it with furniture.
Place a vintage chair, a small bistro table with florals, or a balloon garland in front of your backdrop to create a layered, dimensional photo station. This makes photos feel intentional and curated rather than flat. Consider your lighting carefully.
Soft, warm fairy lights woven through the flowers add an ethereal glow for indoor events. For outdoor parties, position the backdrop to face soft afternoon light for the most flattering photos. Add a personalized element — a custom banner, wooden letter signs, or a neon light — to make the backdrop uniquely yours.
These small details elevate the entire setup and give guests something to remember.
Conclusion
There’s something genuinely magical about transforming paper into a lush, blooming wall of flowers. Paper flower wall backdrop ideas for spring parties and events give you the creative freedom to design something completely unique to your celebration — without the high cost of professional floral installations. Whether you go for soft pastels, bold rainbows, or elegant monochromes, the result is always a space that makes people stop, smile, and reach for their camera.
The best part? The skills you build making one backdrop open the door to so many other creative projects. Once you experience the joy of crafting something beautiful from simple materials, you’ll want to keep going.
Start small, experiment freely, and let your creativity lead the way this spring. Ready to start crafting your dream spring backdrop? Pick your color palette, gather your supplies, and set aside a creative weekend — your most beautiful event setup is closer than you think.
Share your finished backdrop in the comments below — we’d love to see what you create!
Frequently Asked Questions
Q: What types of paper work best for paper flower wall backdrop ideas for spring parties and events? A: Tissue paper is the most popular choice because it’s lightweight, inexpensive, and creates beautifully soft, realistic-looking petals. Crepe paper offers more texture and holds its shape well for larger blooms.
Cardstock works best for structured flowers like roses and dahlias that need firmer petals. Mixing multiple paper types in one backdrop adds visual depth and dimension. Q: How long does it take to make a paper flower wall backdrop?
A: The timeline depends on the size and complexity of your design. A basic 4×4 foot panel with simple tissue pom-poms can be completed in 4–6 hours. A full 6×8 foot wall with varied flower styles typically takes 12–20 hours of crafting time.
Spreading the work across several days or enlisting help from friends makes the process much more manageable and enjoyable. Q: Can paper flower wall backdrops be used outdoors for spring events? A: Yes, but with some precautions.
Paper flowers are susceptible to moisture and wind, so choose a sheltered outdoor location away from direct rain. Lightly spraying your finished flowers with hairspray or a matte sealant adds some water resistance. For windy conditions, secure the backdrop firmly to a sturdy frame and consider using heavier cardstock flowers rather than delicate tissue paper versions.
Q: What are the best color combinations for a spring party paper flower backdrop? A: Spring color palettes tend to feel fresh and uplifting. Blush pink and gold is perennially popular for elegant events.
Lavender, mint, and white creates a soft, ethereal garden feel. For a more vibrant, playful look, combine coral, yellow, and turquoise. Monochromatic schemes — all white with green foliage, or all peach tones — feel sophisticated and on-trend for modern spring celebrations.
Q: Are paper flower wall backdrop ideas for spring parties suitable for beginners with no crafting experience? A: Absolutely! Paper flower walls are one of the most beginner-friendly large-scale craft projects you can tackle.
Simple tissue paper pom-poms require no special skills — just folding, cutting, and fluffing. Starting with a small panel rather than a full wall helps build confidence. There are countless free tutorials available, and even imperfect flowers look beautiful when grouped together in a full backdrop display.