How to Make a DIY Pendant Light Wicker Basket: A Step-by-Step Guide
Have you ever looked at a designer pendant light in a home décor magazine and thought, “I could never afford that”? Here’s the thing — you probably already have everything you need to create something just as stunning. Learning how to make a DIY pendant light from a wicker basket is one of those surprisingly simple projects that delivers massive visual impact without draining your wallet.
Whether you’re sprucing up a dining room, bedroom, or cozy reading nook, a wicker basket light adds instant warmth and bohemian charm to any space. In this guide, you’ll get a complete walkthrough — from choosing the right basket to safely wiring your new fixture — so you can go from beginner to proud DIY decorator in just a few hours.
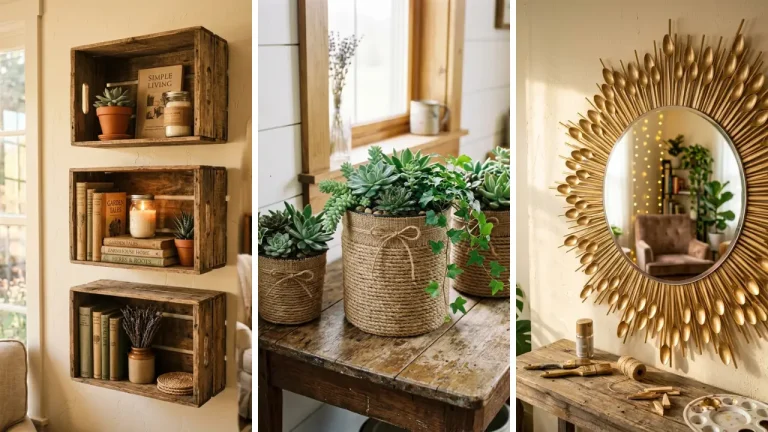
Why a Wicker Basket Makes the Perfect DIY Pendant Light Shade

Wicker and rattan materials have dominated interior design trends for years, and it’s easy to see why. Their natural weave creates a beautiful dappled light effect when illuminated, casting warm, organic patterns across your walls and ceiling. Beyond aesthetics, wicker baskets are incredibly lightweight, making them easy to handle during installation.
They’re also widely available — from thrift stores to garden centers — so you can often find the perfect shape for just a few dollars. If you love exploring dollar store crafts ideas, you’ll be thrilled to know that many dollar stores carry small wicker baskets that work brilliantly for this project. The natural texture also means every light you create is genuinely one-of-a-kind.
No two baskets weave exactly the same, so your pendant light will have a character that mass-produced fixtures simply can’t replicate.
Materials You’ll Need to Make a DIY Pendant Light From a Wicker Basket

Before you start, gather all your supplies. Having everything on hand makes the process smooth and enjoyable. Here’s what you’ll need:
- 1 wicker or rattan basket (round, oval, or square — your choice)
- Pendant light cord kit (available at hardware stores or online, includes socket and canopy)
- LED bulb (choose Edison-style for extra warmth and visual appeal)
- Drill with a spade bit (sized to fit your cord kit)
- Wire cutters and a utility knife
- Sandpaper (fine grit, to smooth any rough edges)
- Optional: spray paint or wood stain to customize your basket’s color
- Optional: twine or macramé cord for extra decorative detail
Most of these items are affordable and reusable, making this one of the best home craft projects quick wins you can tackle on a weekend. The total cost for a single pendant light typically ranges from $15 to $40, depending on your basket and cord kit.
Step-by-Step: How to Make a DIY Pendant Light From a Wicker Basket

Step 1 — Choose and Prep Your Basket
Select a basket with a shape you love. Deep, bowl-shaped baskets diffuse light downward beautifully and work great over dining tables. Shallower, wider baskets create a more spread-out ambient glow — perfect for living rooms.
Once you have your basket, inspect it for any loose weaves or rough spots. Use fine-grit sandpaper to smooth out any snags that could catch the cord. If you want to change the color, now is the time to apply spray paint or wood stain.
Let it dry completely before moving on.
Step 2 — Drill the Center Hole

Flip your basket upside down so the base faces upward — this will become the top of your pendant light. Using a spade bit that matches the diameter of your pendant cord kit’s strain relief fitting, drill a clean hole through the center of the basket base. Work slowly and apply steady pressure.
Wicker can crack if you rush this step. Once the hole is through, use sandpaper to smooth any frayed edges around it so the weave doesn’t unravel over time.
Step 3 — Thread the Pendant Cord
Follow the instructions included with your pendant cord kit to assemble the socket. Most kits are genuinely beginner-friendly — they require no electrical expertise beyond screwing wires into the correct terminals (typically marked L for live and N for neutral). Thread the cord up through the hole you drilled, from the inside of the basket outward.
Attach the strain relief fitting to hold the cord securely in place so the socket doesn’t bear the weight of the fixture. The socket should sit inside the basket, roughly centered, with the bulb pointing downward.
Step 4 — Secure the Canopy and Mount the Light

Slide the ceiling canopy up the cord and attach it to your existing ceiling box or hook. Make sure your mounting point can support the weight — wicker baskets are light, but you should always verify that your hook or ceiling box is rated for pendant fixtures. Once the canopy is in place, screw in your LED bulb.
An Edison-style filament bulb is highly recommended because it adds a warm, vintage glow that complements the organic texture of wicker perfectly.
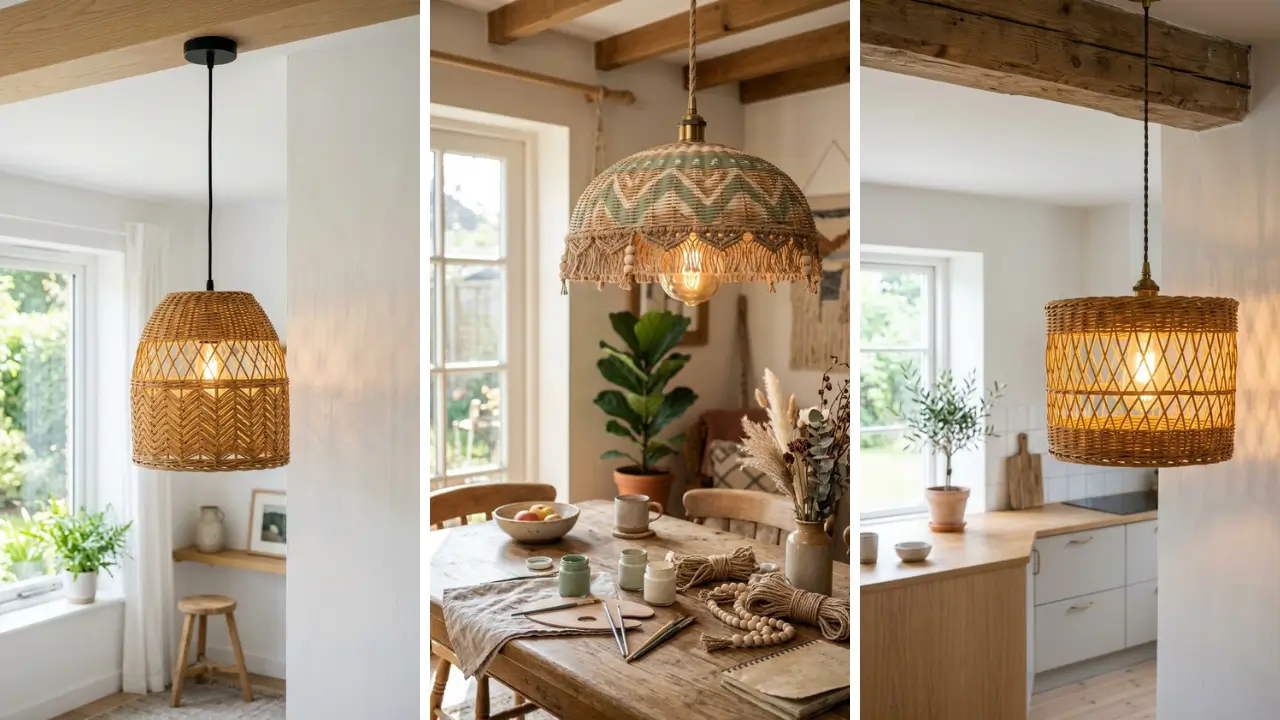
Step 5 — Test and Style
Turn on the light and step back to admire your work. The woven pattern of the basket will cast gorgeous shadows across your ceiling and walls, creating an atmosphere that feels like it came straight from a high-end boutique hotel. Adjust the cord length to hang at the ideal height.
Over a dining table, aim for the bottom of the shade to sit about 30–36 inches above the tabletop. For bedside or accent lighting, adjust based on your personal preference and ceiling height.
Creative Ways to Customize Your Wicker Basket Pendant Light

One of the best parts about this project is how easy it is to personalize. Here are a few ideas to make your pendant truly unique:
- Wrap the cord with macramé or jute twine for a boho-chic look that ties the natural materials together.
- Add dried flowers or greenery tucked into the weave for a seasonal, organic touch.
- Paint the basket in a bold color — matte black, terracotta, or dusty sage all look stunning and unexpected.
- Cluster three different-sized baskets at varying heights for a dramatic statement installation above a kitchen island.
- Weave in LED string lights alongside the main bulb for extra sparkle and a layered lighting effect.
This kind of creative thinking is exactly what makes projects like these fall squarely into the category of DIY handmade gifts — because a finished wicker pendant light also makes an incredibly thoughtful, personalized present for a friend’s housewarming or holiday gift.
Safety Tips You Should Never Skip

Working with electrical components is straightforward with a cord kit, but safety is non-negotiable. Always make sure your pendant cord kit is UL-listed or CE-certified, meaning it’s been tested to meet safety standards. Always turn off the power at the circuit breaker before connecting your cord kit to the ceiling box.
Never assume the wall switch is enough — it doesn’t always cut live current to the box. Use only LED bulbs in wicker pendant lights. Traditional incandescent bulbs generate significantly more heat, which is a fire risk around natural fibers like wicker and rattan.
An LED bulb produces warm, beautiful light with almost no heat output. If you’re ever unsure about the wiring process, consult a licensed electrician. The cord kit portion is simple, but ceiling box wiring varies by home and country.
Where This Project Fits Into Your Bigger DIY Journey

This wicker pendant light is a gateway project. Once you’ve successfully made one, you’ll realize that transforming your home through handmade décor is both affordable and deeply satisfying. There’s a whole world of fun crafts to make at home that follow the same philosophy — minimal cost, maximum impact, zero prior experience required.
If you’re building a collection of handmade home accents or looking for unique gift ideas, wicker lights pair beautifully with macramé wall hangings, hand-painted plant pots, and woven table runners. Exploring handmade gift craft ideas can help you build out a whole aesthetic for your home — or fill your gift-giving list with pieces that feel genuinely special and personal. The more you practice, the faster and more intuitive these projects become.
Your second pendant light will probably take half the time your first one did.
Conclusion: Your Wicker Basket Pendant Light Awaits
Now you know exactly how to make a DIY pendant light from a wicker basket — and it’s far simpler than most people imagine. With a basket, a cord kit, a drill, and an afternoon, you can create a lighting fixture that genuinely looks like it belongs in a design showroom. The warm, dappled glow of a wicker shade transforms any room’s atmosphere in a way that standard ceiling lights simply can’t match.
This project proves that beautiful home décor doesn’t require a big budget — just a little creativity and the willingness to try something new. Whether you’re making it for yourself or as a gift, a handmade wicker pendant light carries a story and a personal touch that purchased items never will. So grab a basket, pick up a pendant cord kit, and start drilling.
Your most stylish room upgrade yet is just a few steps away. Ready to start crafting? Share a photo of your finished wicker pendant light in the comments below — we’d love to see your creative spin on this project!
And if you found this guide helpful, share it with a friend who loves DIY home décor.
Frequently Asked Questions
Q: Do I need electrical experience to make a DIY pendant light from a wicker basket? A: Not at all. A pendant cord kit is specifically designed for beginners — it includes a pre-wired socket with labeled terminals and clear instructions.
The most technical step is threading the cord and tightening the strain relief fitting. If you can use a screwdriver, you can complete this project safely. Q: What size wicker basket works best for a pendant light?
A: It depends on the room and the effect you want. For a dining table centerpiece, a basket between 12–18 inches in diameter creates a well-proportioned shade. For bedside or accent lighting, smaller baskets (8–12 inches) are ideal.
Deep baskets direct light downward, while shallow baskets spread light more broadly. Q: Is it safe to use a wicker basket as a lamp shade? A: Yes, as long as you use an LED bulb.
LED bulbs run cool and pose no fire risk to natural fiber shades like wicker or rattan. Avoid incandescent or halogen bulbs, which generate significant heat. Always use a UL-listed or CE-certified pendant cord kit for added safety assurance.
Q: How to make a DIY pendant light from a wicker basket on a very tight budget? A: Source your basket from a thrift store, dollar store, or even a garage sale — you can often find suitable baskets for under $5. Basic pendant cord kits are available online for as little as $8–$12.
With a budget of around $15–$20 total, you can create a pendant light that looks like a $100+ designer fixture. Q: Can I make multiple wicker basket pendant lights and cluster them together? A: Absolutely — clustering is actually one of the most popular ways to use this technique.
Choose baskets of varying sizes and hang them at different heights using a multi-hook ceiling canopy or individual hooks spaced a few inches apart. This creates a dramatic, layered lighting installation that works especially well above kitchen islands or in open-plan living areas.