18 Unique Resin Art Techniques to Try (From Pours to Cells)
Have you ever watched resin transform into a swirling galaxy of colors and wondered how artists create such magic? Resin art offers endless possibilities for creative expression, but knowing which techniques to use can feel overwhelming. Whether you’re a complete beginner or looking to expand your skills, these 18 unique resin art techniques will help you create stunning pieces.
From classic pours to mesmerizing cell formations, you’ll discover methods that match your artistic vision. Let’s dive in…
1. Classic Dirty Pour

- Epoxy resin and hardener
- Acrylic paints (3-4 colors)
- Mixing cups and stir sticks
- Silicone mold or canvas panel
- Disposable gloves
The dirty pour technique involves layering multiple colored resins in one cup before pouring. You simply add each pigmented resin without stirring them together. This creates beautiful organic patterns as colors interact during the pour.
Tilt your surface slowly to spread the resin evenly across your canvas. The flowing motion reveals hidden color combinations that make each piece unique.
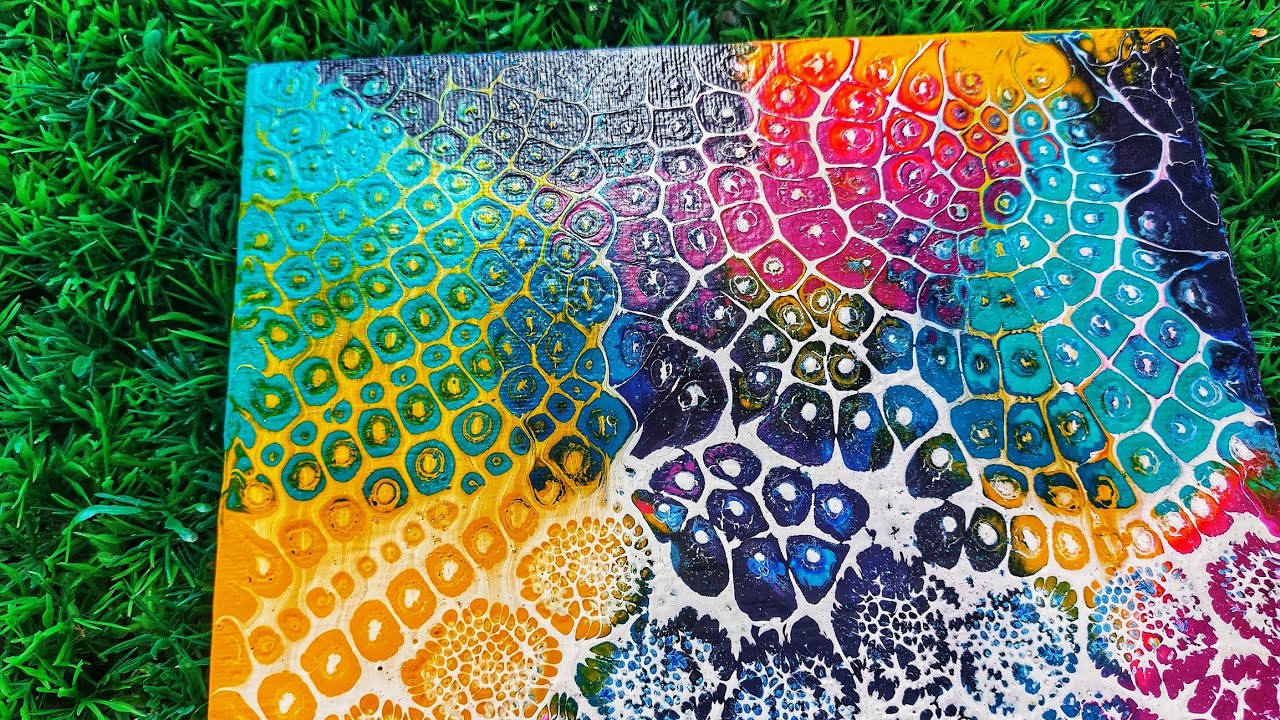
2. Stunning Cell Creation
- Epoxy resin
- Silicone oil or dimethicone
- Heat gun or torch
- Resin pigments
- Protective respirator
Creating resin cells requires adding silicone oil to your pigmented resin mixture. Just a few drops per color creates the cell-forming reaction. The oil rises through the resin layers when heat is applied.
Use a heat gun to gently pass over the surface in sweeping motions. Watch as beautiful lacing patterns and cell formations appear almost magically before your eyes.
3. Elegant Petri Dish Effect

- Clear epoxy resin
- Alcohol inks
- White alcohol ink
- Silicone coaster molds
- Pipettes or droppers
The petri dish technique creates delicate, flower-like patterns in clear resin. Start by pouring crystal-clear resin into your mold. Then drop alcohol inks from above and watch them bloom.
Add white ink last to push colors outward and create stunning contrast. This technique works perfectly for coasters and small decorative pieces. If you enjoy creating DIY handmade gifts, petri dishes make impressive presents.
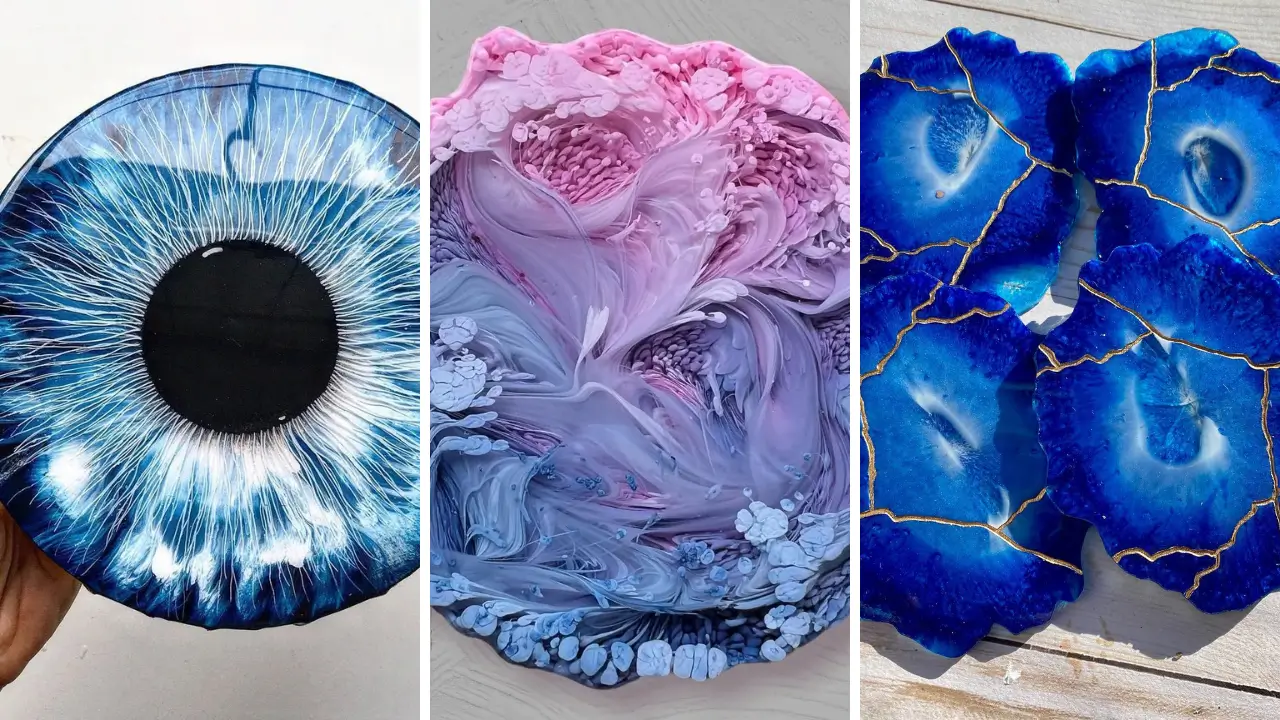
4. Mesmerizing Geode Style

- Epoxy resin
- Crushed glass or crystals
- Metallic pigments (gold, copper)
- Wood board or canvas
- Painter’s tape
Transform ordinary surfaces into stunning geode art with this popular technique. Layer resin in organic shapes that mimic natural crystal formations. Add crushed glass and metallic accents along the edges.
Build depth by applying multiple thin layers over several days. Each layer adds dimension and sparkle to your geode creation. The final result resembles a precious stone slice.
5. Vibrant Ocean Wave Effect

- Epoxy resin
- Blue and teal pigments
- White resin paste
- Heat gun
- Wood serving board
Capture the beauty of crashing waves with this ocean resin technique. Layer different blue tones from dark to light across your surface. Add white resin paste where waves would naturally break.
Use your heat gun to push the white resin into foam-like patterns. The movement creates realistic wave crests that look ready to crash onto shore.
6. Dramatic Swipe Method

- Epoxy resin
- Multiple pigment colors
- Silicone spatula or swipe tool
- Canvas panel
- Level surface
The swipe technique creates elongated cell patterns and dramatic color reveals. Pour your base colors onto the canvas first. Then add a contrasting color in a line across one edge.
Drag your silicone spatula across the surface in one smooth motion. This pulls the top layer over underlying colors, creating beautiful lacing effects and exposed cells.
7. Glittery Galaxy Pour

- Epoxy resin
- Black and purple pigments
- Fine glitter (multiple colors)
- White acrylic paint
- Toothbrush for splatter
Create cosmic masterpieces with this galaxy pour technique. Mix deep purples and blacks as your base colors. Add generous amounts of fine glitter to represent distant stars.
Splatter white paint with a toothbrush for star clusters and nebulae. The layered effect creates depth that mimics actual space photography. This technique pairs well with other fun crafts to make at home for a creative weekend.
8. Sophisticated Marble Look
- White pigmented resin
- Gray and black alcohol inks
- Thin wire or toothpick
- Coaster or tray mold
- Heat gun
Achieve the look of expensive marble countertops with resin marbling. Start with a pure white resin base poured into your mold. Drop thin lines of gray and black alcohol ink across the surface.
Use a toothpick to gently drag through the ink lines. Create natural-looking marble veining by varying pressure and direction. Less manipulation often yields more realistic results.
9. Enchanting Flower Preservation

- Crystal clear casting resin
- Dried or pressed flowers
- Silicone molds (various shapes)
- Tweezers
- UV resin for touch-ups
Preserve nature’s beauty forever by embedding flowers in resin. Flowers must be completely dried first to prevent browning. Press them flat for at least two weeks before casting.
Pour a thin base layer first and let it partially cure. Position your dried botanicals with tweezers, then cover with more resin. This suspension technique keeps flowers centered beautifully.
10. Dynamic Ring Pour

- Epoxy resin
- 4-5 complementary pigments
- Large mixing cup
- Round canvas or panel
- Lazy Susan turntable
Create concentric color patterns with the ring pour technique. Layer colors in a single cup without mixing. Pour directly into the center of your canvas in one steady stream.
The colors spread outward in beautiful ring formations as resin flows. Rotate your piece on a turntable for perfectly symmetrical patterns. Each pour produces completely unique results.
11. Textured Sculpted Waves

- Thick epoxy resin
- Blue and white pigments
- Palette knife
- Wood panel
- Resin thickening powder
Add dimension to your art with sculpted wave textures. Mix resin with thickening powder to create a paste-like consistency. This allows you to build up three-dimensional wave forms.
Use a palette knife to shape and sculpt your waves. Work quickly before the thickened resin begins curing. Layer multiple applications for dramatic height variations.
12. Luminous Glow Effects

- Epoxy resin
- Glow-in-the-dark powder
- UV flashlight for charging
- Dark-colored base pigments
- Silicone molds
Create magical pieces that glow in darkness using phosphorescent powders. Mix glow powder thoroughly into clear resin before adding other pigments. Use generous amounts for maximum luminosity.
Dark backgrounds make glow effects more dramatic and visible. Charge your finished piece under UV light or sunlight for brightest results. This technique works beautifully for jewelry and home decor.
13. Striking Alcohol Ink Bloom

- Clear epoxy resin
- Alcohol inks (various colors)
- Isopropyl alcohol
- Droppers
- Yupo paper or resin surface
Watch colors dance and blend with alcohol ink techniques. Drop inks directly onto uncured clear resin surface. The inks spread and blend creating organic patterns automatically.
Add drops of plain alcohol to push colors outward. This creates interesting negative space and lighter areas within your design. Colors continue moving until resin begins setting.
14. Elegant Metallic Accents

- Epoxy resin
- Metallic mica powders
- Gold or silver leaf
- Small paintbrush
- Clear mixing cups
Add luxurious shimmer with metallic resin techniques. Mix mica powders directly into resin for all-over sparkle. Or apply gold leaf to partially cured resin for dramatic accents.
Layer different metallic tones for depth and complexity. Copper pairs beautifully with teal, while silver complements cool blues. These pieces make excellent handmade gift craft ideas for special occasions.
15. Creative Wood Integration

- Deep pour epoxy resin
- Live edge wood slab
- Pigments of choice
- Wood sealant
- Clamps and mold walls
Combine natural wood with colorful resin for river table effects. Seal your wood piece thoroughly to prevent bubbles. Build temporary walls around your piece to contain the resin pour.
Use deep pour formulas designed for thick applications. Regular epoxy overheats in deep pours and can crack. The wood and resin combination creates stunning functional art pieces.
16. Playful Inclusion Art

- Crystal clear resin
- Small objects (shells, beads, charms)
- Silicone molds
- Tweezers
- Torch for bubble removal
Create memory-filled pieces by embedding objects in resin. Collect meaningful items like seashells, coins, or small treasures. Arrange them thoughtfully before pouring your clear resin over them.
Position items at different depths for visual interest. Some objects float while others sink, creating natural layered compositions. Looking for more project ideas?
Check out these home craft projects quick tutorials for inspiration.
17. Abstract Puddle Pour

- Epoxy resin
- Multiple pigment colors
- Canvas or wood panel
- Cups for each color
- Heat gun
Create organic abstract designs with the puddle pour method. Pour separate colored puddles directly onto your surface. Allow puddles to naturally flow and merge without manipulation.
Each color maintains its integrity while edges blend softly together. Tilt your surface gently to encourage movement. This technique creates beautiful abstract landscapes with minimal effort.
18. Dazzling Chameleon Finish

- Epoxy resin
- Chameleon or color-shift pigments
- Black base coat
- Mixing supplies
- Silicone mold or panel
Finish your resin journey with color-shifting pigments that change hues as viewing angles shift. These special powders require dark backgrounds to show their full chameleon effect. Mix pigments thoroughly for even color distribution throughout your piece.
The magical color transformation captivates viewers from every angle. Even dollar store crafts ideas can look luxurious with these special pigments.
These 18 unique resin art techniques offer endless creative possibilities from simple pours to complex cell formations. Each method brings something special to your artistic toolkit. Grab your resin supplies and start creating your own masterpieces today!
Share your favorite techniques in the comments below!
Rate this post